


5
c. Navigating iMEDIAN HD
Use the 4-way buttons to navigate iMEDIAN HD. Holding the left and
right buttons will take you to the “Home” and “Menu” screens
d. Local Media
Users can easily enjoy music, videos, and pictures on their PC by
using just the remote control. IMEDIAN HD supports every essential
internal codec.
e. Network Media
Users can easily enjoy media files on other local PCs as well as Inter-
net radio.
f. CD/DVD
Users can listen to CDs or watch DVDs
g. TV
Users can watch and record digital/analog TV channels by TV card on
the PC.
h. Tasks
Users can check RSS news feeds, world city time and weather, man-
age their files, set an alarm, and shut down their system
i. Settings
Users can change and adjust settings such as GUI, Media Playback
features, and more
Hard disk Drive Installation
Besides the motherboard chamber, there are the HDD chamber and the Power
Supply Chamber. Each chamber comes with a hard disk drive bracket with soft
silicone grommets. Each can hold two hard drives.
1. Remove the HDD bracket from the chamber by
removing the four screws on top of it.
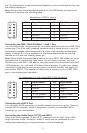
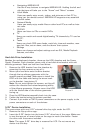
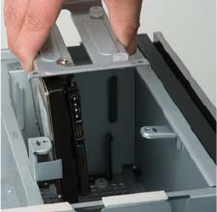
2. Mount your hard drive onto the drive bracket
through the top silicone grommets with the
special screws provided. Make sure to install the
HDD with the cable side facing the arrow mark
on the bracket. (see picture 2)
Note: Do not over-tighten the screws, as this will
reduce the vibration and noise-dampening ability
of the silicone grommets. Always mount the HDD
with the thicker side of the silicone grommets
facing up.
3. Drop the HDD/bracket assembly back into the case.
4. Fasten the bracket using the screws provided.
5. Connect 4-pin molex or SATA power connectors on the power supply to the
power connectors on each of the devices.
5.25” Device Installation
This case comes with one 5.25” external drive bay right under the LCD.
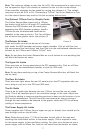
1. Remove the flip-up drive cage.
2. Insert the 5.25” device into the lower 5.25” drive bay of the cage. Make sure
to use the rear set of screw holes on the cage to mount the device. Fasten
the drive with the screws included.
Note: The upper 5.25” drive bay is reserved for LCD. Do not mount any
device into this bay.
Picture 2