INTERFACES
5
5
13
Horizontal Sync
14
Vertical Sync
15
SCL – DDC Clock
Table 4. VA6822 Input pin-outs
4.2 LOCAL MONITOR OUTPUT (15-PIN HD
CONNECTOR)
The 15-Pin HD connector output is used to
connect the local monitor to the interface.
This is a fully buffered output, eliminating
reflections often caused by “Y” type monitor
breakout cables. This output does not have to be
terminated if unused. The Local Monitor output is
buffered so that it can drive a distance up to 25ft
with high-resolution coaxial cable. The output is
VESA compatible for VGA through UXGA signals,
but can also be used to transmit signals to other
types of local monitors using designated ALTINEX
adapter cables such as MAC, SUN, SGI, or RGB.
PIN
No.
LOCAL MONITOR OUTPUT SIGNALS ON
15-PIN HD FEMALE CONNECTOR
1
Red Video
2
Green Video
3
Blue Video
4
ID Bit 2
5
SCL/SDA ID Bit Reference/ Return
6
Ground
7
Ground
8
Ground
9
Composite SYNC (used for MAC/ SUN /
SGI)
10
Sync Return
11
ID Bit 0
12
SDA – DDC Data
13
Horizontal Sync
14
Vertical Sync
15
SCL – DDC Clock
Table 5. Local Monitor Output pin-outs
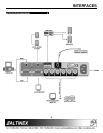
4.3 MAIN OUTPUT THROUGH 5 BNC
CONNECTORS
BNC connectors offer a reliable connection for
high-resolution video signals, and they facilitate
easy cable maintenance in the field. The VA6822
offers the main output with 5-BNC connectors. By
connecting to the appropriate connectors of the
VA6822, it can provide RG
S
B, RGBHV, or RGBS
output signals.
With these connectors the VA6822 can be
connected to compatible data projectors using
3 coax, 4 coax, or 5 coax cables.
CONNECTOR MAIN DUAL OUTPUT (6-BNC
FEMALE)
Red
Red Video
Green
Green Video
Blue
Blue Video
HSYNC
Sync/ Horizontal Sync
VSYNC
Vertical Sync
CSYNC
Composite Sync
Table 6. VA6822 Main Output pin-outs
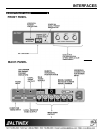
4.4 HORIZONTAL POSITION ADJUSTMENT
Most monitors and projectors have the ability to
adjust the horizontal position of the image, but in
some instances it is helpful to be able to control
this feature at the interface. This control is
especially useful when multiple computers are
switched to a single display and the horizontal
positions from each computer are slightly
different.
With the VA6822’s horizontal position control dial
in the OFF (locked) position, first the image
should be adjusted using the control on the
monitor or projector. Then adjust the image with
the VA6822’s horizontal position control dial
located on the front panel.
To disable the adjustment of the horizontal
position of the image, turn the horizontal position
dial fully to the right until a “clicking” sound is
heard.
The VA6822’s horizontal position of the image can
also be adjusted remotely using an available
optional accessory that is inserted into a 3.5mm
jack labeled as “Remote H-position”. To enable
adjustment of the image’s position, first the H-
position dial located on the front panel must be in
a locked position. Now using the knob on the
optional accessory, the image can be shifted.


