6
POSITIONING
Because low-frequency sound reproduced by the powered
subwoofer is mostly non-directional, the listener will be unable to
localize the bass source. Accordingly, the powered subwoofer
provides maximum flexibility in terms of positioning. For the most
effective low-frequency sound, the powered subwoofer should be
placed on the floor close to a wall or in a corner of the room.
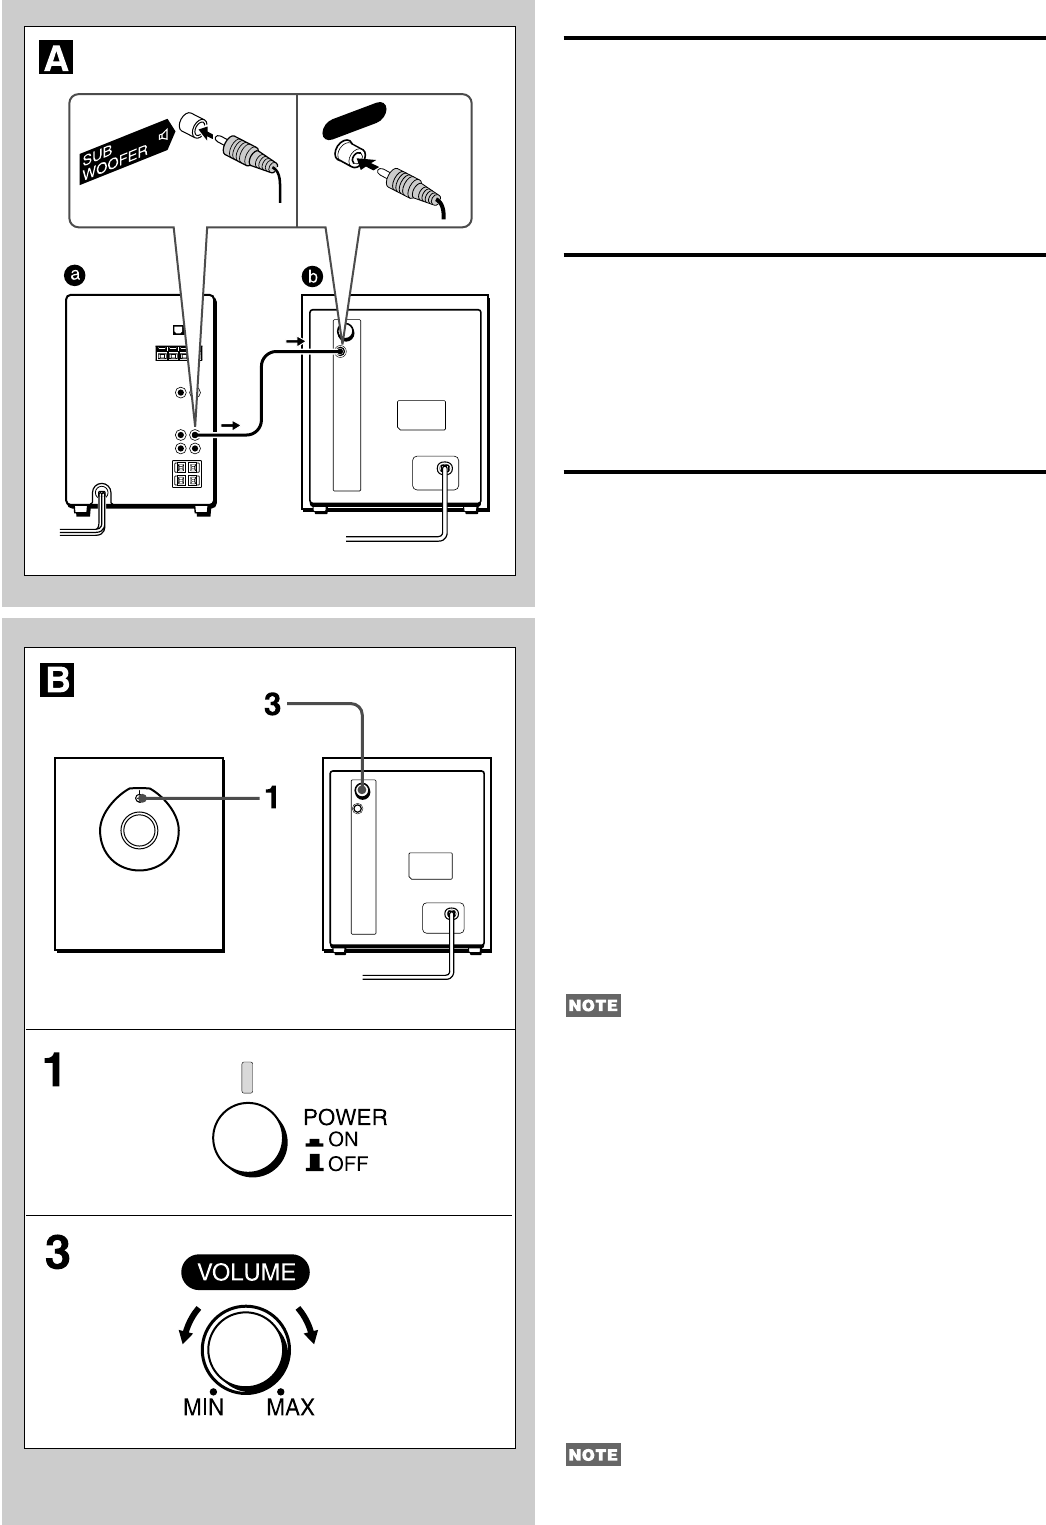
A CONNECTIONS
Connect the speaker cords before connecting the AC cord.
Connect the SUPER WOOFER or SUB WOOFER jack on the
stereo system a to the INPUT (FROM SUPER WOOFER
TERMINAL) jack on the powered subwoofer b with the
supplied connecting cord.
B OPERATION
ADJUSTING THE VOLUME BALANCE
Adjust the volume balance between the powered subwoofer and
the left and right speakers of the connected stereo system.
1 Press the POWER button.
The unit enters the power standby mode and the POWER
indicator above the button lights up dimly.
2 Start playback on the connected stereo system.
The unit is automatically turned on and the POWER indicator
becomes brighter when receiving a signal input.
3 Adjust the volume of the powered subwoofer.
Moderate volume setting
To get natural bass sounds, adjust the volume of the powered
subwoofer according to its position and the graphic equalizer
setting of the stereo system.
Adjustment examples
a Set the VOLUME control to a little lower than the middle when
the subwoofer is placed on the floor and the graphic equalizer
is set to off.
b Set the VOLUME control to the middle when the subwoofer is
positioned higher than the floor and the graphic equalizer is
set to off.
• To avoid overloading the powered subwoofer, do not set the
volume of the stereo system so high that the sound is distorted.
• Low frequency sounds may be distorted when they are
emphasized by the graphic equalizer on the stereo system. Adjust
the VOLUME control on the powered subwoofer or the graphic
equalizer on the stereo system.
• If the powered subwoofer will not be used for a long period of
time, press the POWER button to turn off the power, and unplug
the AC cord from the wall outlet.
AUTO POWER ON/OFF FUNCTION
Once the POWER button is pressed, the auto power on/off function
automatically controls on and off.
When no signal is input for more than about 90 seconds, the power
is automatically turned off and the unit enters the standby mode.
When receiving a signal input, the power is automatically turned
on.
In the standby mode, the POWER indicator becomes dimmer.
If the volume of the connected equipment is low, the sound may
be cut by the auto power on/off function.
FRONT REAR
INPUT


