Playback
Approx. 21 hours**
Approx. 31 hours
Approx. 56 hours**
Playing an MD right
away!
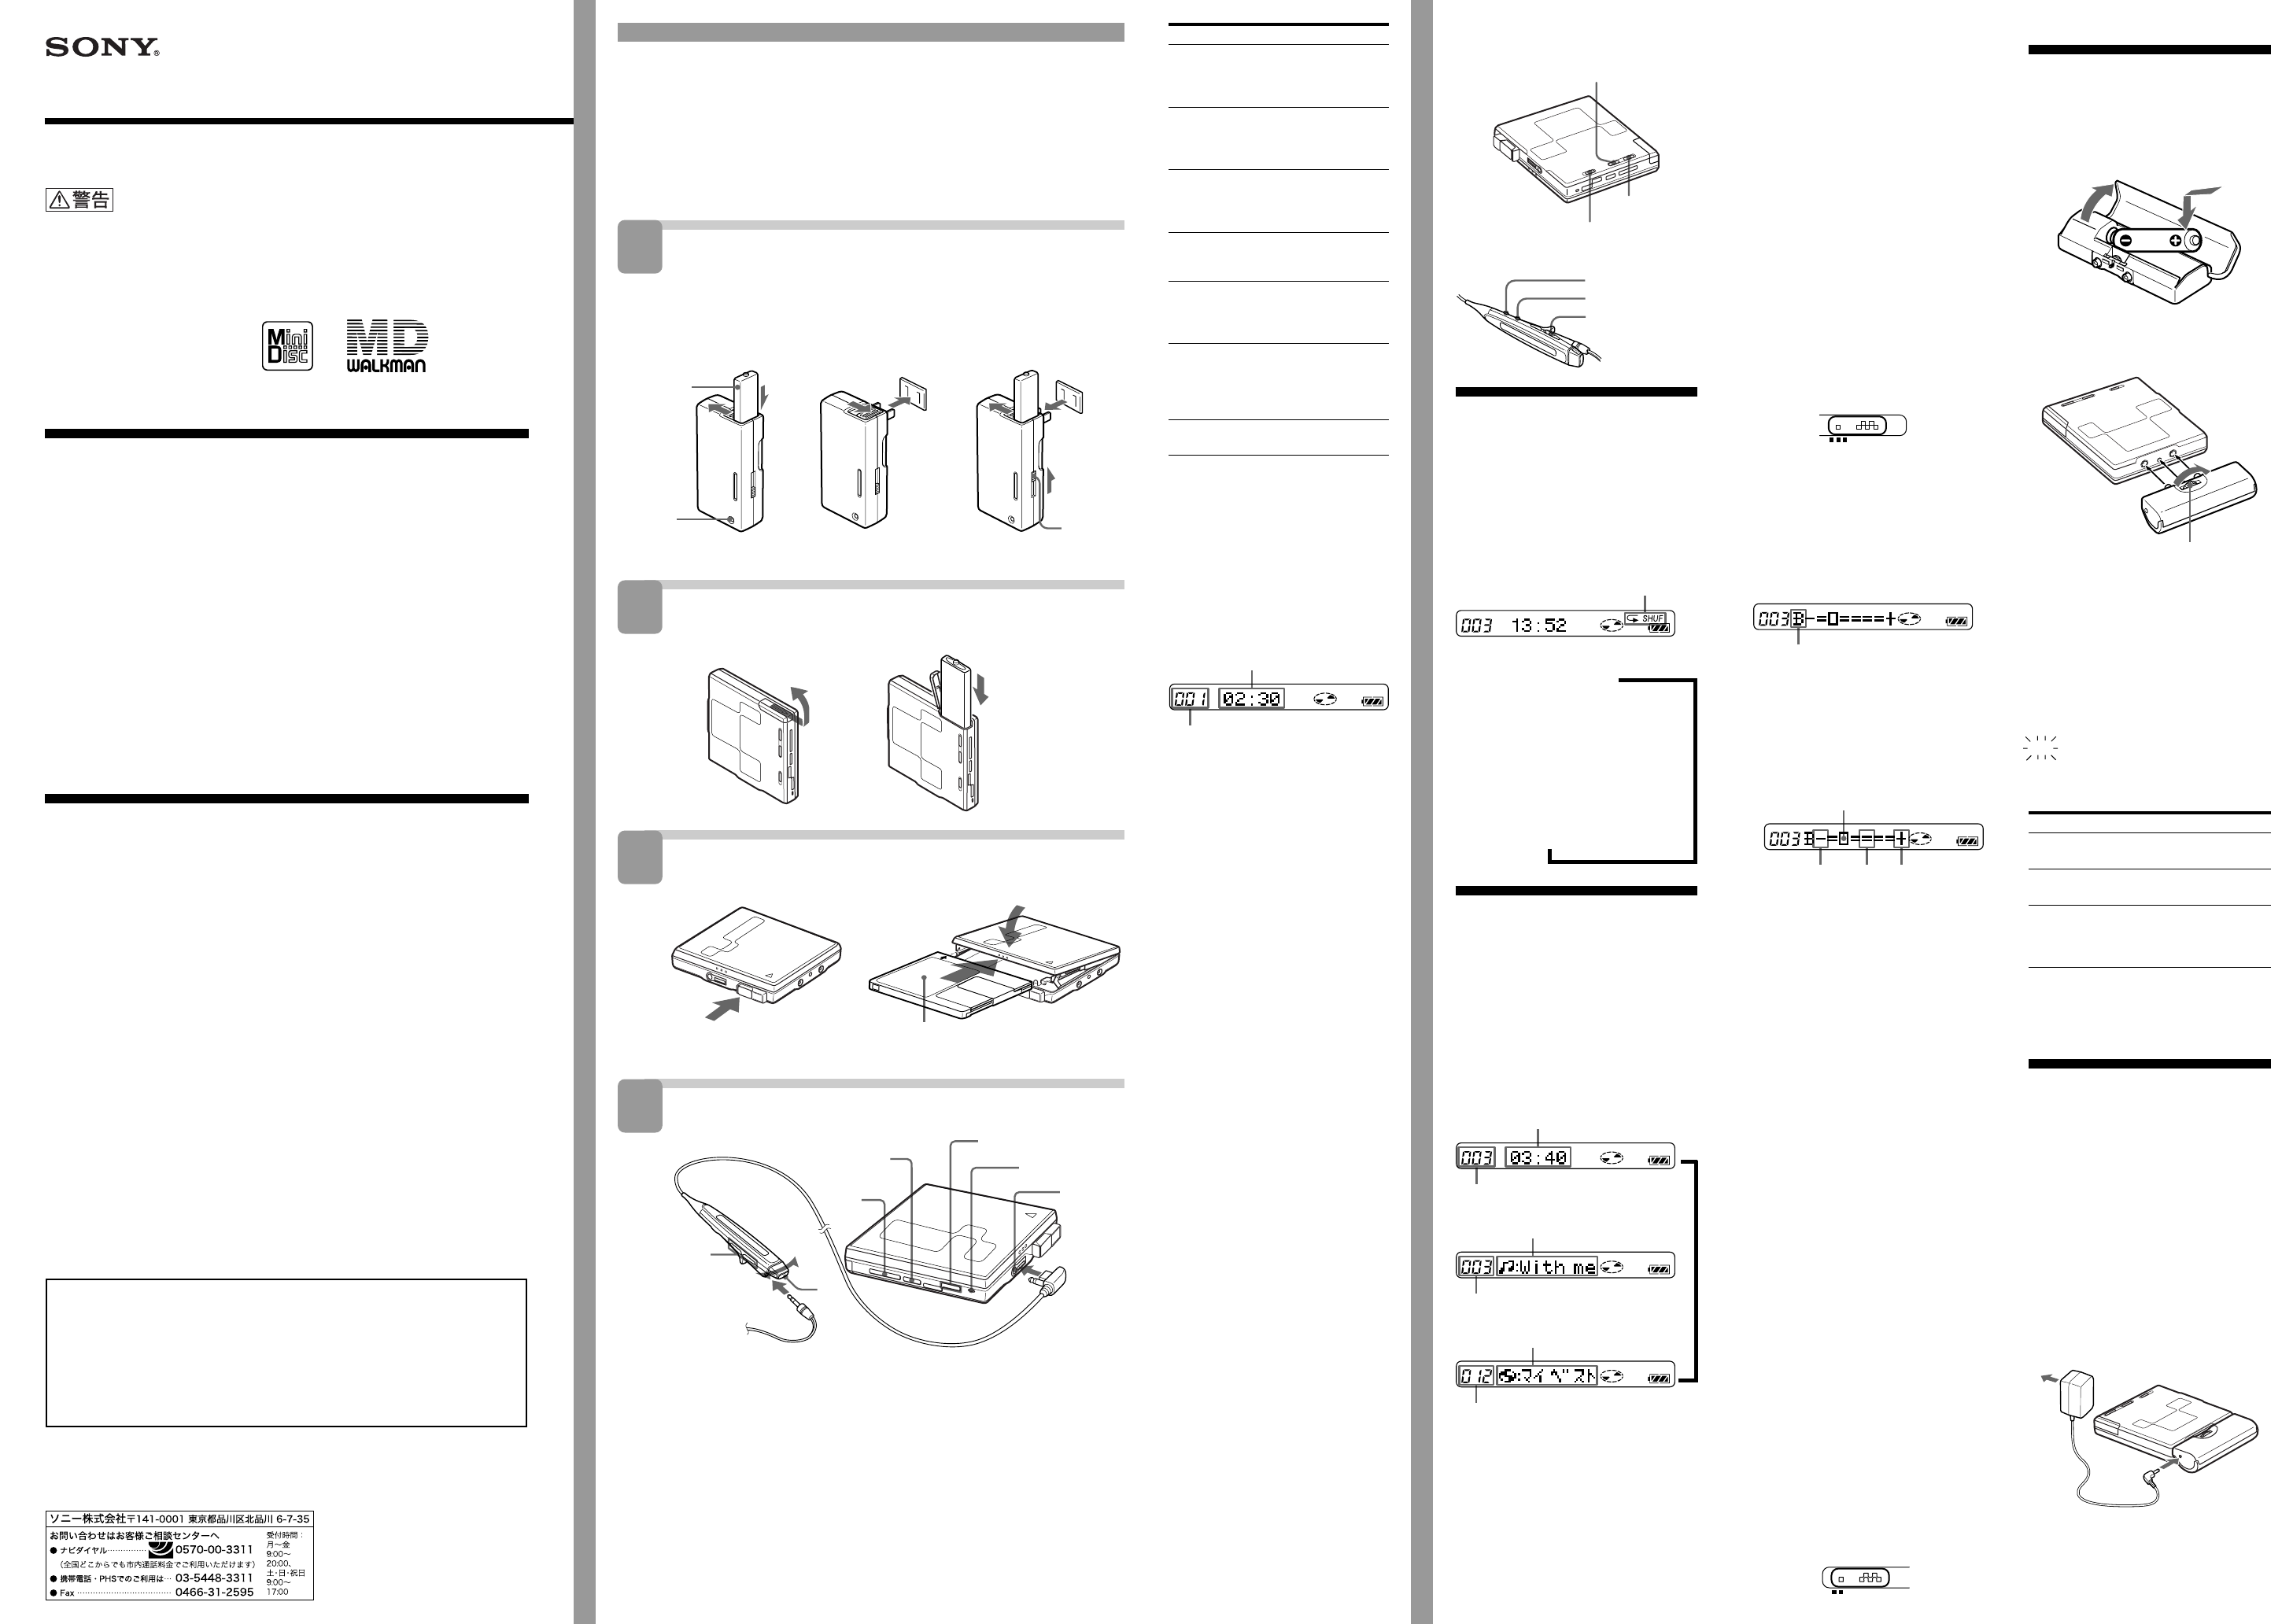
A
Charge the supplied rechargeable battery, before using it for the first
time. Other choices are a dry battery and house current. For details, see
“Power Sources”.
Stereo or monaural playback is automatically selected, depending on
the sound source.
Charge the rechargeable battery.
After about 1.5 hours, charging ends and the lamp on the charger
turns off. (To get maximum performance from battery, continue
charging it for another hour after the lamp turns off.)
Insert the rechargeable battery.
e
E
Insert an MD.
Play an MD.
1
4
4
3
3
2
.
N/
>
x
x
1 Connect the headphones to the remote control.
Plug it in firmly all the way.
2 Connect the headphones with the remote control to the i jack.
3 Press > N (or press the control towards N/> or . on the remote
control).
The OPR lamp on the player lights up and the player starts to play the first track.
When using the remote control, a short beep sounds in the headphones.
4 Press VOLUME +/– (or press VOL +/– on the remote control) to adjust the
volume.
The volume indicator appears on the remote control to allow you to check the
volume.
To stop play, press x.
The OPR lamp on the player goes off. The display on the remote control disappears
after a while. When using the remote control, a long beep sounds in the headphones.
BPower sources
You can use the player on a dry battery,
house current, or a Ni-MH rechargeable
battery.
Using on a dry battery G
1 Insert one LR6 (size AA) alkaline battery
(not supplied) into the supplied battery
case, and close the lid.
Make sure the + and – terminals
are correctly oriented.
2 Attach the battery case to the player.
Turn towards LOCK.
To release the battery case,
turn towards RELEASE.
When to replace or charge the batteries
You can check the battery condition with the
battery indication which is displayed while using
the player.
t Battery power decreasing
v
r Weak batteries.
v
e The batteries have gone out. “LOW
BATT” flashes in the display on the
remote control, and the power goes off.
Battery life*
Batteries
Ni-MH
rechargeable battery
(NH-14WM)
One LR6 (size AA)
alkaline battery
One LR6 (size AA)
alkaline battery
and a Ni-MH
rechargeable
battery
(NH-14WM)
* The battery life may be shorter depending on
operating conditions and the temperature of
the location.
** With a fully charged battery
Using on house current H
Remove the rechargeable battery when using
the player on house current.
1 Attach the supplied battery case to the
player.
2 Connect the AC-E15L AC power adaptor
(not supplied) to the DC IN 1.5V jack of
the battery case.
3 Connect the AC power adaptor to a wall
outlet.
Note
The battery indication is displayed while using
the AC power adaptor.
Operating instructions
XXXXXX (XXXX)
Portable MiniDisc Player
MZ-E77
Sony Corporation © 2000 Printed in Japan
3-046-782-11(1)
WARNING
To prevent fire or shock
hazard, do not expose
the unit to rain or
moisture.
To avoid electrical
shock, do not open the
cabinet. Refer servicing
to qualified personnel
only.
Caution
The use of optical instruments with this
product will increase eye hazard.
Listening for many hours at maximum
volume may damage your hearings.
CAUTION — LASER RADIATION WHEN
OPEN
DO NOT STARE INTO BEAM OR VIEW
DIRECTLY WITH OPTICAL INSTRUMENTS
Information
IN NO EVENT SHALL SELLER BE LIABLE
FOR ANY DIRECT, INCIDENTAL OR
CONSEQUENTIAL DAMAGES OF ANY
NATURE, OR LOSSES OR EXPENSES
RESULTING FROM ANY DEFECTIVE
PRODUCT OR THE USE OF ANY
PRODUCT.
Certain countries may regulate disposal of
the battery used to power this product.
Please consult with your local authority.
“MD WALKMAN” is a trademark of Sony
Corporation.
2 Insert an MD and press the lid down to
close.
1 Press OPEN.
3
2 Insert the battery.1 Slide open the battery
compartment as shown in the
illustration.
BVarious ways of
playback
Bottom side of the player
Remote control
Playing tracks repeatedly
B
You can play tracks repeatedly in three ways
— all repeat, single repeat, and shuffle repeat.
Press PLAYMODE while the player is playing
an MD.
Each time you press PLAYMODE, the play
mode indication changes as follows.
Play mode indication
(none) (normal play)
All the tracks are played once.
m
“F” (all repeat)
All the tracks are played repeatedly.
m
“F
1
” (single repeat)
A single track is played repeatedly.
m
“F
SHUF
” (shuffle repeat)
All the tracks are played repeatedly in
random order.
Tips on playback
To know the track name and time C
Press DISPLAY on the remote control while
the player is playing an MD.
Each time you press DISPLAY, the display
changes as follows.
Elapsed time
Track number
m
Track name
Track number
m
Disc name
Number of tracks recorded on the MD
Note
Disc and track names appear only with MDs that
have been electronically labeled.
to DC IN 1.5V jack
to a wall outlet
4
To
Pause
Find the
beginning of
the current
track
Find the
beginning of
the previous
tracks
Find the
beginning of
the next track
Go backwards
while
playing*
1
Go forward
while
playing*
1
Remove the
MD
If playback does not start
Make sure the player is not locked. For
details, see “To lock the controls
(HOLD)”.
For models supplied with the AC
plug adaptor
If the battery charger does not fit the wall
outlet, use the AC plug adaptor.
Display window while playing
back
For details, see “To know the track name
and time”.
Track name*
3
or elapsed time of
the track being played
Track number
Tips
•The OPR lamp on the player lights up on
the player during playback. When you
press x, the lamp goes off.
•The display on the remote control
disappears after a while after you have
pressed x.
Note
Do not press OPEN during playback. If you
do, the lid opens and playback stops.
When using optional headphones
Use headphones with a stereo-miniplug.
You cannot use headphones with a
microplug.
*
1
When you press . or > N on the
player during pause (X), the player
resumes playback.
If you hold down . or > N on the
player (or press and hold the control
towards . or N/> on the remote
control) during pause (X), you can fast
forward/rewind without listening to the
playback sound.
*
2
Once you open the lid, the point to start
playback will change to the beginning of
the first track.
*
3
Appears only with MDs that have been
electronically labeled.
With label facing upward, insert disc in
direction of the arrow.
Do this (Beeps in the
headphones)
Press X on the remote
control. (Continuous
short beeps)
Press X on the remote
control again to
resume play.*
1
Press .once.
Press the control
towards . on the
remote control. (Three
short beeps)
Press . repeatedly.
Press the control
towards . on the
remote control
repeatedly.
(Continuous three
short beeps)
Press > N once.
Press the control
towards N/> on
the remote control.
(Two short beeps)
Hold down ..
Press and hold the
control towards .
on the remote control.
Hold down > N.
Press and hold the
control towards
N/> on the
remote control.
Press x, and then
press OPEN.*
2
b
b
Make sure the + and
– terminals are
correctly oriented.
Player
Remote
control
i jack
1
2
Welcome!
Welcome to the world of the MiniDisc! Here
are some of the capabilities and features
you’ll discover with the new MiniDisc Player.
• Small body almost the size of a MiniDisc
jacket
Ideal weight and size; fits in your shirt
pocket.
• Personalized sound through Digital
Sound Preset functions
You can store two sets of sound quality
adjustments (made during playback) to
two switches.
• Low power-consumption design enables
extended battery life.
• Simple “One-Touch Eject” function for
easy MiniDisc handling
A single press of the OPEN button causes
the player lid to open and the MiniDisc to
eject.
• Easy-to-operate headphones remote
control with backlit LCD
The LCD displays disc and track
information, playback mode as well as
battery condition. Keep the main unit in
your pocket and operate the MiniDisc
player through the “slim stick” remote
control.
• Shock-resistant memory offsets up to 40
seconds of optical read errors.
TM
OPR lamp
lamp
NH-14WM (supplied)
to a wall outlet
PLAYMODE B
DIGITAL SOUND PRESET E
HOLD D
AVLS F
DISPLAY C
HOLD D
To lock the controls (HOLD) D
To prevent the buttons from being
accidentally operated when you carry the
player, use this function.
Slide HOLD on the player in the direction of
the . to lock the controls of the unit.
Slide HOLD on the remote control in the
direction of the . to lock the controls of the
remote control.
To adjust the sound quality
(DIGITAL SOUND PRESET) E
You can make adjustments to the sound
quality to suit your taste, and then store
two sets of these adjustments.
1 Slide DIGITAL SOUND PRESET to select
1 or 2.
If you want, you may also listen to MDs
without making any adjustments (i.e., by
using the factory settings).
OFF 1 2
DIGITAL SOUND PRESET
2 During playback, hold down DISPLAY
or PLAYMODE until the following
indicator appears on the remote control.
Press DISPLAY to select bass, and
PLAYMODE to select treble.
When you select bass-setting mode, “B”
appears. When you select treble-setting
mode, “T” appears.
3 Press N/> or . on the remote
repeatedly to adjust the bass or the treble.
Adjust the sound as you listen to it.
Example: While adjusting the bass.
The cursor moves. (Position: –2)
–4 ±0 +3
The sound can be adjusted in 8 steps
(–4, –3…±0…+2, +3).
If you hold down PLAYMODE while in
bass-setting mode, the mode will change
to treble-setting mode. If you hold down
DISPLAY while in treble-setting mode,
the mode will change to bass-setting
mode.
4 Press DISPLAY or PLAYMODE.
The sound settings are saved and the
playback display appears again.
If you perform no sound adjustments for
a given duration of time, the playback
display appears again and any settings
that were made are saved.
Returning the MD player to its factory
settings
To return the MD player to its factory settings,
reset the following items to the value indicated:
•DIGITAL SOUND PRESET 1:
bass +1, treble ±0
•DIGITAL SOUND PRESET 2:
bass +3, treble ±0
Notes
•Settings can also be changed while playback is
momentarily paused (X).
•Settings cannot be changed through the
operation buttons on the player.
•Settings cannot be changed while the DIGITAL
SOUND PRESET switch is set to OFF.
To protect your hearing (AVLS) F
The AVLS (Automatic Volume Limiter
System) function keeps down the maximum
volume to protect your ears.
Set AVLS to LIMIT.
The volume is kept at a moderate level, even
if you try to turn the volume above the
limited level.
NORM LIMIT