8
Get more information and exclusive accessories, visit www.polkaudio.com
• T
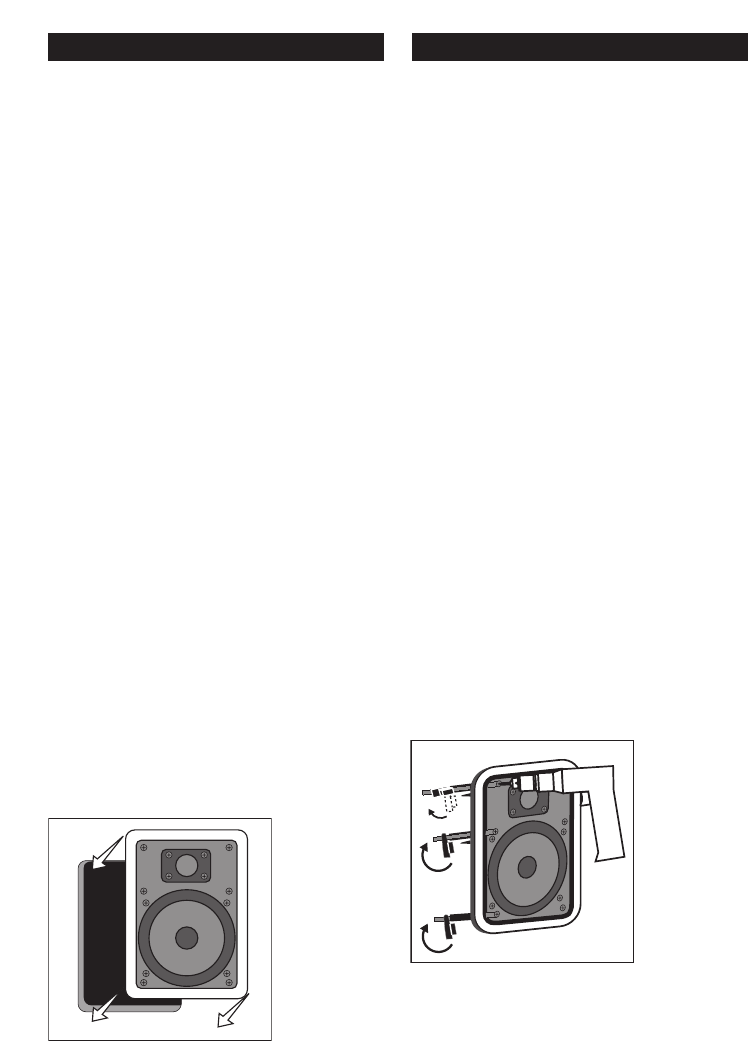
o install the speaker, first carefully remove the grille using
a straightened paper
clip or other pointed metal tool. Insert
the point into one of the grille perforations near a corner and
lift the grille free. Never use a knife or screwdriver to pry
between the grille and the speaker frame. This will damage
your speaker
.
• Loosen the rotating wall clamps by unscrewing them. Make
sure that the rotating wall clamps are flipped inwards so that
your speaker fits into your cutout without nicking your wall.
Then place the speaker carefully into the cutout [figure 13].
If you have a level, use it to help you correctly align the
speaker. Tighten the wall clamp screws with a screwdriver.
This will r
otate the wall clamps and secure the speaker to
the wall. Hint—on the RC55
i, RC65i and RC85i models,
tighten the center screws before tightening the corners for
the most flush fit to your wall.
Do not overtighten the wall
clamp screws
[figure 14].
• Pour installer le haut-parleur, retirez délicatement la grille
à l’aide d’un trombone ou d’un outil pointu. Insérez la pointe
dans un des trous dans un coin de la grille et soulevez la grille.
N’utilisez jamais un couteau ou un tournevis entre la grille
et le cadre pour retirer la grille, ceci endommagera votre
haut-parleur.
• Desserrez les crampons rotatifs en les dévissant. Assurez-vous
que les crampons rotatifs sont dirigés vers l’intérieur de façon
à ce que votre haut-parleur puisse pénétrer l’embrasure sans
érafler le mur ou le plafond. Placez ensuite délicatement le
haut-parleur dans l’embrasure [figure 13]. Alignez correcte-
ment le haut-parleur à l’aide d’un niveau. Resserrez les vis des
crampons avec un tournevis. Cela fera tourner les crampons et
fixera solidement votre haut-parleur au mur ou au plafond.
Conseil : pour les modèles RC55
i, RC65i et RC85i, resserrez les
vis du milieu avant de resserrer les vis des coins – le haut-par-
leur sera ainsi mieux affleuré. Ne serrez pas trop les vis des
crampons [figure 14].
• Car
efully reinstall the grille by fitting it into its recess so that
it is just resting on the frame. Starting with one corner, go
around the speaker and push the grille into the grille notch a
little bit at a time. Be gentle; the grille may be easily bent out
of shape by r
ough handling. You will feel a positive “snap”
when it is fully in place. (Where’s the corkscrew?)
• Car
efully reinstall the grille by fitting it into its recess so that
it is just r
esting on the frame. Starting with one corner, go
around the speaker and push the grille into the grille notch a
little bit at a time. Be gentle; the grille may be easily bent out
of shape by rough handling. You will feel a positive “snap”
when it is fully in place. (Where’s the corkscrew?)
FIGURE 14
T
ighten retaining wall clamps to engage wall. Use a
#2 Phillips head scr
ewdriver or a powered screwdriver.
Apriete las prensas de retención de la pared para
enganchar el altavoz a la pared. Use un destornillador
Phillips No. 2 o un destor
nillador eléctrico.
Reser
r
ez les attaches murales pour fixer solidement l'unité au mur
.
Utilisez un tournevis ou une perceuse à tête Phillips no 2.
Ziehen Sie die W
andklemmen fest, um das System an der W
and zu
befestigen. Verwenden Sie dazu einen Kreuzschlitzschraubendreher
(Nr. 2) oder einen Schraubendreher mit Motorantrieb.
FIGURE 13
Place the speaker carefully into the cutout.
Coloque cuidadosamente el altavoz en el agujer
o.
Placez délicatement le haut-parleur dans l’ouverture.
Platzieren Sie die Lautsprecher vorsichtig in der
ausgeschnittenen Öffnung.


