


69
INSTALLATION AND ASSEMBLY
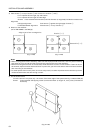
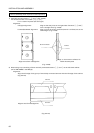
7) Adjust the heights of the joints and tilts of each of the groups of 3 vertically connected screens using the
following screws. After this, realign the vertical joints (removing any gaps) (see P52 [5]).
Screws: Cross-recessed small screws (nominal diameter 6, length 10) (included as accessories)
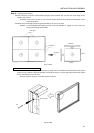
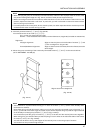
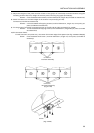
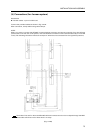
8) Attach connectors to the lower edges of the screens in 4 places (Fig. 3-4-45).
Connectors (included as accessories)
Screws: 2 cross-recessed self-tapping screws (nominal diameter 4, length 10, cone point) per
place (included as accessories)
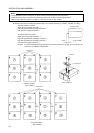
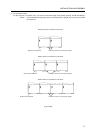
9) Fix the groups of vertically connected screens on the left and the right (4 places) (Fig. 3-4-46).
Screws: 1 cross-recessed self-tapping screw (nominal diameter 4, length 25) per place (included
as accessories)
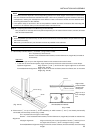
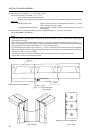
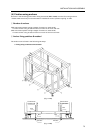
10)Fix the screen frame.
Fix with a screw in one place only - the center of the lower edge of the system (see Fig. 3-4-48 and P53 [6])
Screw: Cross-recessed small screw (nominal diameter 4, length 12, cone point) (included as
accessory)
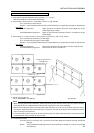
Connectors
9-screen assembly
Connectors
12-screen assembly
(Fig. 3-4-45)
(Fig. 3-4-46)
Screws
Screws