


64
INSTALLATION AND ASSEMBLY
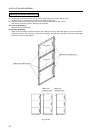
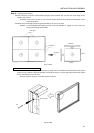
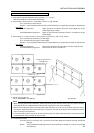
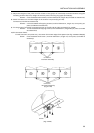
3) Place screen 2 on top of screen 4 and connect it to screens 1 and 4.
Fix in 2 places left and right, top and bottom
Fix in 2 places left and right of lower edge
Screws: Cross-recessed small screws (nominal diameter 4, length 25) (included as accessories)
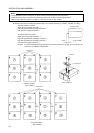
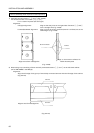
Alignment
Left/right alignment: Push screen 2 against the right edge of screen 1.
Forward/backward alignment: Place screen 2 on top of screen 4.
4) Mount on the cabinets
(as for RM-V2550S - see P50 [3])
Notes
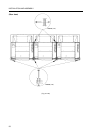
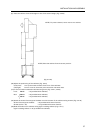
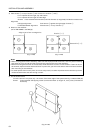
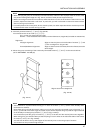
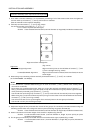
* When carrying the 4-screen assembly, make sure that 2 people hold the screen, with one person holding
each edge as in Fig. 3-4-35, and that a third person supports the top of the assembly.
* Before mounting the screens on the cabinets, check that there is no dirt on the screens. If there is dirt on
the screens, wipe them clean with a soft cloth. In particular, you will not be able to clean the Fresnel surface
after mounting on the cabinets.
* For small pieces of dirt on the joints, do not use a dry cloth, but rather wipe clean with a cloth that you have
moistened with water and then wrung out well.
Align so as to form a straight line
(Fig. 3-4-33) (Fig. 3-4-34)
(Fig. 3-4-35)
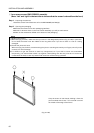
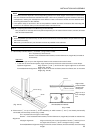
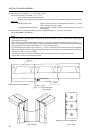
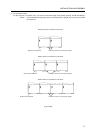
5) Fix the screen frame
Fix with a screw in one place only - the center of the lower edge of the system (see Fig. 3-4-48 and P53 [6])
Screw: Cross-recessed self-tapping screw (nominal diameter 4, length 12, cone point) (included as
accessory)
First Fix 1 + 2
Second Fix 2 + 4