


49
EnglishFrançais
En/Fr
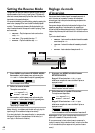
Making Tape Recordings
You can make tape recordings from any other component in the
system, and also from an external component connected to the
AUX/CD-R inputs. If you're recording from CD or the optional MD
recorder, it's usually most convenient to use the synchro-recording
mode. This makes the process largely automatic with the system
starting and stopping the recording for you. Detailed instructions
for this are below. If you're recording from the tuner or from a
component connected to the AUX/CD-R inputs, use the manual
recording mode explained on page 54.
Once recording has started, you can't switch to another compo-
nent until either the recording has stopped, or you pause the
recording. So, for example, you can't switch over to the tuner
while you're recording a CD.
Unlike some tape decks, there's no need to set recording levels—
the deck sets the right level automatically. Also, when recording,
the volume, tone and balance controls have no effect on the
recording. This means that you can record something with the
volume turned right down, if you want.
Before recording, check that the cassette erase tabs have not been
broken, and that the tape is either a type I (normal position) or
type II (high position/CrO
2
)—you can't record on type IV
(metal) tapes using this deck.
If you're recording from the start of a tape, it's a good idea to wind
the tape on a little so that you don't accidently start recording over
the leader tape. You can either do this by hand, or load the tape
into the deck and play the tape for 5–6 seconds.
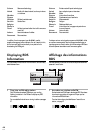
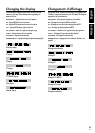
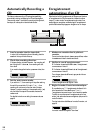
Changing the Display
You can choose to display various kinds of when using the tape
deck. Switch between them by pressing the DISPLAY button.
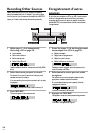
TAPE COUNTER - displays the tape counter
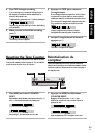
CLOCK - displays the current time and date
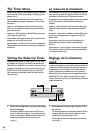
CALENDAR - displays the current date
DIMMER SELECT - adjusts the display brightness (see page 63)
Clock display
Tape counter display
Calendar display
Réalisation
d’enregistrements
Vous pouvez effectuer des enregistrements depuis n’importe quel
élément de la chaîne et depuis un appareil raccordé aux entrées
AUX/CD-R. Si vous enregistrez depuis un CD ou l’enregistreur MD
proposé en option, il sera plus pratique d’utiliser le mode
d’enregistrement synchronisé. L’enregistrement commencera et
s’arrêtera automatiquement. Vous trouverez des informations
détaillées à ce sujet aux pages suivantes. Si vous enregistrez depuis
la radio ou un appareil raccordé aux entrées AUX/CD-R, utilisez le
mode d’enregistrement manuel expliqué à la page 54.
Lorsque l’enregistrement a commencé, vous pouvez mettre un
autre appareil en service jusqu’à ce que l’enregistrement s’arrête
ou jusqu’à ce que vous l’interrompiez. Par exemple, vous pouvez
écouter la radio tout en enregistrant un CD.
Contrairement à certaines platines à cassette, il est inutile de régler
les niveaux d’enregistrement, car la platine les règle
automatiquement. En outre, pendant l’enregistrement les réglages
de volume, de timbre et de balance n’ont aucun effet sur
l’enregistrement. Vous pouvez donc enregistrer quelque chose en
réduisant au minimum le volume, par exemple.
Avant d’enregistrer, vérifiez si les taquets de protection de la
cassette ont été enlevés et si la cassette est de type I (position
Normal) ou type II (position High/CrO2). Vous ne pouvez pas
enregistrer sur des cassettes de type IV (métal) sur cette platine.
Si vous enregistrez depuis le début de la cassette, avancez un peu
la bande pour que l’enregistrement ne commence pas sur
l’amorce de la bande. Vous pouvez le faire à la main ou insérer la
cassette et la laisser tourner pendant 5 ou 6 secondes.
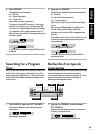
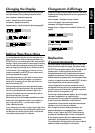
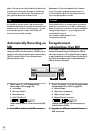
Changement d’affichage
Lorsque vous utilisez la platine à cassette, vous avez le choix entre
différents types d’affichage. Sélectionnez-en un en appuyant sur la
touche DISPLAY.
TAPE COUNTER - affichage du compteur de bande
CLOCK - affichage de l’heure et de la date actuelles
CALENDAR - affichage de la date actuelle
DIMMER SELECT - réglage de la luminosité de l’afficheur (voir
page 63)
Affichage de l’horloge
Affichage du compteur de bande
Affichage du calendrier