


OPERATIONS / UTILISATION
26
<DRB1376>
En/Fr
Loop Playback
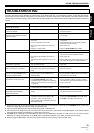
7 Creating a loop
1. Press the PLAY/PAUSE button (6) button to start play-
back.
2. During playback, press the IN/REALTIME CUE/HOT LOOP
button at the loop-in point.
¶ Note that this operation is not needed if a prerecorded cue
point is to be used as the start of the loop.
3. During playback, press the OUT/OUT ADJUST button at
the desired loop-out point.
¶ Loop playback will start between the loop-in point and loop-out
point.
¶ By using the frame search, the loop-out point can be set in
units of frames.
¶ During playback of MP3s, looping is only possible within one
and the same track set having a cue point.
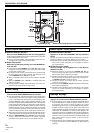
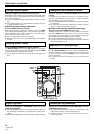
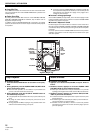
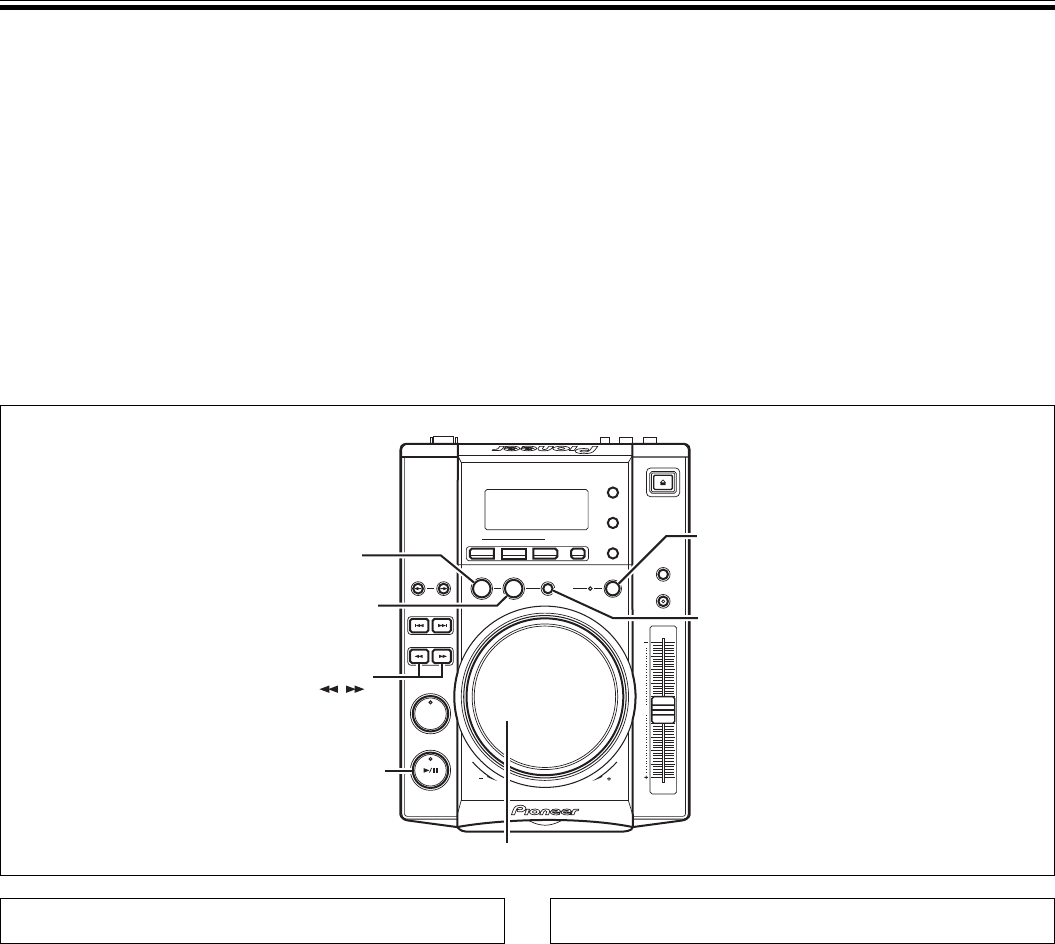
PLAY/PAUSE
SEARCH
RELOOP
/EXIT
LOOP OUT
/OUT ADJUST
LOOP IN/
REALTIME CUE
/HOT LOOP
BEAT
LOOP/
LOOP
CUTTER
Jog dial / Bague Jog
7 Long Mix Play
If the BPM rates match, the mixed sound of track A and track B will
not sound unnatural even if the CROSS FADER slider is placed in the
middle position.
7 Fader Start Play
By using the Cross Fader Start function of the DJM-600, DJM-500,
DJM-300, DJM-3000, DJM-909 or DJM-707, step 10 above can be
skipped for simpler mixing.
In addition, when the CROSS FADER slider is returned to its original
position, the status returns to that in step 9, so that the same play can
be repeated.
¶ Lorsque le curseur CROSS FADER de la table de mixage DJ
est complètement déplacé au côté droit, le son audible par les
haut-parleurs aura changé de la plage A à la plage B et le
mixage est ainsi terminé.
7 Lecture à mixage prolongé
Si les cadences (BPM) correspondent, le son mixé de la plage A et de
la plage B paraîtra assez naturel, même si le curseur CROSS FADER
est amené à la position moyenne.
7 Lecture à départ en fondu
En faisant appel à la fonction Mise en marche à fondu croisé de la
table de mixage DJM-600, DJM-500, DJM-300, DJM-3000, DJM-909
ou DJM-707, l’étape 10 ci-dessus peut étre ignorée afin de simplifier
le mixage.
En outre, quand le curseur CROSS FADER est ramené à sa position
originale, l’état revient à celui de l’étape 9 et la même lecture peut
donc être répétée.
Lecture à boucle
7 Création d’une boucle
1. Appuyez sur le bouton PLAY/PAUSE (6) pour lancer la
lecture.
2. Pendant la lecture, appuyez sur le bouton IN/REAL TIME
CUE/HOT LOOP au point initial de la boucle.
¶ Notez que cette démarche n’est pas nécessaire si un point de
repérage préenregistré sera utilisé comme début de la boucle.
3. Pendant la lecture, appuyez sur le bouton OUT/OUT AD-
JUST au point final de la boucle.
¶ La lecture à boucle s’accomplira entre le point initial et le point
final de la boucle.
¶ En faisant appel à la recherche par cadre, le point final de bou-
cle peut être défini en unités de cadre.
¶ Pendant la lecture de MP3, la lecture à boucle est possible
uniquement à l’intérieur d’une seule et même plage, ayant un
point de repérage.