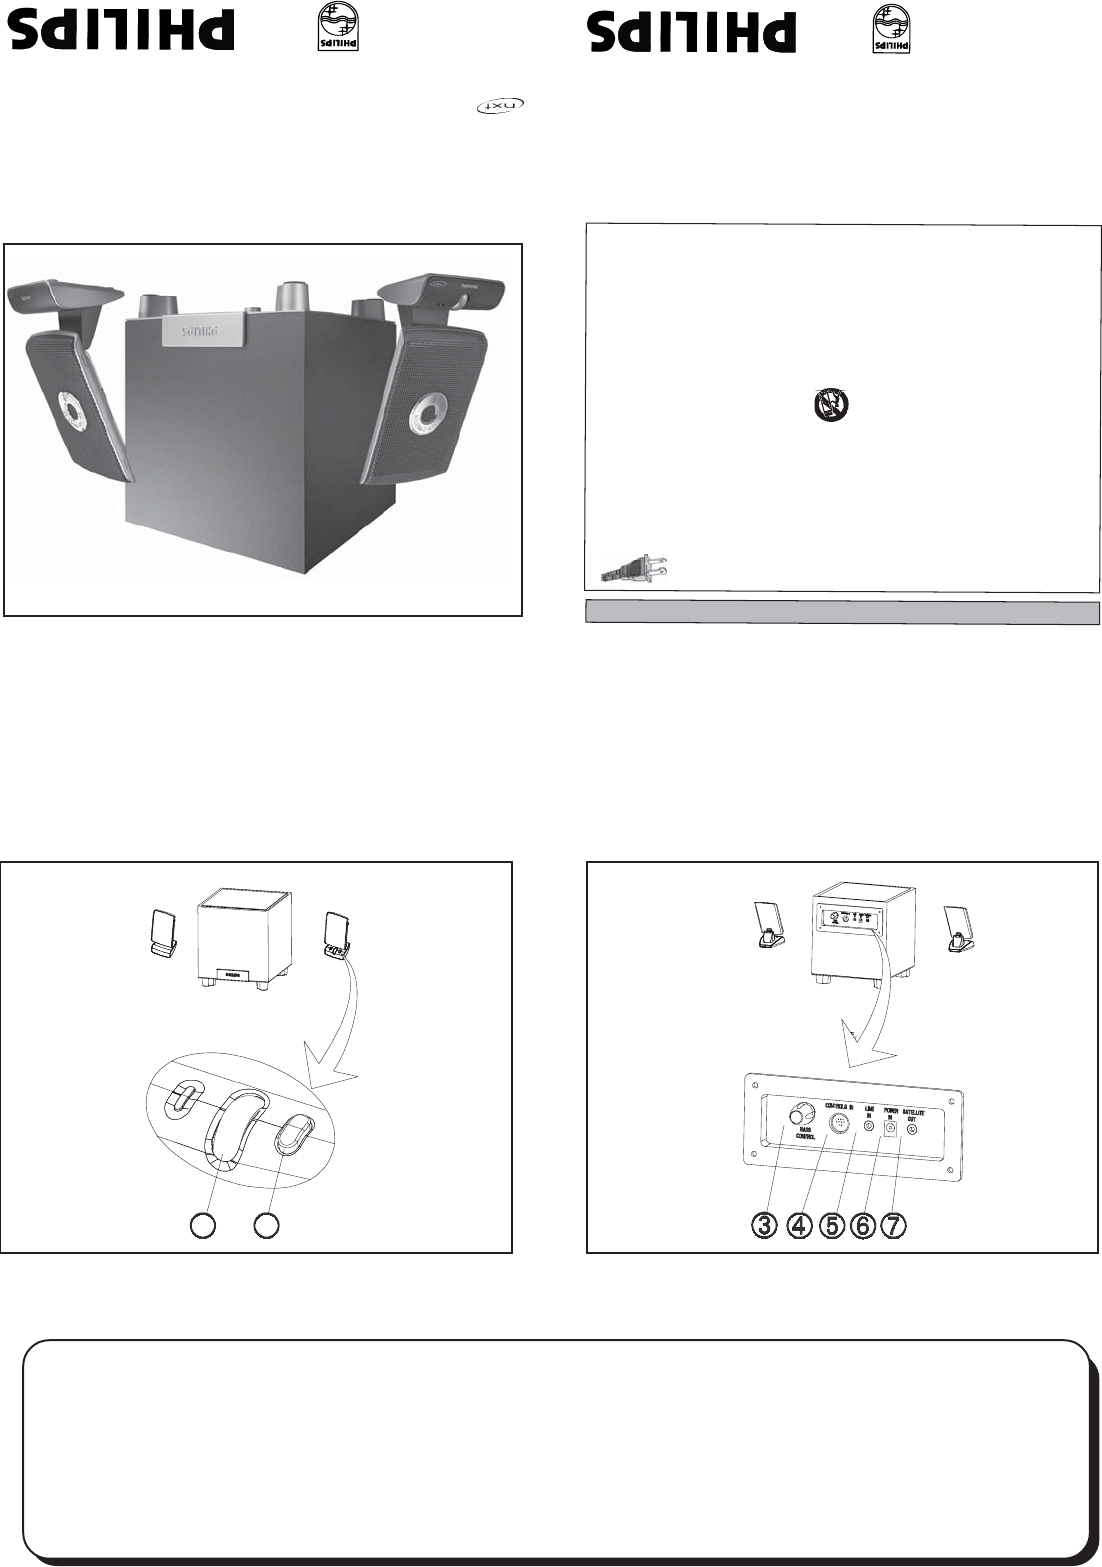
~ EXPLANATION ~
➀ Power On/Off
To switch on or off power (Green LED
indicates that the power is On)
➁ Rotary Volume Control
To adjust the volume higher or lower
➂ Bass Control
To adjust bass level to desired volume
➃ Control In
Plug in the mini DIN connector
➄ Line In
To connect the Line In cable from the sound
card/sound source.
➅ Power In
To connect the AC/AC adapter
➆ Satellite Out
To connect the satellite speakers
2
1
This stylish speaker system consists of 2 Soft Flat Panel satellites and a subwoofer. It
combines Philips extensive acoustic knowledge with modern design to create the
ultimate desktop MultiMedia speaker system. The compact wooden subwoofer design
will add depth to music and powerful bass to games and sound effects. The system
can not only be used for PC’s and notebooks, but also TV’s, portable CD/MP3 players
and any other audio devices with an analogue line-out or headphone jack.
Trade Mark of New Transducers Ltd.
All Patent Rights Reserved.
Multimedia Speaker System
A
3.310 Acoustic Fusion 310
MMS 313
http://www.philips.com/sound (Rest of the World)
http://www.philips.com/ce (USA)
4399 294 60881
This product was designed and m
an
ufactured to m
eet
strict quality and safety standards. There are, however,
som
e installation and oper
ation precautions w
hich y
ou
should be particularly aware of.
1. R
ead these instructions -
All the safety and
operating instructions should be read before the
appliance is operated.
2. Keep these instructions - The safety and operating
instructions should be retained for future reference.
3. Heed all w
arnings -
All warnings on the appliance
and in the operating instructions should be adhered
to.
4. Follow
all instructions -
All operating and use
instructions should be followed.
5. D
o not use this apparatus near water - for exam
ple
,
near a bathtub, washbow
l, kitchen sink, laundr
y tub,
in a wet basem
ent or near a s
w
im
m
ing pool, etc.
6. Clean only w
ith a dam
p c
loth. The appliance should
be cleaned only s recom
m
ended b
y
the m
an
ufacturer.
7. Install in acco
r
dan
ce w
ith the m
an
ufacturers
Instructions. D
o not b
lock any of the ventilation
openings. For exam
ple
, the appliance should not be
situated on a bed, sofa, rug, or sim
ilar surf
ace or
place
d in a b
uilt-in installation, such as a bookcase or
cabinet that m
a
y im
pede the flo
w of air through the
ventilation openings.
IMPORTANT SAFETY INSTRUCTIONS - Read before operating equipment
For US/Canada only
8. Do not Install near any heat
sources such as radiators, heat
registers, stoves, or other apparatus
(including am
plifiers) that produce
heat.
9. Do not defeat the safety purpose
of the polarized or grounding-type plug. A polarized plug
has two blades with one wider than the other. M
atch wide
blade of Plug to w
ide slot, fully inser
t. A grounding type
plug has two blades and a third grounding prong. The wide
blade or the third prong are provided for your safety. W
hen
the provided plug does not fit into your outlet, consult an
electrician for replacem
ent of the obsolete outlet.
10.Protect the pow
er cor
d from
being w
alked on or
pinched particulary at plugs, convenience receptacles,
and the point where they exit from
the appar
atus.
12. U
se onl
y w
ith a car
t, stand, tripod, bracket, or table
specified by the m
an
ufacturer, or sold w
ith the appar
atus.
W
hen a car
t is used, use caution when m
o
ving the cart/
apparatus com
bination to a
void injury from
tip-o
ver.
13.U
nplug this apparatus
during lightning storm
s or w
hen
unused for long periods of tim
e
.
14. Refer all servicing to qualified service personnel. Servicing
is required when the apparatus has been dam
aged in an
y
way, such as power-supply cord or plug is dam
aged, liquid
has been spilled or objects have fallen into the apparatus,
the apparatus has been exposed to rain or m
oisture
, does
not operate norm
ally
, or has been dropped.
15.Warning! To reduce the risk of fire or electric shock, do
not expose this appliance to rain or m
oisture
.
E
L
4
5
6
2
-E
0
0
4
: 9
9
/3
A
C
P
o
la
riz
e
d
P
lu
g
11. Only use attachments/accessories specified
by the manufacturer.


