INSTALLATION GUIDE
15° Angled LCRS In-Ceiling 15° Angled LCRS In-Ceiling
Round In-Ceiling Loudspeakers
Mounting Diameter x Depth
AP-615 LCRS 9-1/4" round x 5" deep
AP-815 LCRS 11-1/2" round x 5-3/4" deep
PS-615 LCRS 9-1/4" round x 5" deep
PS-815 LCRS 11-1/2" round x 5-3/4" deep
1. Check ceiling area for concealed obstructions such as wiring, plumbing, heating ducts, etc.
2. Use a “stud nder” to locate positions of joists or rafters. Make sure that your intended locations for
your speakers are unobstructed and that the holes will be at least 2 inches away from joists or rafters.
3. Use the supplied compass or cut-out template/paint mask to draw a circle with the diameter that
corresponds to the model of your speaker on the chart below, and carefully cut out the hole.
4. Remove grille from speaker assembly using included grille remover.
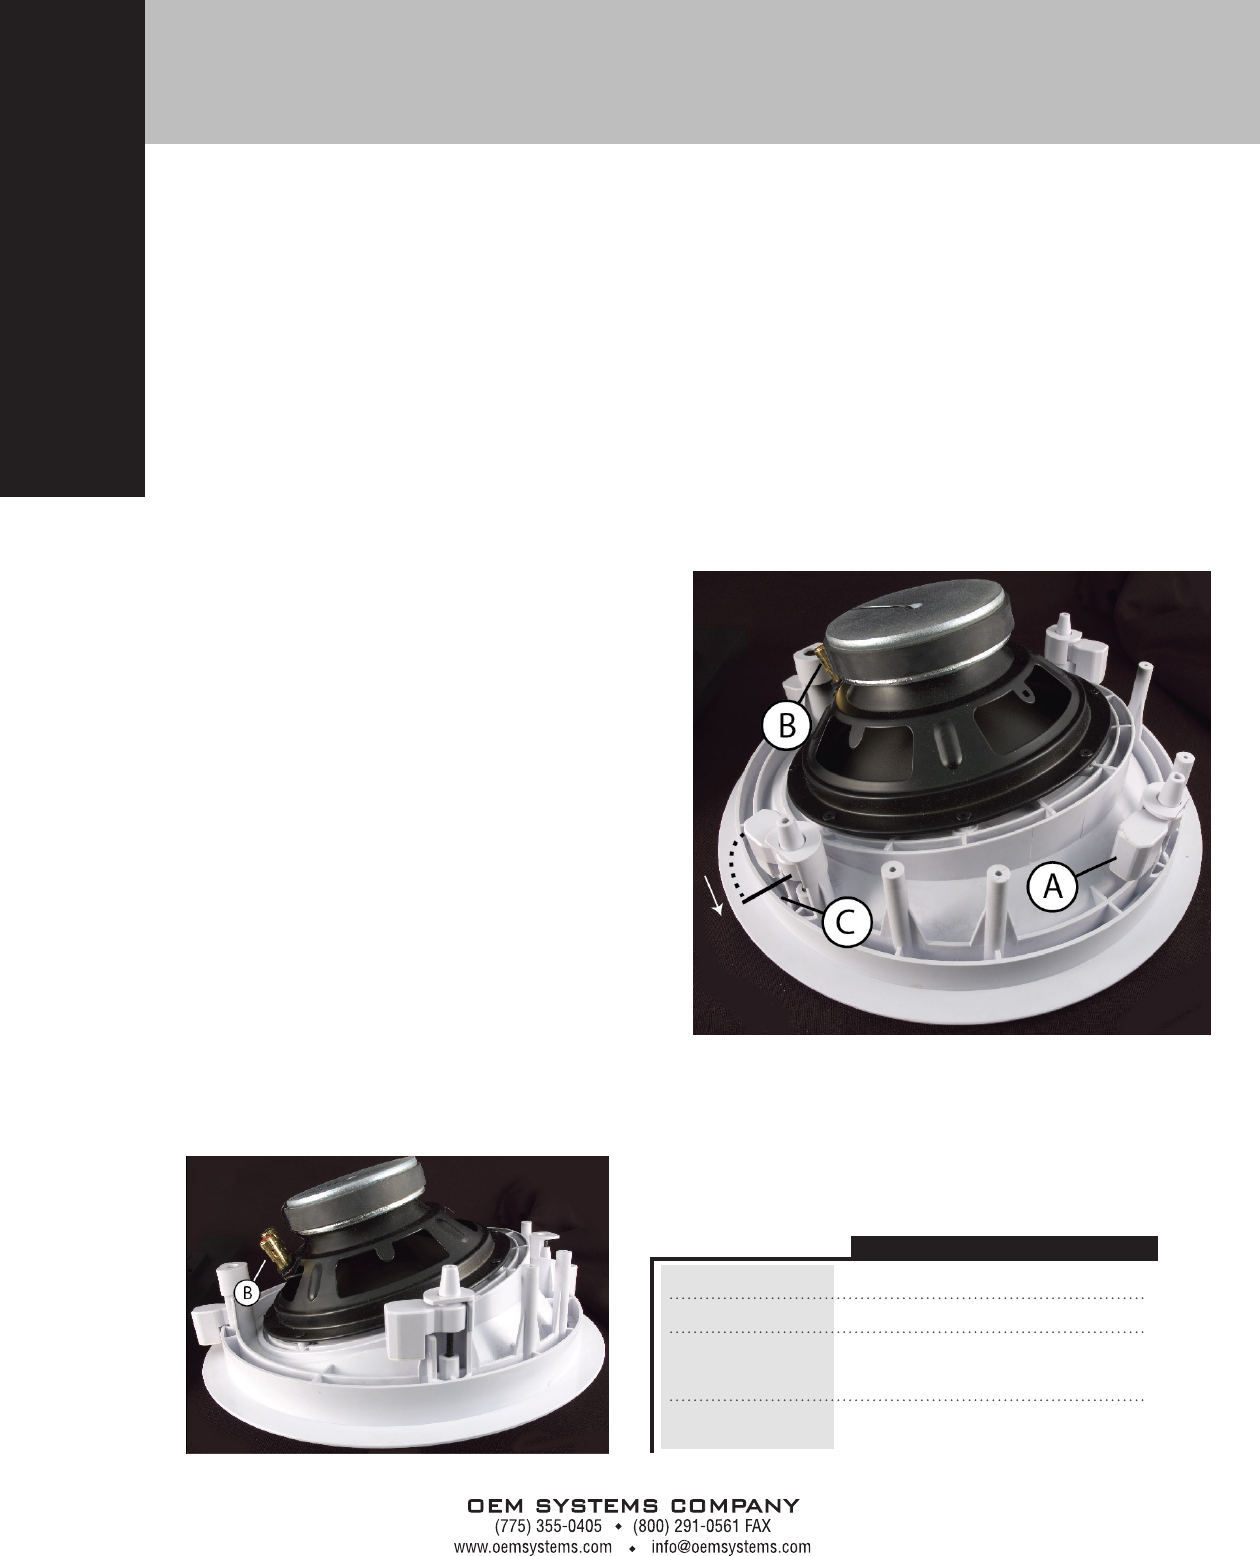
5. Before installation, turn the “Angle Lug Installation Clamps” (Item A) so they are positioned as in
photo below. This way, they will clear the cut-out hole for installation.
6. Prior to inserting speaker assembly into cut-out hole, attach speaker wires. Make sure to observe
polarity (the “+” and the “-”). Speakers wired out of phase will exhibit an apparent loss of bass
response. The wires will be held in place by the “Spring Clip Terminals” (Item B). Wires should be
stripped about .25". Tinning of wire ends will assure a trouble free installation, but is not necessary.
7. Insert speaker assembly into hole and orient it so
that it is angled toward the listening area. A clear
plastic template is included to precisely align the
direction of the speaker. The template must be
removed before the speaker is operated.
8. Begin to tighten installation screws. As you start to
turn each screw, the “Angle Lug Clamps” will rotate
outward to engage ceiling material (Item C). CAUTION:
Do not overtighten the clamps. Too much torque may
snap off the lug, causing the speaker not to seat
securely. A snug t is all that is necessary to assure
proper performance.
9. If speaker assemblies are to be painted, either
before or after installation, use the paint masking
template (cardboard disc) to cover the speaker
driver(s) to prevent damage. DO NOT TRY TO PAINT THE
GRILLE AND FRAME ASSEMBLY TOGETHER. The grille
should always be painted separately. Use thin coats
taking care not to block perforations with excessive
paint.
10. Your speaker includes a pivoting tweeter and it may be aimed to achieve even better imaging.
Tweeter output should be directed toward the typical listening position. USE CARE TO AVOID
DAMAGING THE DOME OF THE TWEETER DURING AIMING!!
page 1 of 1Rev. A


