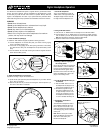
Digital Headphone Operation
1. Turn On the Headphones:
To turn on the headphones, press the
”PWR” button on the right side ear pad.
The digital display will show radio sta-
tion digits when the headphone is on.
2. Tuning an FM Radio Station:
A. Press the ”UP” or ”DOWN” button to manually tune in an FM radio station.
B. Press and hold the ”UP” or ”DOWN” button for one second then release. The radio
tuner will search up or down the radio band for the next strongest FM radio station.
Note: FM radio stations are always received in Stereo Mode.
C. Adjust the volume knob to the desired volume level.
Plug for second pair of
headphones
3. Listening to What Is Displayed on
the Viewing Screen:
On the right ear pad are 3 pre-programmed
buttons marked 1, 2 and 3. These but-
tons will tune the headphone radio to
the exact MovieVision signals. Press
the buttons one at a time until what you
hear in the headphones is what is dis-
played on the viewing screen.
4. Turn Off the Headphones when you
are Finished:
A. Press the ”PWR” button to turn off
the headphones.The display will be
blank when the headphones are off.
B. The batteries supplied with your
MovieVision headphones will last
for approximately 10 hours of con-
tinuous use. Forgetting to turn off
the headphones when they are not
in use will decrease the battery life.
Volume Control
5. Connecting a Second Set of
Headphones
Your Movievision headphones have a
plug receptacle located at the side of
the “L” ear pad. A second set of per-
sonal type headphones (Must have 3.5
mini male type plug) can be connected
at this point.
Note: When a second pair of head-
phones are attached, the tuning and
audio level is controlled by the
Movievision headphone.
Your Movievision entertainment system is supplied with two (2) Movievision head-
phones. The correct operation, care and maintenance of the headphones is critical
to their ability to provide the user with a lifetime of operation. Misuse, abuse and
neglect of the headphones will result in poor performance and premature failure.
Please read through the simple operation and maintenance instructions enclosed.
1. Install the Batteries (AAA Type)
To install the “AAA” batteries supplied, repeat the following procedure:
A. Hold the headphones in one hand and place your thumb onto the gripping
arrow on the battery holder cover.
B. Press down on the gripping arrows while pulling downward on the battery
door. Slide the door away from the headphones to expose the battery holder
cavity.
C. Place the batteries into the holder following the directions engraved inside the
holder. Observe battery polarity.
WARNING!
• Do not throw the headphones.
• Do not get the headphones wet or submerse them in any liquid.
• Do not use the headphones as a hammer.
• Do not step, stand or sit on the headphones.
• Do not lay heavy objects on the headphones.
•
Refrain from turning the volume of the headphones to the
maximum
position, this may result in ear damage.
2. Adjust the Headphones to Fit Your Head
Repeat the following to adjust the headband to fit:
A. Spread the ear pads apart and place the headphones on your head. Observe
the “L” and “R” indicators.
B. Grab the ear pads and use your thumb and forefinger to slide the adjusters up or
down until a comfortable fit is achieved.
MV-USER5000
Rev. A 2-6-02
© Copyright 2002
Magnadyne Corporation


