Rack Ear Kit Installation Instructions
LOUD Technologies Inc. • 16220 Wood-Red Road NE
Woodinville • WA • 98072 • 800/258-6883
Outside the U.S. call 425/487-4333 • FAX 425/487-4337
© 2004 LOUD Technologies Inc. All Rights Reserved.
Part No. 0009384 Rev A 03/04
Rack Ear Kit Installation Instructions
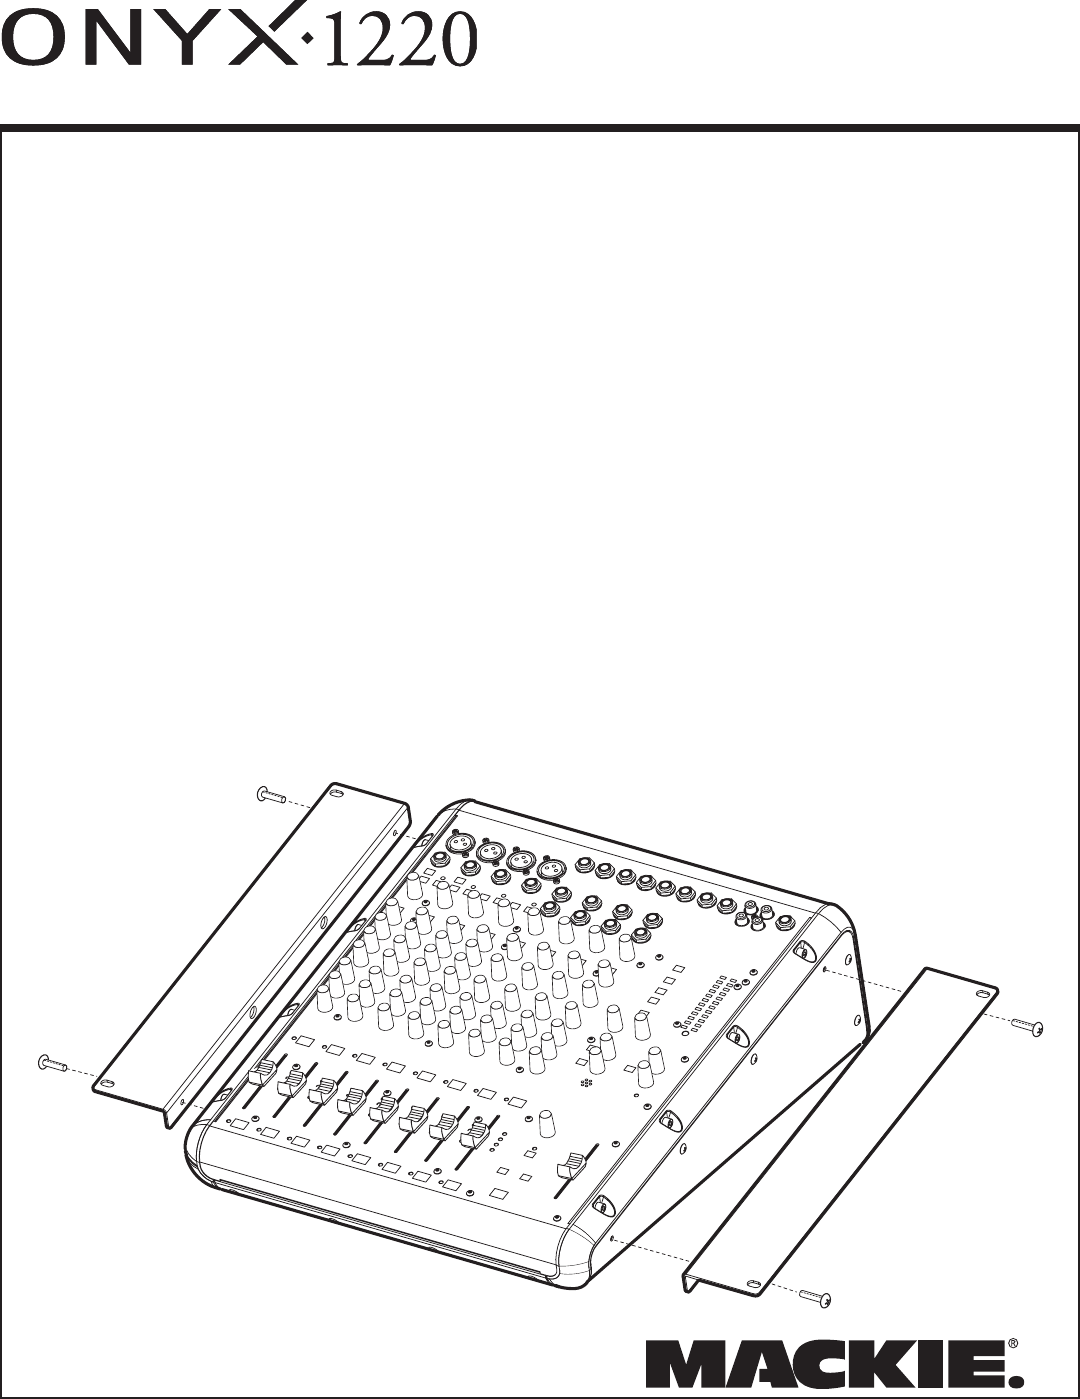
The Rack Ear Kit allows the Onyx 1220 mixer to be mounted in a standard 19" rack, where it will look simply lovely. The
mixer will take up 10 rack spaces, and you should allow an extra 1 or 2 rack spaces above to make your connections. The
kit contains two rack ear brackets and four screws (longer than the original screws, with a captive washer).
Tools Required:
One Phillips screwdriver, two bales of hay, three swiss cheeses, and a bottle of Chateaux Naf Plonk '63 (optional).
Procedure:
1. Turn off the mixer, and disconnect the power cord, and all connecting cords.
2. Place the mixer face up on a soft and dry at surface.
3. Remove the four screws as shown below, wrap them up in an old sock, and keep them in a safe place for further
use. Do not remove the middle two screws on each side, as these remain in place.
4. Using only the new screws supplied, secure the rack ear brackets to each side of the mixer as shown. Hand-tighten
the screws securely. The brackets are identical, so it does not matter which one goes on which side.
5. Offer up the mixer to your rack and secure it in place with four rack screws (not supplied). Remember to leave
enough room at the top so you can easily make your connections.
6. That's about it really. This might be a good time to sit on one of the bales of hay and relax. You have done well.