


•
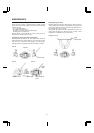
When the tape is played or recorded in the reverse direction
(side B), only side B is played back or recorded and then the
tape stops automatically.
DDRP (Dynamics Detection Recording Processor) record-
ing
DDRP recording is performed with suitable JVC CD players and
the recording level adjustment is performed automatically.
Since recording level adjustment is performed automatically for
different types of tape (normal, CrO
2
and metal), the adjustment
of INPUT LEVEL control is not required.
Read the instruction book of your CD player carefully.
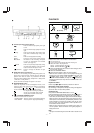
COMPU CALIBRATION (COMPU CAL) FUNCTION
•
This unit is equipped with a COMPU CAL function which can
automatically set the flat frequency characteristics and optimal
tape sensitivity for each tape in approximately 30 seconds.
Calibration data is retained for each tape type (Type I, II or IV).
•
Calibration data set with COMPU CAL is retained even if the
power is turned off (or the power cord is unplugged), and the
previous calibration data for the same type of tape as the new
tape is recalled each time tapes are changed.
•
Performing COMPU CAL operations again replaces existing
data with the new data.
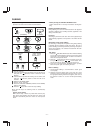
COMPU CAL operation
•
Insert the tape to be recorded and press the COMPU CAL but-
ton. During the operation, ‘‘C’’ → ‘‘CA’’ → ‘‘CAL’’ is displayed in
the tape counter. When the operation finishes, the tape returns
to its starting position, and the COMPU CAL indicator lights.
COMPU CALIBRATION is now finished.
•
Pressing the (stop) button part-way will interrupt the opera-
tions.
•
To recalibrate the unit, press the COMPU CAL button and wait
for the COMPU CAL indicator to go out. Then, press the
COMPU CAL button again.
Note:
If the tape is near its end, it will automatically stop and an error
will be generated during operation. Therefore, be sure to check
the time remaining on the tape (more than 2 minutes in the play
mode) before starting the operations.
COMPU CAL Errors
•
When the COMPU CAL indicator flashes, this indicates a
COMPU CAL error.
•
Press the (stop) button to stop the error indication.
Care should be taken for the following items as they are the
cause of errors.
1) Dirty heads -Clean the heads.
2) Scratches on the tape surface
-Replace with an undamaged tape.
3) When the tape ends part-way through the operations
-Change the tape position.
4) In rare cases, tapes may have characteristics which fall out-
side the COMPU CAL setting range.
•
When an error occurs or when COMPU CAL operations are
interrupted, calibration data cannot be stored in the memory. If
settings were previously performed, the previous setting val-
ues are retained.
•
After confirming items 1) to 3) above and stopping the error
indication if there are no problems, even tapes which experi-
ence errors can be recorded on using either 1 the unit’s pre-
set values or 2 previous setting values. (These are the values
obtained by opening and closing the cassette holder one time.)
* Preset value: a standard value corresponding to each type of
tape, which allows normal recording. (The pre-
set value condition is in effect when the
COMPU CAL indicator is unlit.)
Notes:
1. Since COMPU CAL operations record a test tone on tapes,
previously recorded contents will be erased.
2. Using new tapes and cleaning the heads beforehand are
recommended for optimal COMPU CAL operations.
3. Some variance in characteristics exists even with the same
type of tape made by the same manufacturer. Therefore,
when precise settings are desired, performing COMPU CAL
operations for each recording is recommended.
4. To delete contents set with COMPU CAL, simultaneously
press the
REC/REC MUTE and B deck COUNTER
RESET buttons. This deletes the calibration data for the type
of tape currently inserted in the unit. Calibration data for
other tape types is not deleted.
–9–
id8/i10371/ 09/23/99 Page 9