


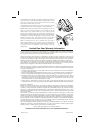
CR1625X2
Model: iB12
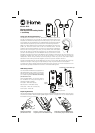
Using Your iHome Headphones
The earpieces are marked “L” and “R”. Place the “L” earpiece in your left ear
and the “R” earpiece in your right ear for proper fit and best sound. If the
earpieces are inserted incorrectly they will not fit properly in your ears and the
sound quality will not be satisfactory. For added stability the cables of these ear
buds should be looped over your ears as shown in the following illustration.
NOTE: Your iB12 headphones are supplied with three different size silicon tips
(S-M-L) for maximum comfort and to seal out unwanted noise. The “M”
(medium) size tips were installed at our factory. If you find that the installed tips
are too small or too large for your ears, you may remove them and replace
them with the larger or smaller size accessory tips. To replace the tips simply
pull them off the earpieces. To install different size tips, push them on to the
earpieces and make sure they are fully seated on each earpiece so that they do not come off when you
remove the earpiece from your ear. If one of the tips remains in your ear when you remove the
headphones, remove the tip carefully and avoid pushing it further into your ear canal. Seek medical
assistance if one of the tips becomes lodged in your ear and you are unable to remove it.
Connect the headphone plug to the headphone jack of your music player. Be sure that the plug is fully
inserted into the jack. If the plug is not fully inserted you may only hear sound from one earpiece.
To protect your hearing, always start listening with the volume control of your music source set to a low
level and then gradually increase the volume to a comfortable listening level.
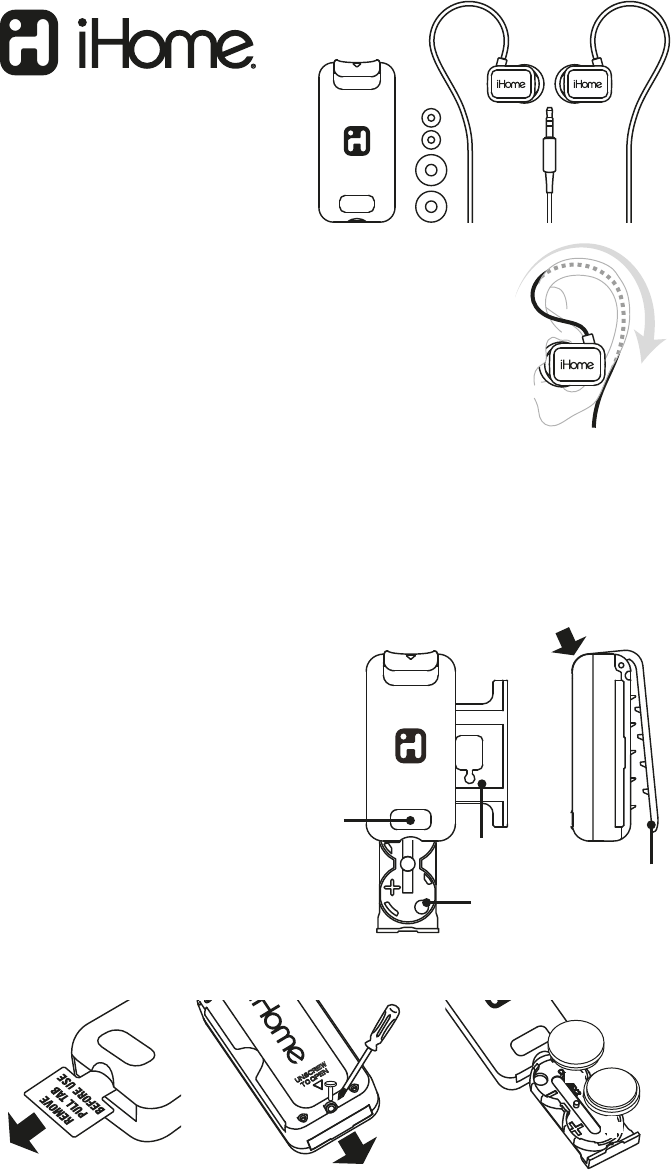
LED Safety Flasher
Your iHome iB12 Ear Buds are supplied with a
LED safety flasher that includes a convenient
belt clip and an integrated cord wrap to keep
your cables tangle free. Remove the battery
pull tab before use.
Press the Mode Button on the front panel to
turn the flasher on and cycle through the 3
operating modes as follows:
First press – LED’s flash rapidly
Second press – LED’s flash slowly
Third press – LED’s ‘On’ continuously
Fourth press – LED’s ‘Off’
Replacing Batteries
Two CR1625 batteries that were installed at our factory should provide sufficient power for up to 96 hours
of continuous operation. When the lighting effect begins to dim or no longer turns ‘On’ you should replace
the batteries as soon as practical.
fitness earbuds
with clip-on LED safety flasher
+ cordwrap
Slide-out
Cord Wrap
Mode
Button
Battery
Compartment
Remove the battery
pull tab before use
To open, unscrew center screw
only and pull out the batteries tray
Install two fresh CR1625 batteries
in the battery tray as shown above
+
LITHIUM BATTREY
CR1625
3V
-
+
+
-
-
-
+
Belt Clip
Press here to open belt clip