


Source Configuration
32
Signature 2.0
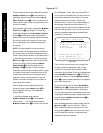
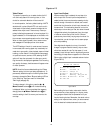
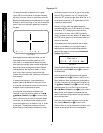
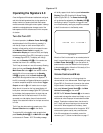
The adjustment screen for Balance is an X/Y graph
(Figure OSD-9) with the center of the graph indicating
the place in the room where you were sitting when the
Speaker Level Adjustments were made as shown on page
25. Keep in mind that this may, or may not, be the actual
center of the room, although it appears at the center on
the graph.
Figure OSD-9
When adjustments are made at this screen, you are
making adjustments to the relative position of the
room center, or to compensate differences that occur
when listening to actual program material as opposed to
setup using the test noise signal provided for Speaker
Level adjustments. Moving the on-screen “
o
” cursor
point on this menu is similar to using the left/right
“balance” and front/back “fade” controls on conventional
audio products.
To assure proper settings, it is recommended that
program material representative of the type of movie
or music that will be used most often with this source
be played while the adjustments are made.
If you feel that the sound does not appear to be
“centered” in the room correctly, use any of the
‹ ›
⁄¤
Menu Control
buttons
i
to move the sonic
center of the room. As you listen to the sound change
in the room, you will see the visual indication of the
current center position by the location of the “
o
” cursor
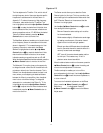
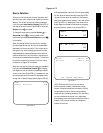
on the screen. The readout at the bottom of the on-
screen display provides a relative indication by noting
F
L
o
R
R/L 0 B F/B 0
the offset from center to the left or right by the number
after the “
R/L
” indication, with “
LF
” indicating a left
offset and “
RT
” indicating a right offset. When the “
o
” is
on the center vertical line, a “
0
” appears after the
R/L
indicating no balance offset.
Similarly, the right side of the displays shows the
front/back fade next to the “
F/B
” indication. A number
followed by “
FT
” indicates you have moved more
volume level to the front, while a “
BK
” indicates an
offset to the back of the room. When a “
0
” appears after
the
F/B
, and the cursor is on the horizontal center line,
there is no fade offset.
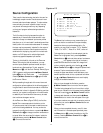
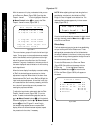
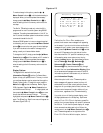
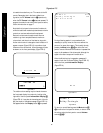
If this adjustment must be made when the on-screen
display is not available, you may judge the relative
balance position using the numeric scales explained
above as they appear in the front panel
Information
Display
(Figure FPD-6).
Figure FPD-6
When the desired balance adjustments have been made
for this input, press the
Menu
button
j
to return to
the Effects Menu.
When all options on the Effects Menu have been set,
press the
Menu
button
j
to return to the
Source
Menu
where any other parameters may be adjusted for
this input. Once the first input has been configured, use
the
⁄
Menu Control
button
i
to move to the high-
lighted area back up to the
Source
line, where the
‹
and
› Menu Control
buttons
i
should be used to
select another input. Repeat all of the steps outlined
above to name and configure each of the eight available
source profile buttons.
When all inputs have been configured to your satisfac-
tion, press the
Menu
button
j
to return to the
Setup Menu
for further adjustments, or press it twice
to enter all settings and return to normal operation.
Balance
R/L 0 LF F/B 6 BAK