


Source Configuration
27
Signature 2.0
Source Configuration
Today’s audio video technology has led to the use of an
increasingly complex number of audio/sources in even
the most basic home theater systems. To make matters
more confusing, the use of a specific output from any
one piece of source equipment may vary depending
on the type of program software being watched or
listened to.
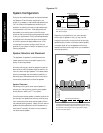
The 2.0 is unique in that it gives users the option to
assemble any of the audio and video sources it is con-
nected to into easy to understand input source profiles
that allow you to “mix and match” combinations and then
identify them with a name that makes sense. For example,
the tuner may be permanently “attached” to the output of
a satellite receiver to allow video for sports events to be
combined with the play-by-play audio from a local radio
station, or a DVD player with multiple digital audio
outputs may appear as separate input sources.
The key to this flexibility is found on the
Source
Menu
. Following the instructions below, you may
combine inputs, establish preferred modes, set input
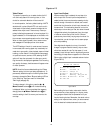
levels and vary effects settings. To start, press the
Menu
button
j
until the main
Setup Menu
(Figure
OSD-1) appears, and then press the
¤ Menu Control
button
i
once until
Sources >
is highlighted.
Press the
› Menu Control
button
i
again to reach
the
Source Menu
.
While proceeding through each of the menu items and
configuration options explained in the following pages, it
is a good idea to record the choices made in the Sources
worksheet that is found in Appendix B. Making a written
record of your system’s configuration will make it easier
to establish your favorites should the memory be reset
due to software changes or service.
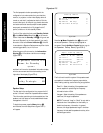
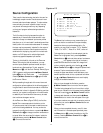
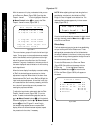
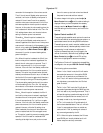
At the
Source Menu
(Figure OSD-5), the first line
labeled
Source
corresponds to the button on the
2.0 remote control that will be used to recall the source
profile that is being established. You may continue to
program the profile that is shown, or press the
› Menu
Control
button
i
to change to another remote button
to be set. When the correct profile is shown inside the
highlighted area, press the
¤ Menu Control
button
i
to move to the next line.
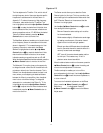
Figure OSD-5
The
Name
line is where you may rename the input
profile so that the on-screen and front-panel display
description shows your preferred description. For
example, you may wish to rename “TV” to “Satellite,”
“Video 1” to “VCR 1,” “Video 2” to “DVD,” and so on.
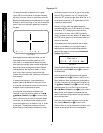
To change the input name, first make certain that the
Name
line is highlighted. Next, press the
› Menu
Control
button
i
and note that a series of underscore
lines (
) will appear to the right of the factory
preset name and that the first letter will change from
white to a slightly greenish color. Use the
⁄
and
¤
Menu Control
buttons
i
to change the alphanumeric
character. Tap the remote buttons lightly to move
through the upper case letters, lower case letters, num-
bers and symbols one at a time, or press and hold either
the
⁄
or
¤ Menu Control
buttons to scroll rapidly
through the available characters.
After you have changed the first letter, press the
› Menu Control
button to move to the next space.
The letter being changed will turn from white to a light
green as your indication of which space is being changed.
Continue to use the
⁄
and
¤ Menu Control
buttons
to change each character, and then press the
› Menu
Control
button to move to the next space to the right.
If you have made an error and wish to correct a previous
spot on the line, use the
‹ Menu Control
button as a
“backspace” key.
When you have completed the entry, even if it does
not fill the entire 11-character space permitted, press
the
Menu
button
j
to enter the setting to the 2.0’s
memory. Press the
¤ Menu Control
button
i
to
move to the next line.
Source Menu
Source:Vid 1
Name: Video 1
Video: Comp 1
Audio: Analog 1
Mode: Movie 1
Video Detect: Auto
Input Level >
Effects >