22 CD RECORDING
CD Recording
Unlike conventional analog tape recorders, the
CDR 20 does not require level setting when
recordings are made from a digital source.
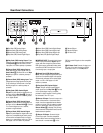
Although the Level Indicator C will operate,
this is only informative and the level may not
be changed or adjusted. However, when you
are making a recording from an external analog
source such as a cassette recorder or the ana-
log output of a receiver or preamp, you should
adjust the input levels using the Record-Level
Control ^. Adjust the levels so that the blue
segments of the display are almost all lit, and
the red segments flash only occasionally. If the
red segments are constantly lit, the recording
will be distorted and produce unacceptable
quality.
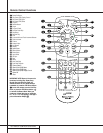
To stop the recording, press the Stop button
x&.The recording will automatically stop if
it takes more space than is available on the
CD-R/RW disc.A DISC FULL message
will appear to remind you that a new disc is
needed.
At the end of a recording, a BUSY message
and an UPDATE message will appear briefly,
and the unit will return to normal operation.
Remember to finalize the disc after recording so
that it may be used in other players.
Finalizing CD-R and CD-RW Discs
Finalizing is a simple process that completes
the recording of a disc so that it may be used in
other players.When a recording is finished, a
disc must be finalized. Once that is done, a
CD-R disc may not be changed or added to.
CD-RW discs are “locked” once they are final-
ized, but they may be unfinalized to permit
additional recording or erasure.
To finalize a disc, place it in the Record
Drawer %. Once the disc’s Table of Contents
information has been read and the OPC process
has been completed, press the Finalize button
o@ and note that the Finalize Indicator
U will begin to flash.Within three seconds,
press the Select button j* and note that
the Finalize Indicator U will stop flashing.
The finalization process will take up to two
minutes, depending on the length of material
recorded on the disc. During the finalization
process the Record Deck will not accept any
operating commands.
When the finalization process is complete the
Finalize Indicator U will go out, and the
R/RW Indicator P will also go out as an
indication that the disc is now playable on
other players.The CD Indicator S will
remain lit.
Unfinalizing and Erasing CD-RW Discs
CD-RW discs are unique in that they are both
recordable and rewritable.This means that you
may use them over again like a cassette tape.
However, the process of reusing a CD-RW disc
is slightly different from that used with tapes.
Unfinalizing a CD-RW Disc
To keep the material that is already recorded on
a CD-RW disc but to add an additional track
and erase single tracks, you must first unfinalize
the disc.To do that, place the CD-RW disc in
the Record Deck % and wait until the Table
of Contents data has been read.
Press the Erase button u! twice and
check to make sure that the Erase Indicator
V flashes and the word TOC appears in the
Record Deck Information Display K.
Within three seconds, press the Play/Select
button j* to start the process. The Erase
Indicator V will remain lit and stop flashing,
and the Information Display K will switch
to OPC and then back to TOC.
When the process is finished, the Erase
Indicator V will go out, and the display will
return to normal.The disc is now ready to have
single tracks removed or additional tracks
added.
Erasing an Entire CD-RW Disc
Erasing the entire contents of a disc is simple,
and it does not matter if the disc has been
finalized or not.To erase the disc, press the
Erase button u! twice if the disc has
NOT been finalized and once if it has been
finalized, so that the word DISC appears in
the Information Display K and the Erase
Indicator V flashes.To start the erasure,
press the Select button j* and note that
the Erase Indicator V will stop flashing. The
erasure process takes about a minute, and it is
complete when the Information Display resets
to 00 00:00 and the Erase Indicator V
goes out.The disc is now totally erased and
may be reused.
Erasing a Single Track
The individual tracks on a CD-RW disc may be
erased one at a time, starting with the last
track on the disc, or you may erase more than
one track. Note that before individual tracks
may be erased the disc must be unfinalized. If
the disc is finalized, follow the instructions
above for unfinalizing before proceeding with
these steps.
To erase only the last track, press the Erase
button u!. Note that the Information
Display K will display 01 TRK and the
Erase Indicator V will flash. Press the
Play/Select button j* within three sec-
onds and note that the Erase Indicator will stop
flashing.When the Erase Indicator V goes
out the Information Display K will show
the total number of tracks that now remain on
the disc.
You may erase more than one track, counting
backwards from the last track. First, press the
Erase button u!. Note that the
Information Display will display 01 TRK and
the Erase Indicator V will flash. Press the
Next button zÓ or Previous button
iÔ until the number of tracks to be erased
appears in the Information Display K.For
example, when 06 TRK appears in the dis-
play a total of six tracks will be erased, count-
ing back from the last track on the disc. Next,
press the Play/Select button j* within
three seconds of making the track selection and
note that the Erase Indicator V will stop
flashing.When the Erase Indicator V goes
out the Information Display K will show
the total number of tracks that now remain on
the disc.
Important Note: Tracks at the beginning or in
the middle of the disc may not be erased until
all of the tracks after them have been erased.
Important Note on Erasure and
Finalization Times: Regardless of the speed
at which a disc was recorded, the CDR 20 will
erase and finalize discs at the x4 speed to mini-
mize the length of the process. However, in
some cases, it may be necessary for the unit to
repeat the erasure or finalization due to the
nature of an individual disc. For that reason, it
is normal for the time required to complete
these steps to vary from one disc to another.


