


42 PROGRAMMING THE REMOTE
Configuring the Remote
The AVR 630 remote is factory-programmed for
all functions needed to operate the unit. In addi-
tion, it is also preprogrammed to operate most
recent Harman Kardon DVD players and chang-
ers, CD players and changers, CD recorders and
cassette decks. The codes for other brand devices
may be programmed into the AVR 630 remote
using its extensive library of remote codes or a
head-to-head learning process for codes not in
the internal library.
Thanks to the remote’s advanced technology and
two-line LCD display, it is no longer necessary to
look up cumbersome codes when programming
the remote; following the steps outlined below,
you simply search for the brand name from the
remote’s memory.We recommend that you first
try the preprogrammed code entry method. If
that procedure is not successful, then try the
code learning method.
Preprogrammed Code Entry
The easiest way to program the AVR remote for
operation with a source device from another
brand is to follow these steps:
1.Turn on the power to the device you wish to
program into the AVR remote.This is impor-
tant, as in a later step you will need to see
whether the device turns off to determine
whether the remote has been programmed for
the proper remote codes.
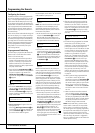
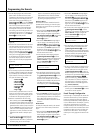
2. Press and hold the Program Button
a
for
about three seconds while the message shown
in Figure 15 appears in the remote’s LCD
Information Display
2
. Release the but-
ton when the red light under the Set Button
F
appears.
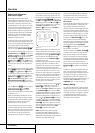
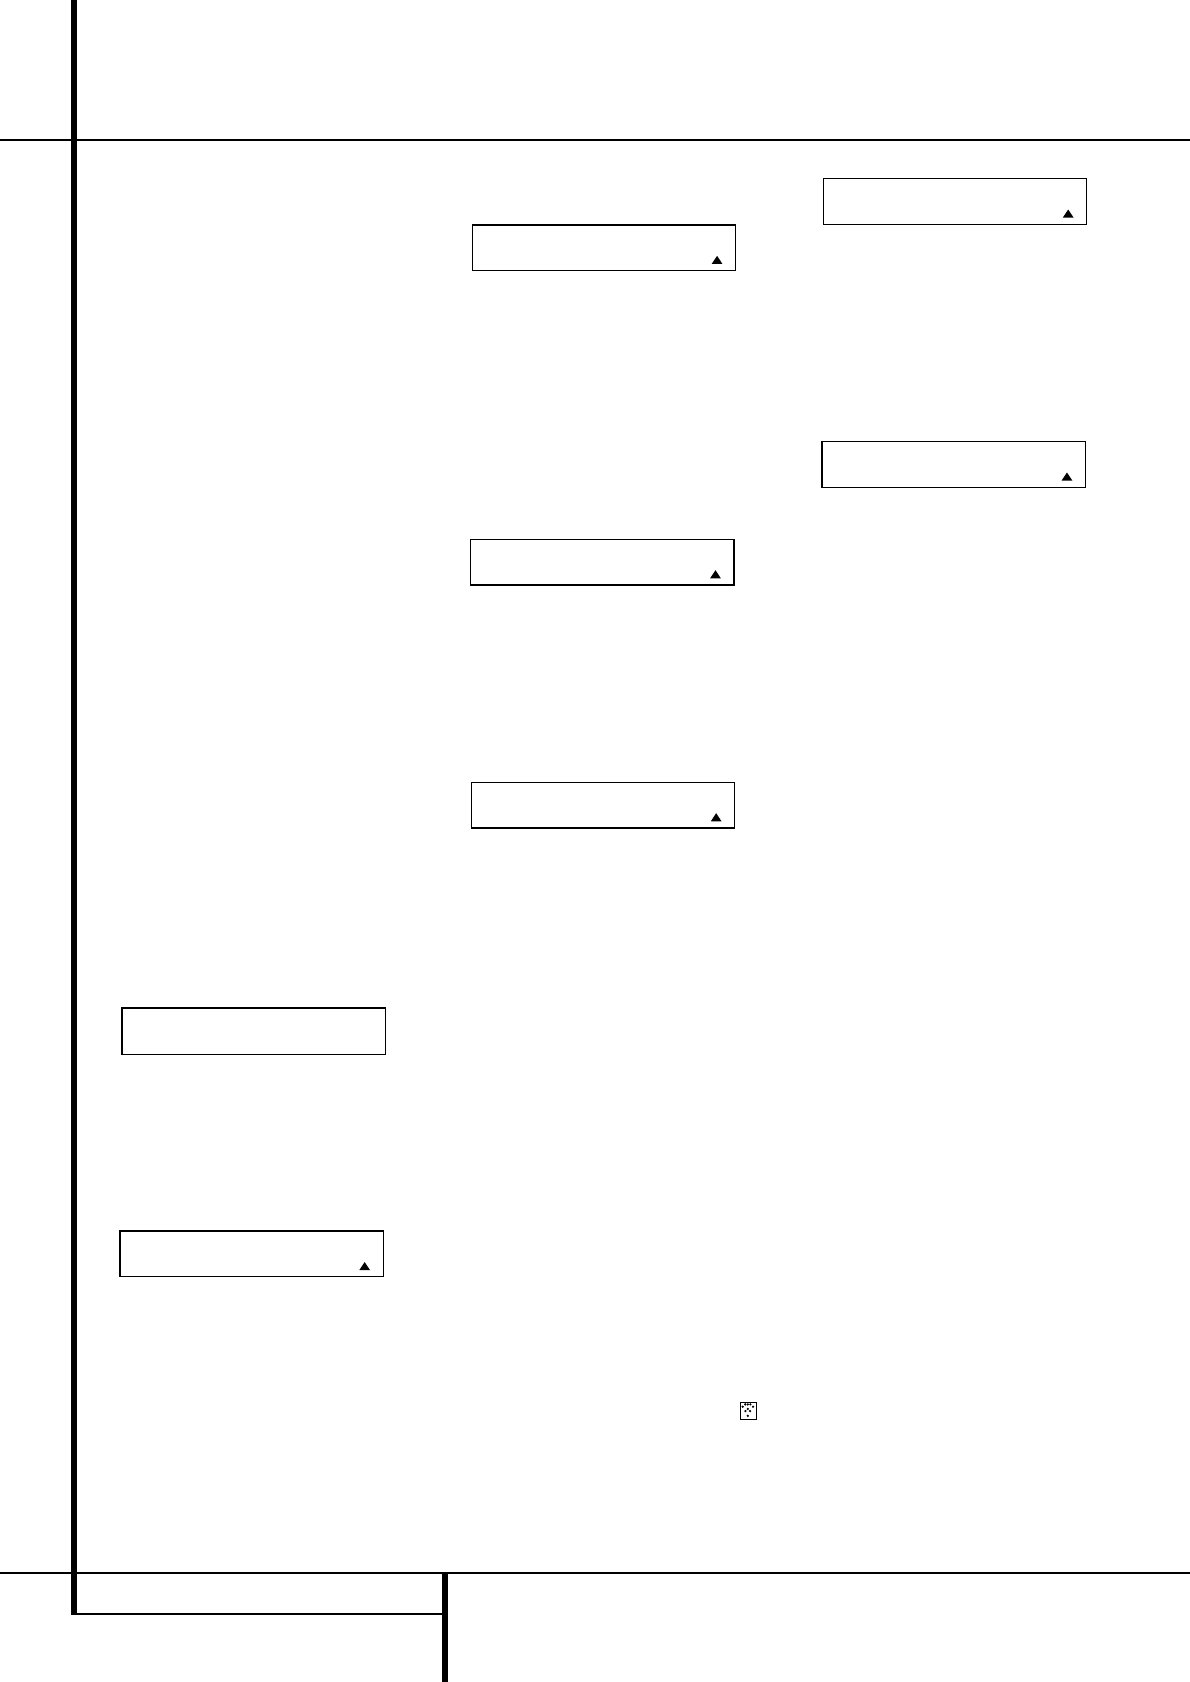
Figure 15
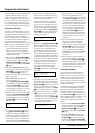
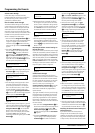
3.The remote’s MAIN MENU message (Figure
16), will appear in the LCD display and the
Set Button
F
will remain illuminated in
red. Press the Set Button
F
to begin the
process of selecting a device and locating the
proper remote codes.
Figure 16
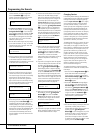
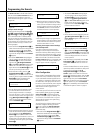
4. SELECT A DEVICE will appear in the LCD
display (Figure 17).
Press the
⁄¤
Navigation Buttons
E
to
scroll through the list of device categories and
press the Set Button
F
when the device
you wish to set the codes for appears.
For this example, we will select “TV” to enter the
codes needed to operate your TV.
Figure 17
NOTE: The codes for hard-drive recorder prod-
ucts (PVR) such as TiVo and Replay are pro-
grammed by selecting VCR as the device. For
satellite-based TiVo products, check under the
brand name of the product.
5.At the next menu screen on the remote (Figure
18) press the Set Button
F
to enter the
Manual mode, which means that you will
select the brand name of the device from the
list programmed into the remote’s memory.
Figure 18
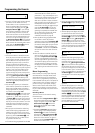
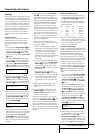
6.The next menu screen on the remote (Figure
19) will show the start of the list of available
brands. Press the
⁄¤
Navigation Buttons
E
until the brand name of the device you
are programming into the remote appears on
the lower line of the display and then press
the Set Button
F
.
Figure 19
NOTE: If the brand name for the product you
wish to program does not appear in the list, the
codes may still be available, as some manufactur-
ers share codes. If the desired brand is not listed,
press the Clear Button
X
to exit the pro-
gramming process, and skip to the instructions
shown on page 43 for the “Automatic” method
of programming the remote. If desired, or if the
codes for your brand are not part of the remote’s
library at all, you may still use the AVR remote to
program most infrared-controlled products by
“learning” the commands from the product’s
original remote into the AVR remote. The instruc-
tions for Learning Commands are on page 43.
7.The next step is important, as it determines
which codes will operate the source device or
display. Point the AVR remote at the device
being programmed and, following the instruc-
tions shown in the remote’s LCD
Information Display
2
, press and release
the Numeric Keys
H
shown on the menu
screen (Figure 20) one at a time, starting with
the “1” button.After you press the “1”
Button
H
, the remote’s LCD screen will
briefly go blank as the code is being transmit-
ted, but you will see the “transmit” icon
in the upper right corner of the display to
serve as confirmation that the remote is send-
ing out commands.
Figure 20
8.After you press and release the number key,
watch the device being programmed to see
whether it turns off.As shown in the instruc-
tions that will appear on the next menu screen
(Figure 21), if your device has turned off, press
the Set Button
F
, and then skip to Step
10. If the unit does not turn off, proceed to the
next step.
Figure 21
9. If the device being programmed into the AVR
remote does not turn off after you have
pressed the “1” key, continue Steps 8 and 9 by
pressing the available numeric keys shown
until the device turns off. If the device still does
not turn off after all choices have been tried,
or if there is only one number key shown as
available to try, the code for this specific
device is not in the AVR remote library under
that brand name. If that is the case, press the
Clear Button
X
to exit the manual pro-
gramming mode. Remember that the codes
may still be stored in the AVR remote’s library
under another brand, and you can have the
remote control search for them by following
the instructions below for automatic program-
ming.You may also manually “learn” the
codes for most devices into the AVR remote by
following the Learning Commands instructions
on page 43.
10.When the device being programmed does
turn off after a numeric key has been
pressed, you must press the Set Button
F
within five seconds to enter the setting into
the remote’s memory.After you press the Set
button, the top line of the LCD display will
read SAVING… and then the word SAVED
will flash four times in the center of the bot-
tom line.
11.When the codes are saved the remote will
return to normal operation, and whenever
you press the Input Selector Button
4
that was just programmed, the codes for the
new device will be used. If no further buttons
are pressed, the remote will revert back to
the default setting for AVR commands.
NOTE: Some brands share a common remote
control code for “Power Off” for many models.
For that reason it is possible that even though
the remote appears to be properly programmed,
you may find that some buttons do not appear to
issue the correct command. If this is the case,
repeat the procedure outlined above, but if more
than one numeric key selection is suggested in
Step 7, try a different number to see whether the
remote operates correctly.
POWER OFF? Y:SET
N: NEXT# OR CLR
PRESS A NUMBER
CODE 1 OF 10
SELECT BRAND
RCA
PROGRAM DEVICE
MANUAL
SELECT A DEVICE
TV
MAIN MENU
PROGRAM DEVICE
HOLD PROG BUTTON
FOR 3 SECONDS
Programming the Remote