


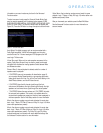
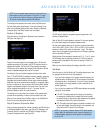


Contrast Adjustment
1. Adjust the contrast on your TV until you see a bright white bar in the
lower right corner of the screen and a deep-dark-black bar to the left.
2. If the brightness of the white bar no longer increases when the con-
trast is turned up or the borders of white letters bloom (overlight) into
the black areas (drastically decreasing the sharpness of the type), the
contrast has been turned up too much. Reduce the contrast until
these effects disappear and the video still looks realistic.
3. If you are watching TV with ambient daylight, adjust the contrast so
that a normal video picture looks the same as the surroundings in
your room. That way the eye is relaxed when watching the TV picture.
Reduce the setting when the surrounding light is dimmed to improve
the sharpness of the picture.
4. The gray scale in the middle line should retain the same distinction
between each bar as before the contrast adjustment. If not, repeat
both Step 3 of the Brightness Adjustment, and the Contrast Adjustment.
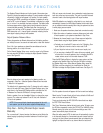
Color Adjustment
1. When the brightness and contrast are set optimally, adjust the color
control. Set the level so that the colors look strong but still natural,
not overdone. If the color level is too high, depending on the TV,
some of the bars will seem wider or the color intensity will not
increase when the control is turned up. Test the color intensity with
a video of pictures of faces, flowers, fruit and vegetables.
2. Refer to the large white bar below the gray scale to tweak the
warmth of the picture using the Tint control on your TV.
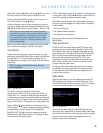
Sharpness Adjustment
Contrary to intuition, the picture will appear sharper and clearer with the
sharpness backed off from the maximum setting. Reduce the sharpness
setting on your television, and the setting on the AVR 3550HD if neces-
sary, to minimize the appearance of any white lines between the bars in
the gray scale portion of the test screen.
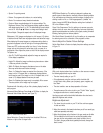
Convergence and Edge Focus
The crosshatch pattern that surrounds the test screen may be used to
evaluate edge focus and convergence in front- or rear-projection video
displays. If you are unable to improve the picture using the available con-
trols, contact the video display manufacturer’s authorized service repre-
sentative for assistance.
When you have finished making any video adjustments, press the
Back/Exit Button.
Multizone Operation
With the multizone system in use, you may enjoy an exciting 5.1-channel
home theater presentation in the main listening area, while others listen
to the same materials or an entirely different presentation in another room.
Although installation of a multizone system is not complicated, it requires
running wires inside walls. Check your local building codes and comply
with the requirements for in-wall wiring systems to prevent the possibility
of a dangerous situation. If you have any questions about installing a
multizone system, it is strongly recommended that you contact a profes-
sional custom installer.
Installing a Multizone System
A basic multizone system consists of only one remote room in the
remote zone, using only one pair of loudspeakers placed in the remote
room for stereo playback. It is not recommended that you place the
left and right multizone speakers in different rooms.
To use the AVR 3550HD with more than one remote room, purchase
a multichannel external amplifier, or use an A-BUS hub. However, the
AVR 3550HD only outputs one remote zone. All remote rooms will
hear the same source, even when a multichannel amplifier is used.
There are three ways of connecting the remote speakers to the
AVR 3550HD:
a) Connect the speakers to the left and right Surround Back/Zone 2
Speaker Outputs. It is not recommended for long speaker-wire runs
(e.g., more than 25 feet), as the audio signal tends to degrade over
long distances. If your application requires a long speaker-wire run,
consider option b below.
b) Purchase an external amplifier. Connect the Surround Back/Zone 2
Preamp Outputs or the Zone 2 Audio Outputs to the amplifier’s
inputs. Place the amplifier either in the main listening room or the
remote room. Remote-room placement is preferred to minimize
the length of the speaker wires.
c) Buy an A-BUS in-wall amplified module, such as the Harman Kardon
AB 1 or AB 2, and connect it to the A-BUS port for use with a single
pair of remote speakers. If you purchase an A-BUS hub, such as the
Harman Kardon ABH 4 or ABH 4000, you may connect up to four
in-wall modules to each hub, or you may cascade hubs to create a
whole-house audio distribution system that delivers audio to almost
every room in your home. A-BUS offers the benefits of simplicity,
expandibility and the inclusion of IR support, all communicated via
single-cable connections and requiring no external power amplifiers.
When you use either the Surround Back/Zone 2 Speaker Outputs or the
Surround Back/Zone 2 Preamp Outputs for a multizone system, you will
not be able to use the surround back speakers with your main system,
which will then be limited to 5.1 channels. However, when the multizone
system is turned off, you may reassign your remote speakers to the main
listening room for 7.1-channel operation.
If you are not using A-BUS components, install an optional remote infrared
(IR) receiver in the remote room and connect it to the Zone 2 IR Input
to use the included Zone 2 remote control, a keypad or another control
device to turn the multizone system on or off, select a source input, and
operate any source devices that are connected in daisychain fashion to
the AVR 3550HD’s Remote IR Output.
You may use the above connection methods simultaneously to increase
the total number of remote rooms in your system. Remember that
sending control commands from one room in the system will affect
the entire remote zone of the multizone system.
47
ADVANCED FUNCTIONS