


28
AVR
Set Up the AVR
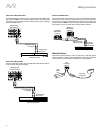
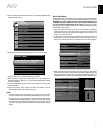
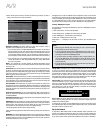
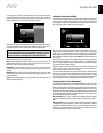
4. Select “Audio Input from Source” and select the audio input connector you want to
assign to the source button. Press the OK button.
Cable/Sat
Audio Effects
Video Modes:
Surround Modes:
Off
Auto Select
1080p – 60Hz
No Video Input
Auto
Cable/Sat
Analog 1
No Audio Input
Component
Coaxial
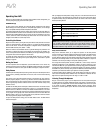
Audio Format from Source:
Video Input from Source:
Audio Input from Source:
Change Name:
Adjust Lip Sync
Zone 2 Audio:
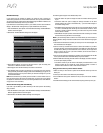
Resolution to Display:
Resolution from Source:
HDMI Bypass:
HDMI 4
HDMI 5
HDMI 6
HDMI 7
HDMI Front
Optical 1
Optical 2
Coaxial
Analog 1
Analog 2
Resolution to Display:
This setting reflects the video output resolution, which is
dependent upon the capabilities of your TV or video display.
sIf you connected your TV to the AVR’s HDMI Monitor Out connector, the two devices
will communicate with each other, and the AVR will automatically select the best
available video output resolution. In almost all cases, you should leave the resolution
set to the AVR’s automatic selection. (You can override this automatic selection if
your video display’s native resolution is different from the AVR’s automatic selection.)
sIf you connected your TV to the AVR’s Composite Video Monitor Out connector, you
must set the resolution to “480i” (AVR 3700/AVR 2700) or to “576p” (AVR 370/AVR
270) to view any content.
NOTE: If your connected TV is 4K video capable, the AVR will automatically pass 4K
video sources through to the TV in their native resolution and will upscale non-4K video
sources up to 4K.
Audio Effects:
This submenu allows you to adjust the Dolby Volume and Dolby PLII/IIx/
IIz settings, the bass and treble tone controls, the LFE trim and the Equalization On/Off
setting for each source independently. We suggest leaving this submenu at its default
settings and returning to it later if your system requires fine-tuning. See Audio Effects
Button, on page 34, for more information.
Video Modes:
This submenu allows you to make picture adjustments for each source
independently. We suggest leaving the settings at their factory defaults. You should make
picture adjustments to your video display first and use this menu only for fine-tuning. See
Video Processing, on page 34, for more information.
Surround Modes:
This submenu lets you program surround modes for movies, music
and games for each source independently. Digital surround signals, such as Dolby Digital
and DTS bitstreams, are automatically played in their native formats, although you may
change the surround mode. See Audio Processing and Surround Sound, on page 33, for
more information.
Audio Format from Source:
This line is informational only. When a digital program is
playing, its format will be identified here. When analog audio programs are playing, this
line displays ANALOG.
Resolution from Source:
This line is informational only. It indicates the resolution of the
video output by the source device.
HDMI Bypass:
This setting allows you to bypass the AVR’s internal video processing for
proper display of 3D video content and of source devices (such as some game consoles)
where the AVR's video processing can create delays that can cause synchronization
errors between the sound and picture. There are two available settings:
s/N!LWAYSBYPASSESTHE!62gSINTERNALVIDEOPROCESSING
s!UTO!UTOMATICALLYBYPASSESTHE!62gSINTERNALVIDEOPROCESSINGWHEN$CONTENTIS
detected.
IMPORTANT: Once the AVR automatically switches into the bypass mode upon detecting
3D video content, it will not automatically switch out of the bypass mode when it detects
conventional 2D video content. To turn the HDMI Bypass off you must cycle the AVR into
the Standby mode and then turn it on again.
We suggest that you create an additional source configuration for each of your 3D video
source devices by assigning each an unused Source Selector button on the AVR’s remote
control. For example, you can assign the AVR’s “Media Server” source as the 3D source
for a 3D-capable disc player or game, and you can assign one of the AVR’s “A/B/C/D”
source buttons as the 3D source for your cable or satellite tuner’s 3D programming.
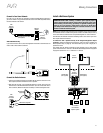
Creating “HDMI Bypass” Inputs
In this example, we will program the Media Server source as an HDMI Bypass source for
3D programming:
1. Select “Setup Source.” The source list will appear.
2. Select “Media Server.” The Media Server setup screen will appear.
3. Select “HDMI Bypass.” A confirmation screen will appear.
4. Select “OK.” The AVR will exit the menu mode.
Repeat Steps 1 – 4, assigning a new 3D source for each of your 3D-capable source
devices.
Notes:
sWhen using your AVR with these new settings, be sure to press the correct
source selectors for your 2D and 3D sources.
sIf you are viewing 3D sources when an HDMI Bypass input is active, the on-
screen indications for volume level will not appear. This is normal, since all video
processing is removed in the HDMI Bypass mode.
sIf your video sources are always operating at 720p or higher resolution, you
may find the HDMI Bypass mode acceptable for normal 2D viewing as well
as for 3D viewing. In this case, you may find it more convenient to use the 3D
sources at all times.
sIf you see side-by-side or top-and-bottom images while watching a 3D program,
manually switch to the HDMI Bypass mode.
Change Name: This selection lets you change the display name for the source, which
is useful if your source’s device type is different from the source’s preprogrammed
name. Select this line and use the Up/Down buttons to scroll forward or reverse through
the alphanumeric characters. When the desired character appears, use the Left/Right
buttons to move the cursor to the next or previous position. Move the cursor again to
leave a blank space. When you have finished, press the OK Button. The name will appear
on the AVR’s front panel and throughout the on-screen menu system.
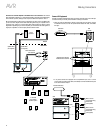
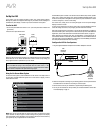
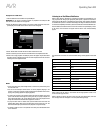
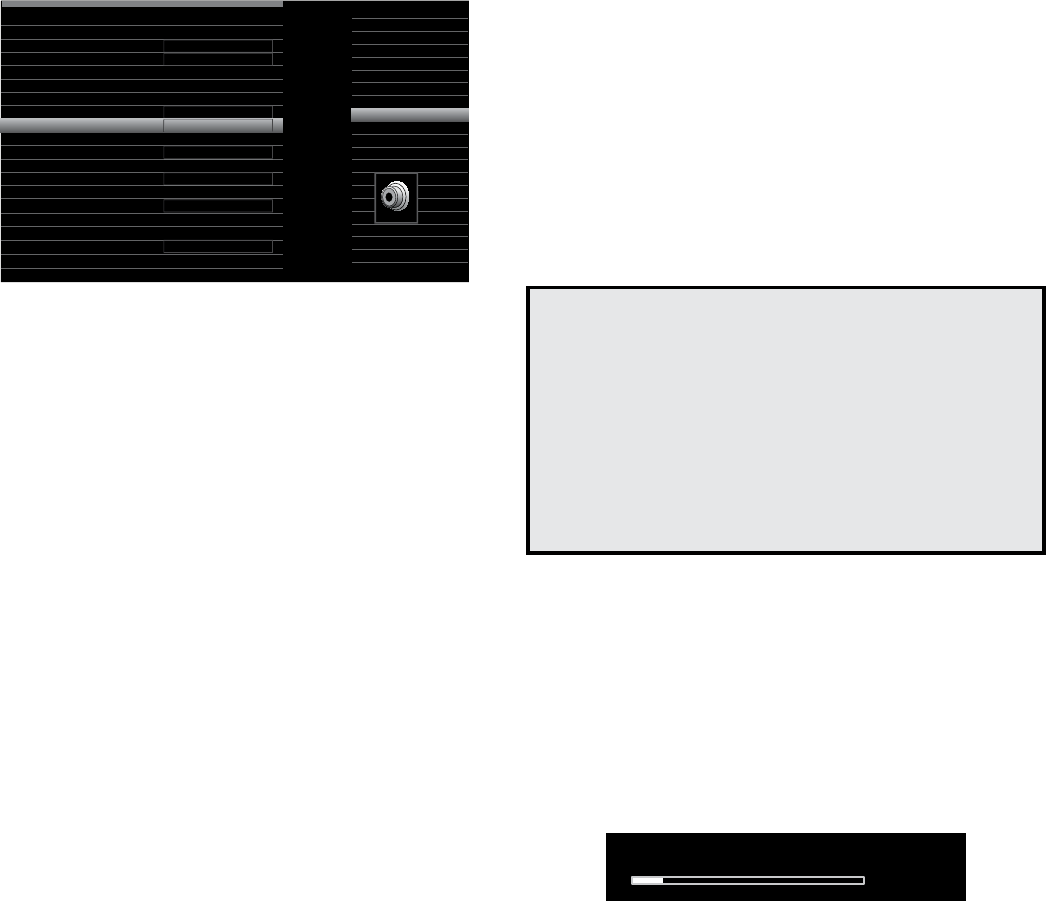
Adjust Lip Sync: This selection lets you resynchronize the audio and video signals from
a source to eliminate a “lip sync” problem. Lip-sync issues can occur when the video
portion of a signal undergoes additional processing in either the source device or the
video display. When you make a Lip Sync adjustment, the Lip Sync menu appears by
itself, enabling you to view the video while listening to the audio. Use the Left/Right
buttons to delay the audio by up to 180ms.
Adjust Lip Sync
15
ms
Zone 2 Audio: This setting determines the audio source for Zone 2 of a multizone
system. Select the analog audio input the source is connected to. Digital audio is not
available to the multizone system.
To configure the next source, press the Back/Exit button, then return to the Setup Source
line of the Main Menu. When you have finished configuring all sources, press the Back/
Exit button to clear the menus from view.
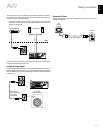
Set Up the Network
To play MP3 or WMA media located on DLNA-compatible devices connected to the
network, use the AVR’s internal Internet radio tuner or listen to sources via AirPlay, the
AVR must be connected to your home network and you must join them with the network.
(If your home network is Wi-Fi, the AVR 3700 and AVR 370 can connect to it wirelessly.)