


47
ADVANCED FUNCTIONS
played through the front left and right speakers and the special
low-frequency effects (LFE) channel information.
LFE: This setting plays low-frequency information contained in the
left and right program channels to the front speakers, and directs
only the LFE channel information to the subwoofer.
NOTE: If you are using a Harman Kardon HKTS Series speaker
system, select the appropriate numeric crossover frequency for
the Left/Right, Center, Surround and Surr Back lines, and the
subwoofer will automatically be set to LFE.
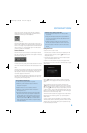
The Speaker/Channel Indicators on the front panel of the receiver (see
Figure 58) will display the speaker size settings as follows. For each
speaker configured numerically, a single box will appear in the position
for that speaker. For each speaker configured as LARGE, a double box
will appear in its position. If a speaker is configured as OFF, no box will
appear. The subwoofer will be indicated by a single box, or no box if
no subwoofer has been configured. The letters inside the boxes appear
when a digital
signal is being received that has that channel discretely
encoded.
The letters flash when the signal is not present, such as when
a DVD is paused. A line will connect the SBL and SBR boxes when a
6.1-channel signal is detected, indicating that the same signal is playing
through both speakers.
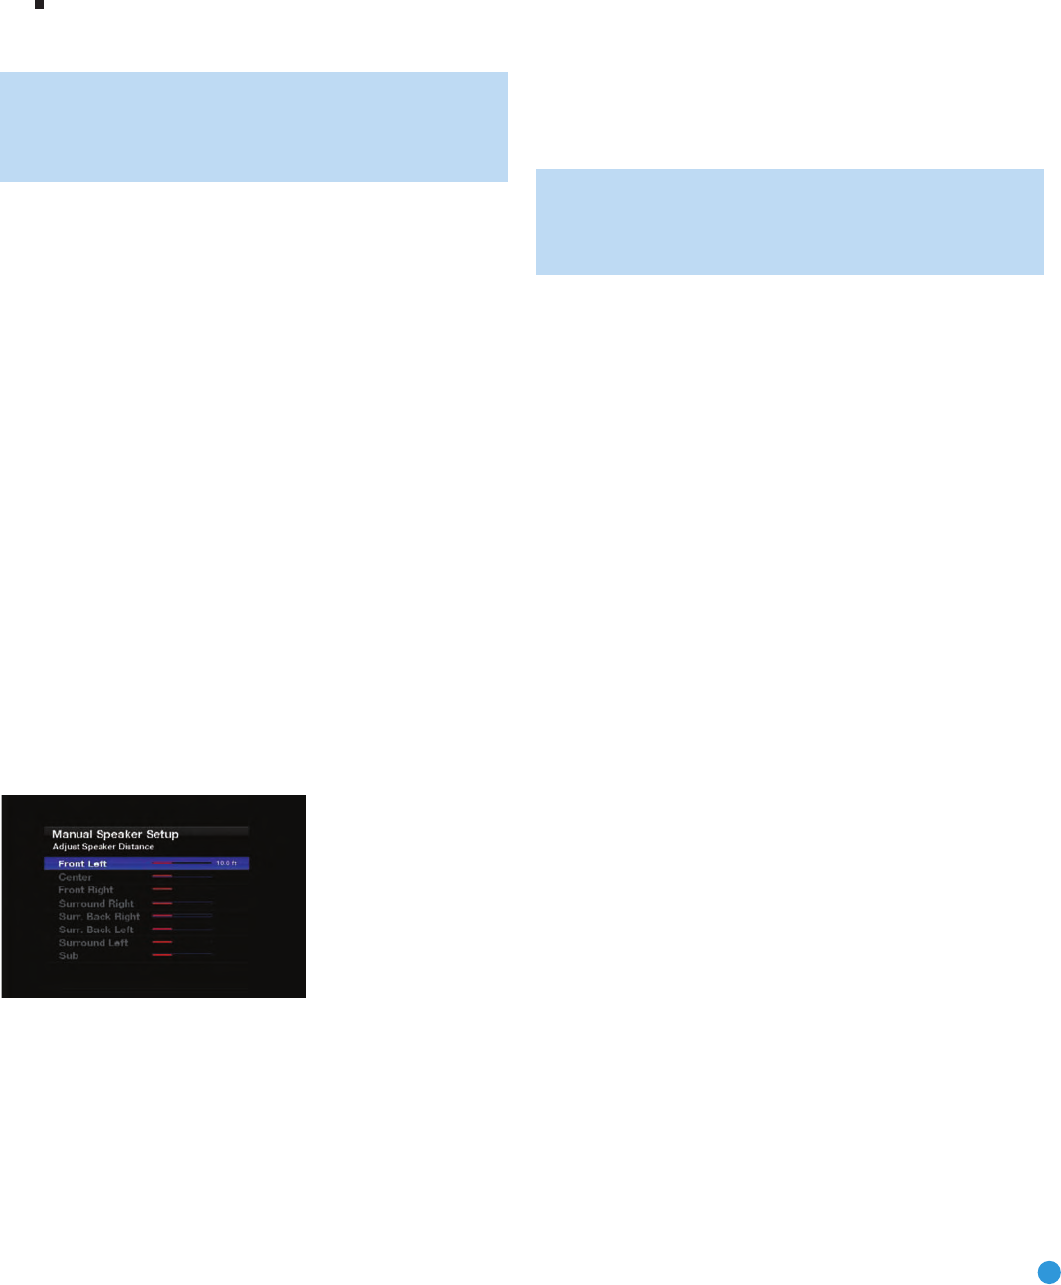
Adjust Speaker Distance Menu
As explained above in Step Two – Measure Speaker Distances, some-
times the speakers are placed at different distances from the listening
position, which can muddy the sound, as sounds are heard earlier or
later than desired.
Even if all of your speakers are placed the same distance from the
listening position, do not skip this menu.
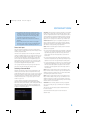
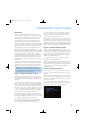
On the Manual Speaker Setup menu, move the cursor to the Distance
line and press the Set Button to display the Adjust Speaker Distance
menu. See Figure 63.
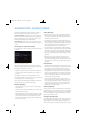
Figure 63 – Adjust Speaker Distance Menu
This menu requires you to enter the distance from each speaker to the
listening position, which you measured in Step Two – Measure Speaker
Distances and noted in Table A4 in the appendix.
The default unit of measurement is feet. If you wish to change the unit
to meters, press the Back/Exit Button until you return to the main AVR
menu. Scroll down to the System line, and select it to view the System
Settings menu. Scroll down this menu to the General AVR Settings
section, and select the Unit of Measure line. Press the OK Button to
change the setting from Feet to Meters.
Use the
⁄
/
¤
Buttons to move the cursor to the Front Left line, press
the OK Button then use the
‹
/
›
Buttons to change the measurement
as needed. The values vary between 0 and 30 feet, with a default of
10 feet for all speakers. Use the
⁄
/
¤
Buttons to move to each
speaker in turn – Center, Front Right, Surround Right, Surround Back
Right, Surround Back Left, Surround Left and Subwoofer, if present in
your system.
NOTE: When the multiroom system is in use, the surround back
channels are automatically assigned to the multiroom system, as
mentioned earlier. You will not be able to adjust the delay settings
for these channels, and the cursor will skip past them.
Step Four – Setting Channel Output Levels
Manually
For a conventional 2-channel receiver, the balance control enables the
user to control the stereo imaging by adjusting the relative loudness of
the left and right channels, as heard at the listening position.
With up to seven main channels plus a subwoofer, imaging becomes
both more critical and more complex. Unlike the rotary balance control,
the goal of the AVR 254’s channel output adjustment process is to
examine the output level of each channel independently and ensure
that each is heard at the listening position with equal loudness.
If you followed the instructions in the Initial Setup section, then you
let EzSet/EQ calibration handle this critical task for you, simply and
automatically.
However, if you prefer to make these adjustments manually, the
AVR 254’s Adjust Speaker Levels menu allows you to do so, either
using the system’s test tone or while playing source material. In addition,
this is the only method for adjusting the level of the subwoofer.
If you use a handheld SPL meter (available at many electronics stores),
set it to the C-Weighting, Slow scale.
1. Make sure all speakers have been connected correctly.
2. Adjust the number of speakers, crossover, distance and sub mode
for each speaker in your system as described in Step Three.
3. If you are using a handheld SPL meter with source material, such
as a test disc or another audio selection, play it now and adjust the
AVR’s master volume control until the meter measures 75dB.
4. There are several methods of adjusting the channel output levels,
using either the test tone or source materials. In all cases, you may
measure the channel levels in one of two ways:
a) By ear. Try to adjust the levels so that all channels sound equally loud.
b) Using a handheld SPL meter set to the C-Weighting, Slow scale.
Try to adjust each channel so that the meter reads 75dB.
AVR254om.qxd 3/28/08 12:46 PM Page 47