


33
INITIAL SETUP
AUTO POLL: The Auto Poll feature is used when both an analog
audio and digital audio connection have been made for one source
device. If for some reason no digital signal is available, the AVR 146
will switch to the analog inputs for the source. This situation can occur
with some cable or satellite television broadcasts, where some channels
are broadcast with digital audio and others with analog audio.
For some sources, the Auto Poll feature is unnecessary and may be
undesirable. For example, if your DVD player is stopped, you may not
want to use the analog audio signal or you may have decided not
to connect analog audio. Move the cursor to this line, and press the
‹/› Buttons until OFF appears, disabling the Auto Poll feature. With
Auto Poll turned off, the receiver will only check for a signal at the
audio input assigned to the source.
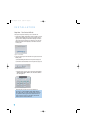
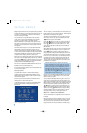
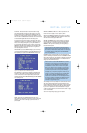
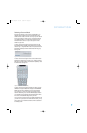
DMP SETTING: If you select DMP/The Bridge as your source input,
you will notice that the AUDIO IN line of the INPUT SETUP menu has
been replaced by the option GO TO DMP SETTING. See Figure 48.
Figure 48 – Input Setup Menu Screen for DMP/The Bridge source
Since The Bridge is connected to the AVR using a dedicated audio
connection, it isn’t possible to select a different audio input for this
source. However, there are several special settings used only with
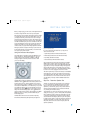
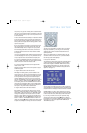
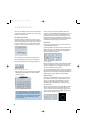
The Bridge. Selecting GO TO DMP SETTING displays the DMP SETTING
menu (see Figure 49).
Figure 49 – DMP Setting Menu Screen
MODE: The first line of the DMP SETTING menu allows you to
select whether the iPod will be used to listen to music (or other audio
materials), or view a video or still image, if your iPod is video- or
photo-capable.
REPEAT: Set REPEAT to ONE, ALL or OFF to repeat one track, all
tracks in an album or playlist, or not to repeat any tracks.
SHUFFLE: Set SHUFFLE to SONGS to play all songs on the iPod in
random order. The ALBUMS setting plays all albums in random order,
with each album’s tracks played in album order.
RESUME: Set RESUME to ON to resume playback of a track from
the point where it was interrupted by turning off the AVR, switching
sources on the AVR, or removing the iPod from The Bridge. Set
RESUME to OFF if you wish to restart play from the beginning of
the track after interruptions.
NOTE: The Resume setting disables the Remember Playback
Position setting that you may set for audio and video files using
later versions of iTunes. Resume affects all files on the iPod until
you manually change the setting either in the DMP SETTING
menu or by using iTunes.
CHARGE IN ST-BY: Your iPod’s battery may be charged while it is
docked in The Bridge with the AVR turned on. Set CHARGE IN ST-BY to
ON to enable charging even when the AVR is in Standby mode (but not
completely off). When CHARGE IN ST-BY is set to OFF, the iPod will
charge only when the AVR is turned on.
NOTE: In order to access the DMP SETTING menu, press the
AVR Selector on the remote so that it operates the AVR 146.
You may then press the OSD Button and use the Navigation
and Set Buttons, as usual, with the on-screen menu system.
When you are ready to return to operation of your iPod using
the remote, remember to press the DMP/The Bridge Selector
so that the transport and other controls operate The Bridge.
To simplify use, you may wish to program two macros on your
remote, one to select the AVR and issue the commands within
the OSD system to display the DMP SETTING menu, and a
second macro to remove the menu from the display and return
the remote to operation of The Bridge. See the Macros section
of the Advanced Functions section of the manual for more
information on programming macros.
The remaining lines in the Input Setup menu activate the tone controls,
and may be skipped at this time. We recommend leaving the tone
controls at their factory defaults for most listening, in order to enjoy the
sound mix created by your favorite movie and music artists. However,
if your room or speakers have unusual characteristics, or simply as
a matter of personal preference, see the Tone Controls section on page
35 for more information.
You are now ready to begin enjoying your new receiver!
AVR146-OM.qxd 2/5/07 3:59 PM Page 33