


36 ADVANCED FEATURES / MULTIROOM
Advanced Features / Multiroom Operation
Semi-OSD Settings
The semi-OSD system places one line messages
at the lower third of the video display screen
whenever the Volume, Input Source, Surround
mode or tuner frequency of any of the configura-
tion settings are changed.The semi-OSD system
is helpful in that enables you to have feedback
on any control changes or remote commands
using the video display when it is difficult to
view the front-panel displays. However,you may
occasionally prefer to turn these displays off for a
particular listening session.You may also want to
adjust the length of time the displays remain on
the screen. Both of those options are possible
with the AVR.
To turn off the semi-OSD system, you will need
to make an adjustment in the
ADVANCED
SELECT
menu (Figure 11).To start the
adjustment, press the OSD button
L
to bring
the
MASTERMENUto the screen. Press the
⁄
Button
D
, until the on-screen › cursor is
next to the ADVANCEDline. Press the Set
Button
F
to enter the ADVANCED
SELECT
menu.
At the
ADVANCEDSELECTmenu make
certain that the on-screen
› cursor is next to the
SEMIOSDline by pressing the
⁄
/
¤
but-
tons
D
as needed. Next, press the
›
button
a
so that the word OFFis highlighted in the
video display.
Note that this setting is temporary and will
remain active only until it is changed or until the
AVR is turned off.Once the unit is turned off, the
semi-OSD displays will remain activated, even if
they were switched off for the previous listening
session.
To change the length of time that the semi-OSD
displays remain on the screen, go to the
ADVANCEDSELECTMenu as outlined
earlier, and press the
⁄
/
¤
buttons
D
as need-
ed, until the on-screen
›
cursor is next to the
SEMI-OSDTIMEOUTline. Next, press
the
‹
/
›
Buttons
Ea
until the desired time
in seconds is displayed. Note that unlike most of
the other options in this menu, this is a perma-
nent setting change, and the time-out entry will
remain in effect until it is changed, even when
the unit is turned off.
If you wish to make other adjustments in the
menu, press the
⁄
/
¤
Buttons
D
until the on-
screen
›
cursor is next to the desired setting or
the
BACKTOMASTERMENUline and
press the Set button
F
. If you have no other
adjustments to make, press the OSD Button
L
to exit the menu system.
Full-OSD Time Out Adjustment
The FULLOSDmenu system is used to
simplify the setup and adjustment of the
AVR using a series of on-screen menus.The fac-
tory default setting for these menus leaves them
on the screen for 20 seconds after a period of
inactivity before they disappear from the screen
or Time Out.This Time Out is a safety measure to
prevent the menu text from burning into the
CRTs in your monitor or projector, which might
happen if they were left on indefinitely. However,
some viewers may prefer a slightly longer or
shorter period before the Time Out display.
To change the Full-OSD Time Out, you will need
to make an adjustment in the
ADVANCED
SELECT
menu (Figure 11).To start the
adjustment, press the OSD button
L
to bring
the
MASTERMENUto the screen. Press the
⁄
button
D
, until the on-screen
›
cursor is
next to the ADVANCEDline. Press the Set
Button
F
to enter the ADVANCED
SELECT
menu (Figure 11).
At the
ADVANCEDSELECTmenu make
certain that the on-screen
› cursor is next to the
FULLOSDTIMEOUTline by pressing the
⁄
/
¤
Buttons
D
as needed. Next, press the
‹
/
›
buttons
Ea
until the desired time is
displayed in seconds. Note that unlike most of
the other options in this menu, this is a perma-
nent setting change, and the time-out entry will
remain in effect until it is changed, even when
the unit is turned off.
If you wish to make other adjustments in the
menu, press the
⁄
/
¤
Buttons
D
until the
on-screen
›
cursor is next to the desired setting
or the
BACKTOMASTERMENUline and
press the Set button
F
. If you have no other
adjustments to make, press the OSD Button
L
to exit the menu system.
Multiroom Operation
The AVR is fully equipped to operate as the con-
trol center for a complete multiroom system that
is capable of sending one source to a second
zone in the house while separate source is lis-
tened to in the main room. In addition to provid-
ing for control over the selection of the remote
source and its volume, the AVR offers a compre-
hensive range of options for powering the
speakers in the second zone.
• Using the line-level Multiroom Audio
Outputs
7
, the selected source may be fed to
optional, external power amplifiers that may be
matched to the specifics of the installation.
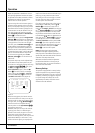
• When the main room system is configured for
5.1 operation, the Surround Back Left/Right
amplifier channels may be used to power the
remote zone so that no additional amplifiers are
required.
In addition, the AVR includes a remote IR sensor
input so that remote control commands from the
Zone II remote included with the unit may be
transmitted to the unit, while standard IR
input/output jacks allow the remote zone’s com-
mands to be sent to compatible IR-controlled
source devices.
Installation
Although simple remote room systems may be
installed by the average do-it-yourself hobbyist,
the complexity of your multizone/multiroom sys-
tem involves running wires inside of walls where
the services of a specially trained installer may
be required. Regardless of who does the work,
please remember that local building codes may
govern in-wall electrical work, including proper
specification of any wiring used and the way in
which it is connected.You are responsible for
making certain that all Multiroom installation
work is done properly and in compliance with all
applicable codes and regulations.
For standard installations, follow the instructions
shown on page 16 for the connection of speaker
wire and IR remote wiring to the AVR.
For installations where the Surround Back
Left/Right amplifier channels are used to power
the remote zone, make certain that the system is
configured for that type of operation, as shown
on page 35.