Dynex earclip headset with microphone • DX-740
Casque d’écoute type oreillette avec microphone
Auriculares con gancho y micrófono Dynex
Using the headset
Installing your headset
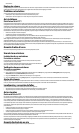
To install your headset
Plug the green and pink connectors into the corresponding ports on
your computer.
If you are prompted with the Add New Hardware Wizard, follow the steps
to download and install the driver.
Testing your headset
To test your headset
1. Plug in your headset.
2. Start the Sound Recorder application (Click Start, then select All Programs, Accessories, Entertainment).
3. Click Record and speak into the headset for 5–10 seconds.
4. Click Stop, then Play. If you can hear your recording through the headset, it is working correctly.
Adjusting the volume
You can adjust the volume by turning the volume knob on the headset, or using the Windows volume control in the Control Panel. Your computer may
also have volume buttons to adjust the Windows volume control.
Troubleshooting
If your headset does not function correctly, try the following:
• Make sure your headset is properly plugged into the correct ports.
• Make sure the volume is set to a medium level, and is not muted.
Legal notices
FCC statement
This equipment has been tested and found to comply with the limits for a Class B digital device, pursuant to Part 15 of the FCC Rules. These limits are
designed to provide reasonable protection against harmful interference in a residential installation. This equipment generates, uses and can radiate radio
frequency energy and, if not installed and used in accordance with the instructions, may cause harmful interference to radio communications. However,
there is no guarantee that interference will not occur in a particular installation. If this equipment does cause harmful interference to radio or television
reception, which can be determined by turning the equipment o and on, the user is encouraged to try to correct the interference by one or more of the
following measures:
• Reorient or relocate the receiving antenna.
• Increase the separation between the equipment and receiver.
• Connect the equipment into an outlet on a circuit di erent from that to which the receiver is connected.
• Consult the dealer or an experienced radio/TV technician for help.
ICES - Canada’s Interference-Causing Equipment Standards This equipment complies with the applicable technical standards of ICES 003:1997 in
accordance with the measurement procedures speci ed in CISPR22-96.
Copyright © 2007 Dynex. DYNEX and the DYNEX logo are trademarks of Best Buy Enterprise Services, Inc. Other brands and product names are
trademarks or registered trademarks of their respective holders. Speci cations and features are subject to change without notice or obligation.
One Year Limited Warranty
For complete warranty go to www.dynexproducts.com.
Utilisation du casque d’écoute
Installation du casque d’écoute
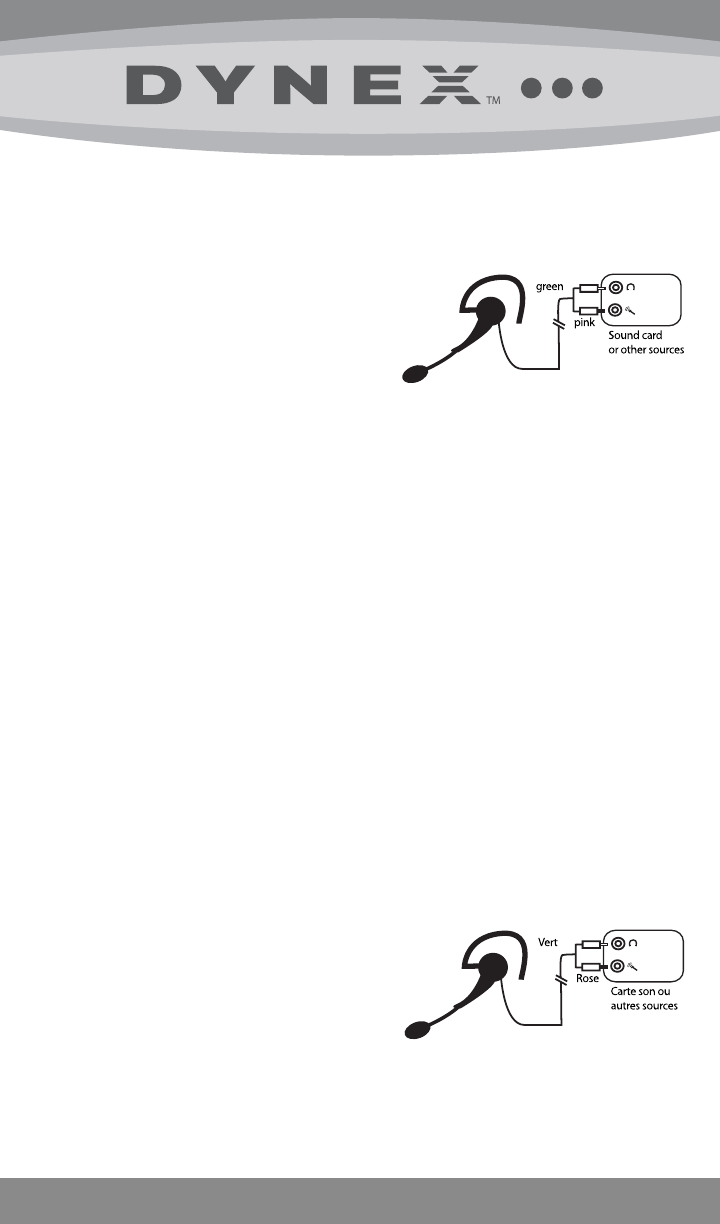
Pour installer le casque d’écoute
Pour installer votre casque d’écoute, branchez les connecteurs vert et rose sur les
ports correspondants de l’ordinateur.
Si l’Assistant ajout de nouveau matériel (Add New Hardware Wizard) s’a che, suivez
les étapes pour télécharger et installer le pilote.
Test du casque d’écoute
Pour tester le casque d’écoute
1. Branchez le casque d’écoute.
2. Démarrez l’application Sound Recorder [Magnétophone] (Cliquez sur Start [Démarrer] puis sélectionnez All Programs [Tous les programmes],
Accessories [Accessoires], Entertainment [Divertissement]).
3. Cliquez sur Record (Enregistrer) et parlez dans le casque d’écoute pendant cinq à 10 secondes.
4. Cliquez sur Stop (Arrêter) puis sur Play (Lecture). Si vous pouvez entendre votre enregistrement en utilisant le casque d’écoute, ce dernier fonctionne
Quick Installation Guide • Guide d’installation rapide • Guía de instalación rápida