


Issue 1.0.2 28 March 2006 © Calibre UK Ltd Page 9 of 30
CONNECTING VANTAGE-HD INPUTS
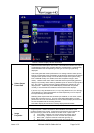
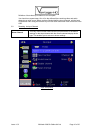
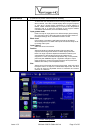
3.1. Introduction
It is now necessary to define which input channels are connected and to pair the correct
audio channel with each video channel. To begin to do this, scroll down to the Input
Connections menu and enter that menu by pressing the right navi-key.
By default, no video channels and no audio channels are active. You must define which
channels are connected on the Input Connections menu and choose whether or not each
video channel has an associated audio channel. Only those video channels which are
physically present on your Vantage-HD are shown, those which are grayed-out require an
additional expansion module.
NOTE
If your input device allows you to select an output resolution please select the native
resolution of the image to be displayed
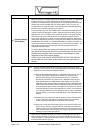
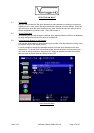
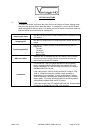
16.
Naming an
Input
To enable or disable a video channel, scroll to that channel type with the up/
down navi-keys, then press OK. You must then give that channel a name
which means something to you or your installation/system for future
reference. Do this by using the up/down navi-keys to scroll through the
available characters and numbers (fast-scroll through the list automatically
activates after approx 2 seconds). Then use the left/right navi-keys to move
to the next character in the name, or go back to alter a character you have
already chosen. (Note: To delete a character and not replace it with another,
scroll with the up/down navi-keys to select the blank/space character.) It is
not possible to enable a video channel or associate a sound channel with it
until you have named that channel. Press the OK button when you have
finished naming that input, the channel will now automatically be enabled as
an available input.
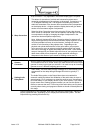
Input Number
(optional
configuration)
To enable direct-selection of an input channel, using the numeric keys on the
remote control, scroll to the Input Number with the up/down navi-keys, then
press OK. Select the desired number from the list the press OK.
Numeric selection is not essential for the operation of Vantage-HD but does
provide a quick method of getting to the desired input.
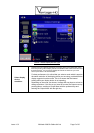
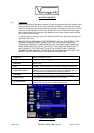
17. Associating an
Audio Channel
After naming the input channel, scroll down to the Sound Source menu item
to choose the associated sound channel and press OK to view the list of
available sound channels. If there is no associated sound channel (e.g. for a
PC input with no audio) choose None. Only those sound channels which
have not already been allocated to another video input channel are available
for selection, those which have already been allocated are grayed-out.
Note the scroll bar at the left of the list - there are too many audio channels to
display all at once, you must scroll up and down the list to see all the
available channel options.
Note: HDMI audio inputs can only be associated with the matching HDMI
video input. For best audio performance we recommend using Coax or
Optical SPDIF audio where supported by the source.
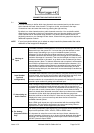
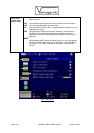
18. For Analog
Component Video
Only
For analog Component Video inputs only, you can also choose whether the
input source provides YPbPr, YPbPrS, RGB or RGBS video.
It is important to select the correct color and sync format, otherwise the
picture coloration will be wrong or no picture may be displayed. Most North
American DVD players and set-top boxes output YPbPr. Most European
(SCART) devices output RGBS