SPS
™
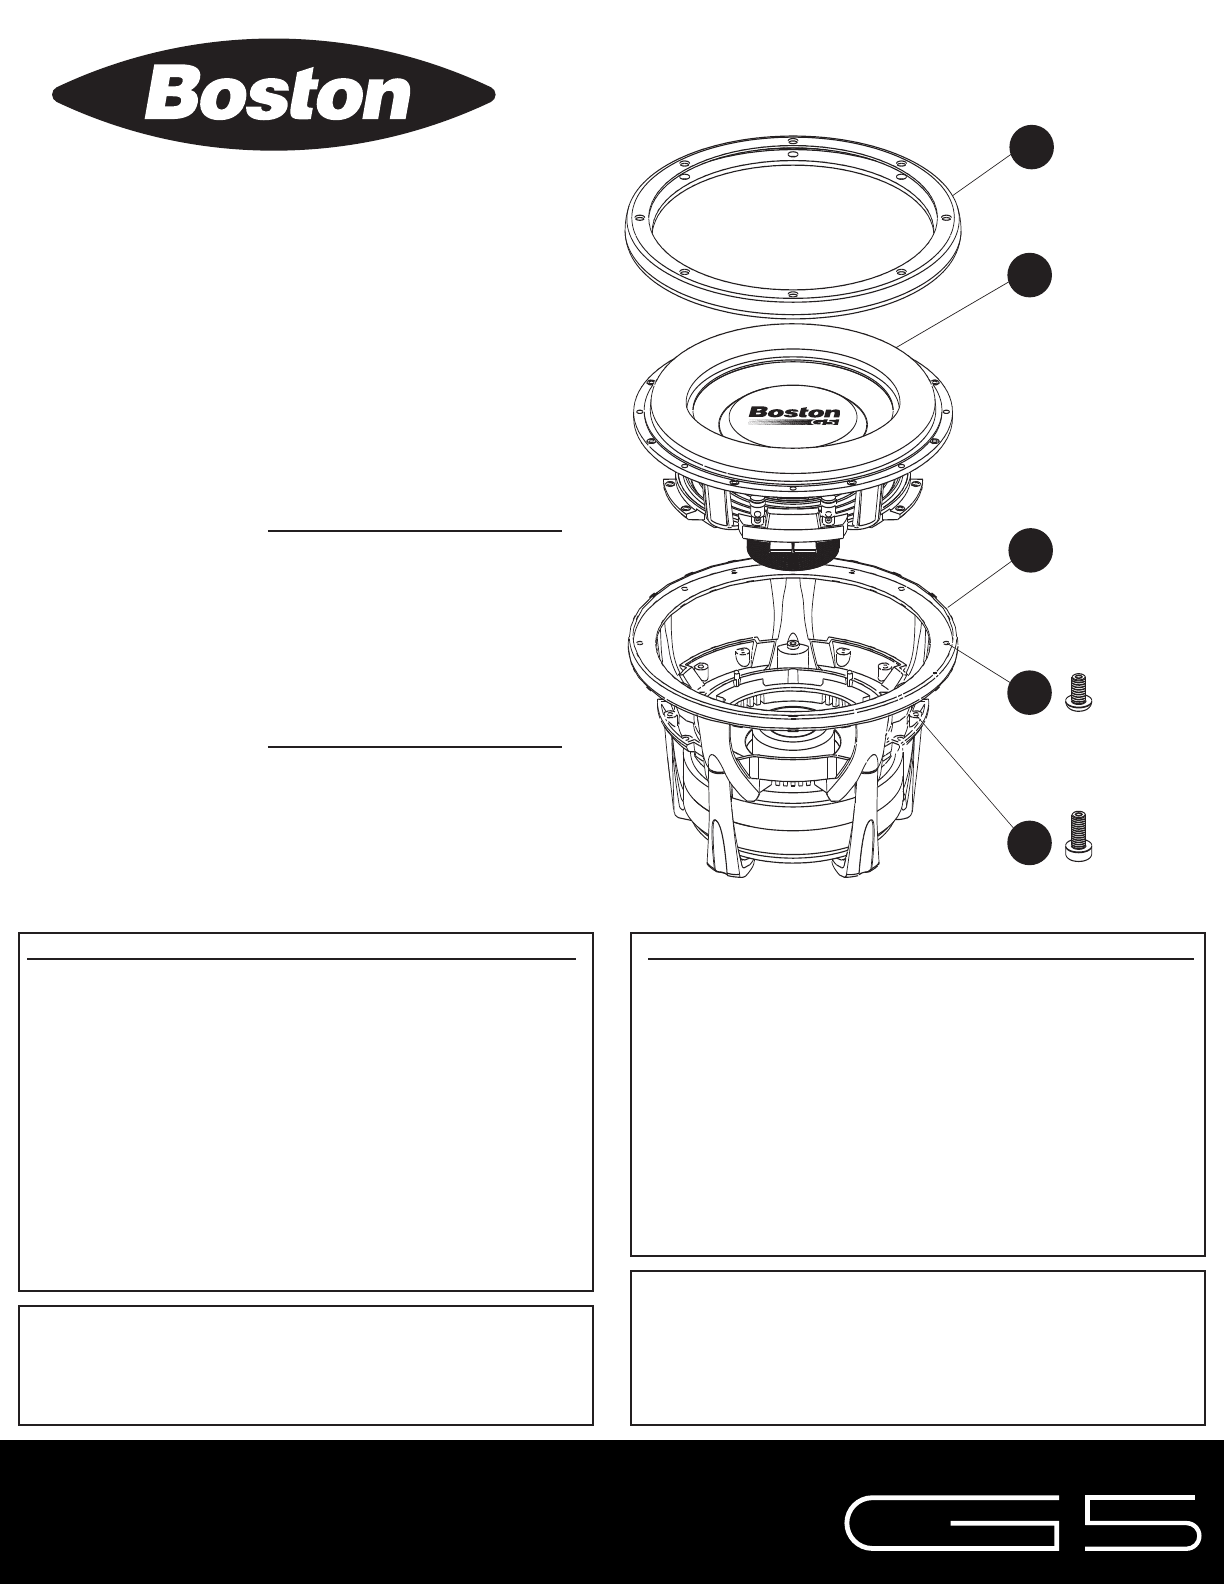
Assembly Installation Instructions
1. Install the SPS
™
assembly
into the basket
. The basket and frame
are notched to prevent the SPS
™
assembly from being installed
incorrectly. Make sure the SPS
™
assembly mounts firmly into the
frame with the speaker terminals located in the correct location.
2. Install the top screws that secure the SPS
™
assembly
to the basket.
Eight top screws
secure the SPS
™
assembly to the top of the frame
(mounting flange) and 10 bottom screws
(G512) and 8 bottom
screws
(G510) secure the SPS
™
assembly to the frame (top plate/spi-
der).
3. Install the integral gasket
.
G512 Part List:
1. Speaker Gasket
2. SPS Assembly
3. G5 Basket Assembly
4. Top Screw x 8
5. Bottom Screw x 10
G510 Part List:
1. Speaker Gasket
2. SPS Assembly
3. G5 Basket Assembly
4. Top Screw x 8
5. Bottom Screw x 8
SPS
™
Assembly Removal Instructions
1. Remove the integral gasket
.
2. Remove the top screws that secure the SPS
™
assembly
to the bas-
ket
. Eight top screws
secure the SPS
™
assembly to the top of the
frame (mounting flange) and 10 bottom screws
(G512) and 8 bot
-
tom screws
(G510) secure the SPS
™
assembly to the frame (top
plate/spider).
3. Once all the screws are removed, the SPS
™
assembly will slide out of
the basket. Use care when removing the SPS
™
assembly from the
basket.
Warning: If disassembling the G5 for customization; where the
SPS
™
will be reused, store the SPS
™
assembly in a safe location
with the voice coil facing up and protected; damage to the voice
coil, even minor damage, can ruin the SPS
™
assembly
.
SPS
™
Removal / Installation
Instructions
Boston Acoustics, Inc. 300 Jubilee Drive, Peabody, MA 01960 USA
T: 978.538.5000 F: 978.538.5100 W: bostonacoustics.com
SPS, is a trademark and Boston, Boston Acoustics, and the Boston Acoustics logo
are registered trademarks of Boston Acoustics, Inc. Specifications are subject to
change without notice.
All rights reserved. Covered by patents issued and/or pending.
© 2004 Boston Acoustics, Inc.
042-002216-0


