


18 19EUROLIVE B115MP3/B112MP3 Quick Start Guide
EUROLIVE B115MP3/B112MP3 Getting started
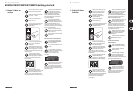
(EN) Step 3: Getting
started
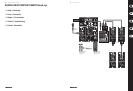
Place the speaker(s) in desired locations,
either on stands or as wedge monitors
onthe oor.
Make all necessary connections.
DONOTturn on the power yet.
Turn on your audio source
(mixer,microphone).
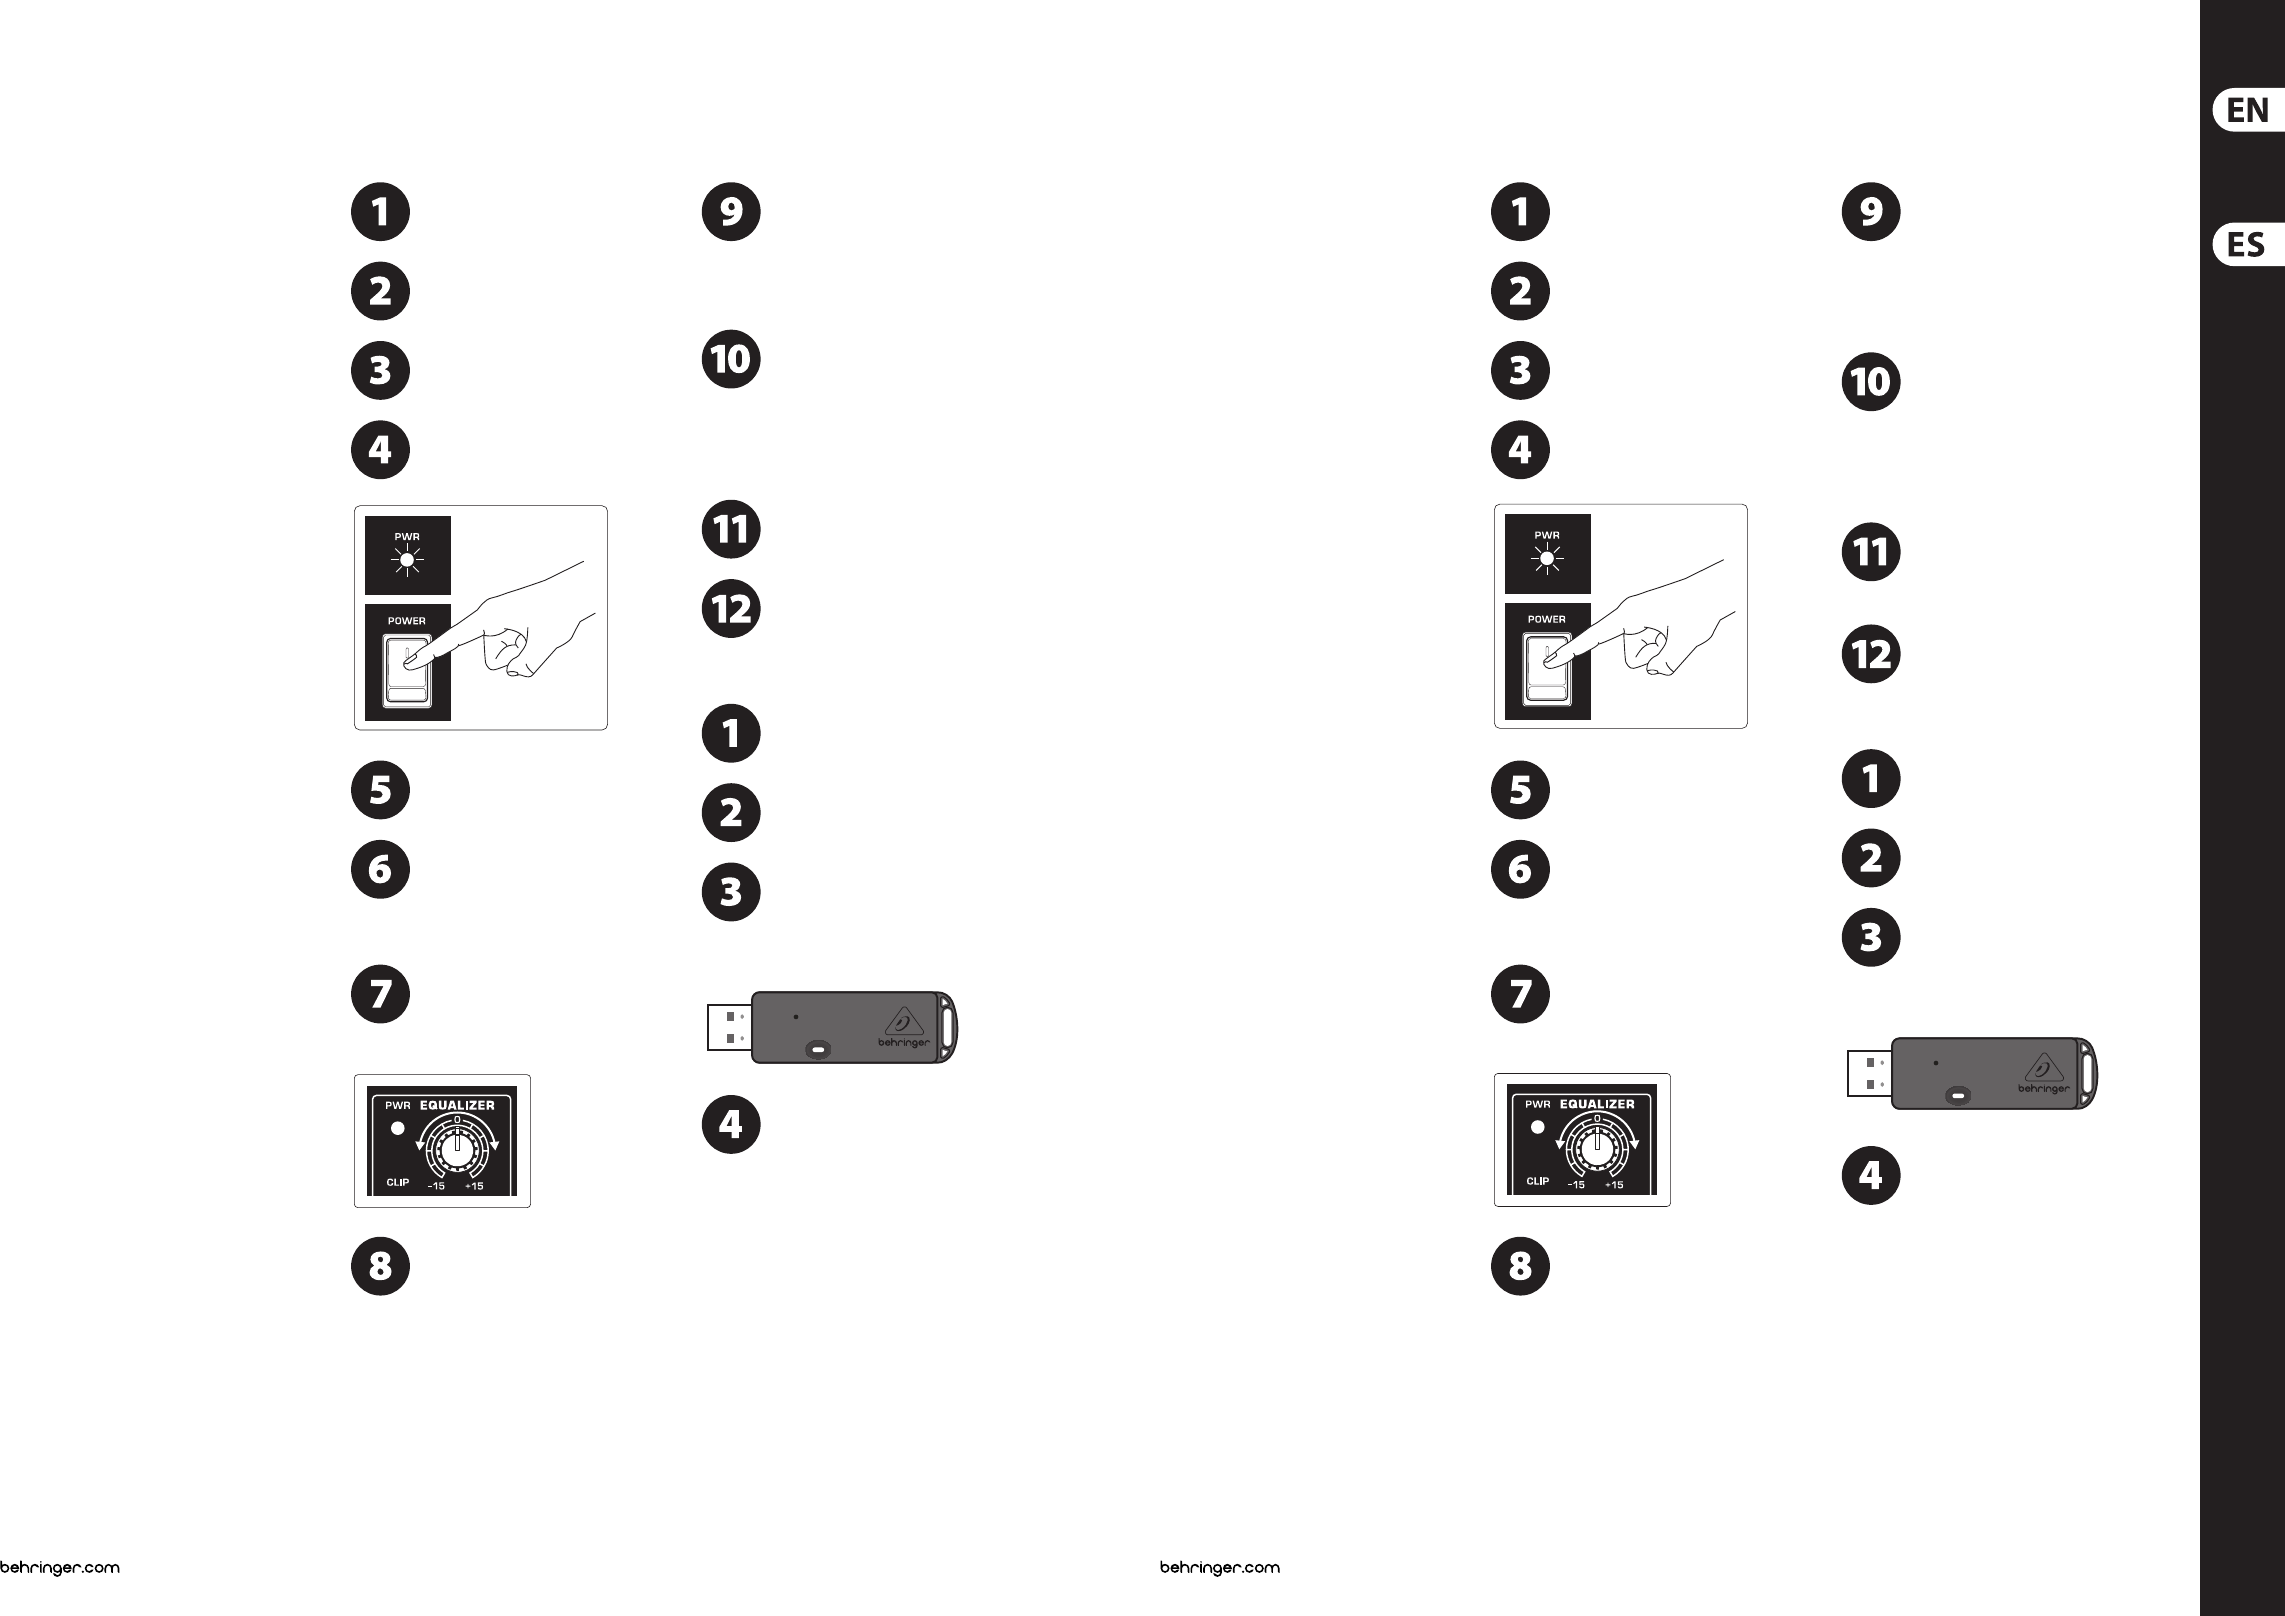
Turn on your speaker(s) by pressing the
POWER SWITCH. The POWER LED will
light up.
Play your audio source or speak into your
microphone at a normal to loud level.
Adjust the LEVEL knob to the desired
volume. If the CLIP LED ashes,
turntheLEVEL knob down. If using
multiple speakers, the LEVEL knob must be
adjustedon eachspeaker.
If necessary, adjust the HIGH and
LOWEQUALIZER knobs on each speaker
toboost or cut treble and bass
frequencies to taste.
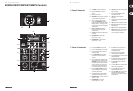
Attach a USB ash drive to the USB port.
Switch between folders on the drive
using the FOLDER buttons. Select the
track you wish to play using the TRACK buttons.
Press the PLAY/PAUSE button to start or
stopplayback.
Press the REPEAT button and then the
MODE button to select between
repeating: ALL mp3 les on the
USBdrive, les in the current FOLDER, the currently
playing le (SINGLE) or to play all les in
RANDOMorder.
Press the DISP(LAY) button to change
what appears on the screen of the
MP3player between the TAG
(artistandsong name information),
TRACK(lename up to 64characters) or TIME
(showstrack number in current folder and the
elapsed time of the currentlyrunningtrack).
Press the DISP(LAY) and MODE buttons
atthe same time to cycle between
screencontrast intensities.
Adjust the playback volume using
theLEVEL knob.
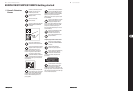
Optional wireless microphone set-up
Only insert the optional BEHRINGER
DIGITAL WIRELESS microphone
receiverinto the input.
Turn the ON/OFF switches on the
microphones to the “ON” position.
During the pairing process, the LED on
the dongle will ash. Once the
connection between the wireless
microphone and the receiver is achieved, the LED
will remain on (solid).
Speak into the wireless microphones
andadjust the volume using the volume
buttons on the individual microphones.
Press the volume down button for two seconds to
mute the microphone signal. Press the volume up
button to unmute the microphone.
(ES) Paso 3: Puesta en
marcha
Coloque los altavoces en las posiciones
que quiera, sobre un soporte o sobre el
suelo como monitores de tipo cuña.
Realice todas las conexiones necesarias.
NO ENCIENDA todavía las unidades.
Encienda su fuente de señal audio
(mesade mezclas, micrófono).
Encienda los altavoces pulsando su
interruptor POWER. El piloto POWER se
iluminará en cuanto haga esto.
Toque o active la reproducción en su
fuente audio o hable o cante en el
micrófono a un nivel entre normal y alto.
Ajuste el mando LEVEL hasta conseguir el
volumen que quiera. Si parpadea el piloto
CLIP, reduzca el ajuste del mando LEVEL.
Si usa varios altavoces, deberá ajustar el mando
LEVEL en cada uno de ellos.
Si es necesario, ajuste los mandos
EQUALIZER HIGH y LOW de cada altavoz
para realzar o cortar las frecuencias
agudas y graves de acuerdo a sus gustos.
Conecte un dispositivo ash USB en el
puerto USB. Cambie entre la distintas
carpetas de dicho dispositivo usando
losbotones FOLDER. Elija la pista que quiera
reproducirusando los botones TRACK. Pulse el
botónPLAY/PAUSE para poner en marcha la
reproducciónodetenerla.
Pulse el botón REPEAT y después el botón
MODE para elegir entre estos modos de
repetición: Todos los cheros mp3 de la
unidad USB (ALL), los cheros de la carpeta activa
(FOLDER), el chero activo (SINGLE) o hacer
quesereproduzcan todos los cheros en orden
aleatorio(RANDOM).
Pulse el botón DISP para cambiar lo que
aparece en la pantalla del reproductor
MP3 entre TAG (información del nombre
de la canción y el músico), TRACK (nombre del chero
de hasta 64 caracteres) o TIME (donde aparecerá el
número de pista de la carpeta activa y el tiempo
transcurrido de la pista en reproducción).
Pulse simultáneamente los botones
DISPy MODE para cambiar entre las
distintas opciones de contraste
posiblespara la pantalla.
Ajuste el volumen de reproducción con el
mando LEVEL.
Conguración de micro inalámbrico opcional
Solo inserte el receptor de microfono
digital opcional inalambrico, BEHRINGER
DIGITAL WIRELESS, en la entrada.
Coloque los interruptores ON/OFF de los
micrófonos a la posición “ON”.
Durante el proceso de sincronización,
elpiloto de la “mochila” parpadeará.
Unavez que se haya establecido la
conexión entre el micro inalámbrico y el receptor,
elpiloto quedará iluminado jo.
Cante o hable en los micros inalámbricos
y ajuste el volumen usando los botones
de volumen de cada uno de los
micrófonos. Pulse durante dos segundos el botón de
volumen abajo para anular la señal del micro.
Pulseel botón de volumen arriba para anular dicha
anulación y volver a activar la señal del micro.