


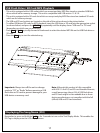
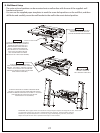
B. Wall Mount Setup
- The main unit and speakers can be mounted onto a wall surface with the use of the supplied wall
bracket and screws.
- You can use the supplied paper templates to mark the screw hole positions on the wall first, and then
drill holes and carefully screw the wall bracket to the wall in the exact desired position.
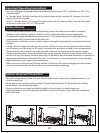
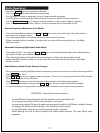
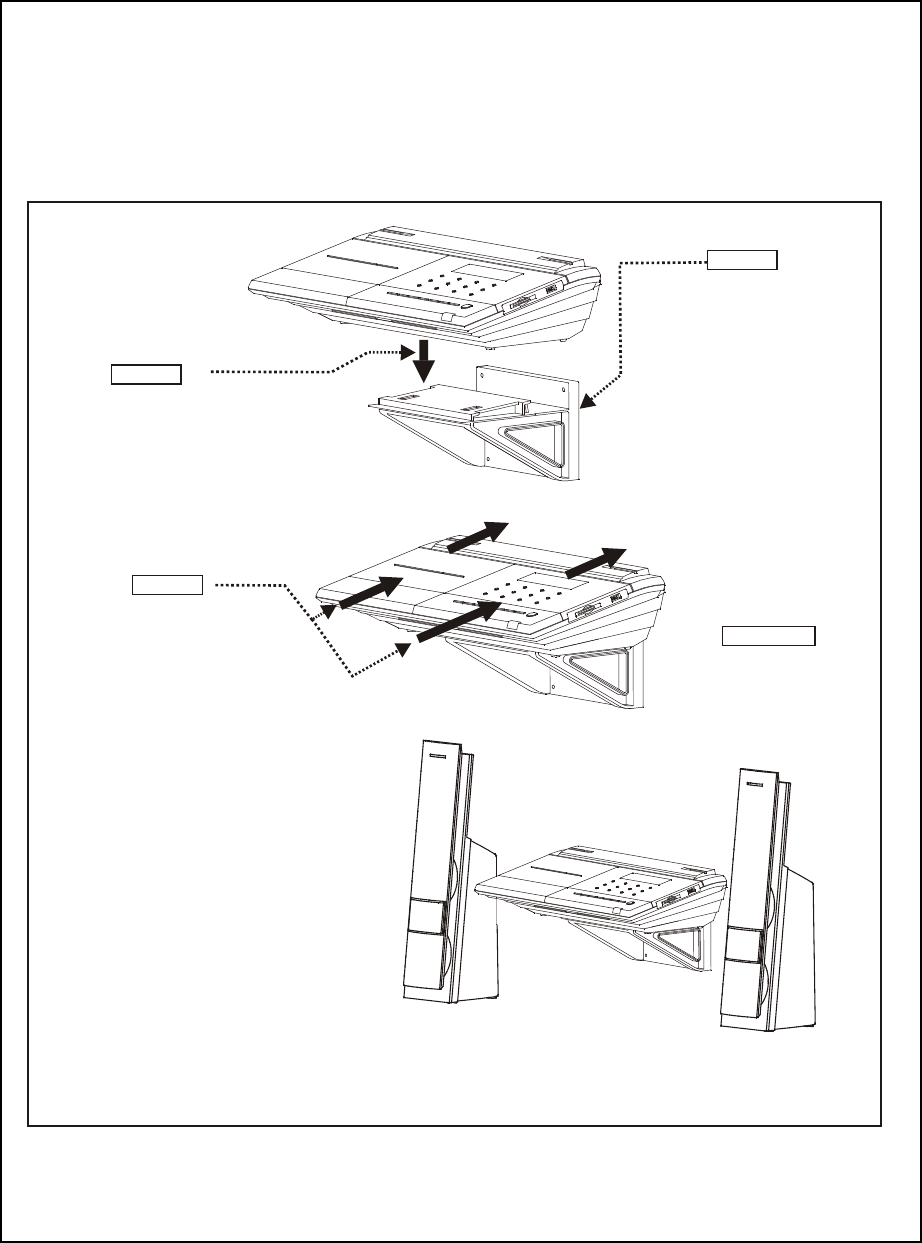
STEP: 1
FIX THE WALL BRACKET TO THE EXACT
DESIRED WALL POSITION USING THE
SUPPLIED PAPER TEMPLATE AND SCREWS.
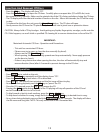
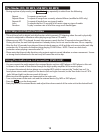
STEP: 2
AFTER THE WALL BRACKET IS SECURELY
MOUNTED ONTO THE WALL, CAREFULLY
LOWER THE MAIN UNIT UNTIL IT IS
SEATED PROPERLY ONTO THE WALL
STAND. (IMPORTANT: MAKE SURE
YOU CONTINUALLY HOLD ONTO THE
UNIT AS THE UNIT MIGHT NOT BE
100% LOCKED ONTO THE STAND
AND COULD FALL AND CAUSE DAMAGE.)
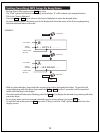
STEP: 3
SLIDE THE MAIN UNIT BACKWARDS
UNTIL IT BECOMES LOCKED ONTO THE WALL
BRACKET. (TO CHECK IF THE UNIT IS LOCKED,
GENTLY LIFT UP ON THE UNIT TO CONFIRM
THE UNIT HAS INDEED LOCKED INTO POSITION
ONTO THE WALL BRACKET.)
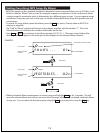
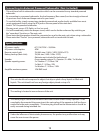
AFTER THE MAIN UNIT IS PROPERLY MOUNTED ONTO
THE WALL, USE THE SUPPLIED PAPER TEMPLATE FOR THE
SPEAKERS TO MOUNT THEM ALSO TO THE WALL IF YOU WISH.
(THE SPEAKERS CAN ALSO BE PLACED ON THE
FLOOR OR SHELF IF YOU PREFER.)
IMPORTANT: Not all types of walls are suitable or strong enough to support the weight of this unit. Please refer
to a specialsit to make sure your wall is suitable before wall mounting. Drilling of holes must also
be done by an experienced specialist. To avoid any injury and damage to your walls, never place
objects on top of the main unit or speakers when they are wall mounted.
IMPORTANT
MAKE SURE THE UNIT IS
SECURELY LOCKED TO
WALL BRACKET AFTER STEP 3
21