


14
Notes on inputs bypassing
Set-up has an option that allows sending the input signal to the outputs to bypass the amplifier when the unit is in stand-
by mode. It is possible to choose among the 8 available outputs. This option is useful when you want to integrate the
preamplifier into a multi-channel system, so that you can connect it to high-quality stereophonic sources while
connecting the multi-channel processor to audio/video sources.
Note sul by-pass degli ingressi
E’ disponibile una opzione del set-up che permette di inviare sulle uscite il segnale di ingresso bypassando
l’amplificatore quando l’apparecchio si trova in stand-by. E’ possibile operare anche una scelta tra le 8 sorgenti possibili.
Questa opzione risulta essere molto utile qualora si voglia integrare questo premplificatore in un impianto multicanale, in
modo da poterlo utilizzare per le sorgenti stereofoniche di alta qualità mentre il processore multicanale viene impiegato
per le sorgenti audio/video.
Stand-by
Maestro Line Preamplifier may be put in Stand-by by pressing the “STANDBY” button on the front panel or the “STBY”
button on the remote controller. When the preamplifier is in stand-by mode and the inputs by-pass is off, all outs are
deactivated: when inputs by-pass is on, the signal of the selected input is directly sent to the outputs. In both cases, the
display on the front panel is off and the led lights blue. To exit the stand-by mode, you may use the remote control or,
alternatively, you may press the stand-by button on the front panel: the unit will exit the stand-by mode immediately. It is
preferable to put Maestro Line Preamplifier in stand-by mode when not using it: the analogical circuit will stay on and
keep the right temperature to provide high performances.
Stand-by
Il Maestro Line Preamplifier può essere posto in stand-by premendo il pulsante “STAND BY” sul pannello frontale oppure
“STBY” sul telecomando. Quando il preamplificatore è in stand-by e il by-pass degli ingressi non è attivo (Off), tutte le
uscite sono disattivate; se invece il by-pass è attivo (On) il segnale di un ingresso selezionato viene inviato direttamente
sulle uscite. In entrambi in casi il pannello frontale presenterà il diplay spento e il led blu acceso. Per uscire dallo stand-
by è possibile agire ancora sul telecomando. In alternativa, è sufficiente agire sul pulsante del pannello frontale:
l’apparecchio uscirà immediatamente dallo stand-by.
E’ consigliabile porre il Maestro Line Preamplifier in stand-by quando non lo si utilizza: la circuitazione analogica rimane
accesa e in temperatura, quindi predisposta per fornire sempre le massime prestazioni.
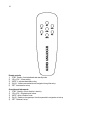
How to use the serial port
Maestro Line Preamplifier is equipped with a standard RS-232 serial port. You may remotely control the CD player
hooking it up to a PC or a home-automation unit through this port. For technical details, please contact your local Audio
Analogue retailer or go to www.audioanalogue.com.
Note sull’utilizzo della porta seriale
Il Maestro Settanta è dotato di una porta seriale in standard RS-232. Tramite questa porta è possibile controllare
l’apparecchio tramite un PC o una centralina per l’home automation. Per maggiori dettagli, contattare il vostro rivenditore
Audio Analogue di fiducia o visitare il sito web www.audioanalogue.com.
Configuration through set-up activation
Maestro Line Preamplifier is an extremely versatile unit. The controls on the front panel and on the remote controller
allow to access to the most used functions but not to the configuration parameters. To customize the unit configuration,
you may access the set-up by pressing the “SET” button on the remote controller or the “SETUP” button on the front
panel. Set-up options will then be shown on the display.
Configurazione attraverso l’attivazione del set-up
Il Maestro Line Preamplifier è un apparecchio estremamente versatile. Ovviamente, i controlli disponibili sul pannello
frontale o sul telecomando permettono di accedere alle funzionalità operative di più frequente utilizzo ma non ai
parametri di configurazione. Per personalizzare la configurazione dell’apparecchio è disponibile un completo setup
accessibile da pannello frontale o da telecomando e visualizzato sul display del pannello frontale. Il set-up viene
richiamato premendo il pulsante “SET” sul telecomando oppure premendo il pulsante “SET UP” sul pannello frontale
dell’apparecchio.