


Installation
16
Tango Series Audio Controllers
Inserting Batteries into The MIO R-1 AUDIO
To install your 4 AAA batteries into the MIO R-1 AUDIO:
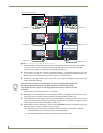
1. Flip and turn the MIO R-1 AUDIO so that the buttons are facing away from you and the device is upside
down.
2. Holding the device in both hands, place your thumbs on the battery door and slide the battery door free.
3. Insert the batteries as indicated inside the battery compartment.
4. Place the battery door back on the device, slide to lock it in place.
Battery Low Indicator
When the battery charge level is too low to sustain continuous operation, the LCD flashes, "Battery Low" and
the device shuts down.
Programming The MIO R-1 AUDIO Using KeypadBuilder
The MIO R-1 AUDIO comes pre-customized with appropriate labels, which in most cases should not be
changed. However, if in your installation you intend to use the MIO R-1 AUDIO with a NetLinx Controller
and Metreau AxLink keypads (for more than just Audio), you could customize your buttons in the
KeypadBuilder application. The application and documentation are available from www.amx.com.
There are a select number of Serial Commands the MIO R-1 AUDIO recognizes. For a full list and
descriptions, consult the MIO R-1 AUDIO Operation/Reference Guide.
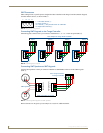
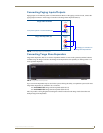
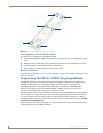
The Programming Jack is used for communication between the device and KeypadBuilder. The programming
jack uses a three-wire, 2.5 mm stereo jack, you can order the programming cable (FG10-817) from AMX if
you do not currently possess one. While loading your configuration file make sure the device is situated as
such that the batteries will not fall out. The load will fail if your batteries fall out during the process. The MIO
communicates at 115200 baud rate.
Refer to the MIO R-1 AUDIO Operation/Reference Guide for instructions on using the Programming Jack to
load configuration files on the MIO R-1 AUDIO.
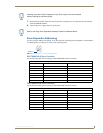
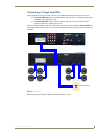
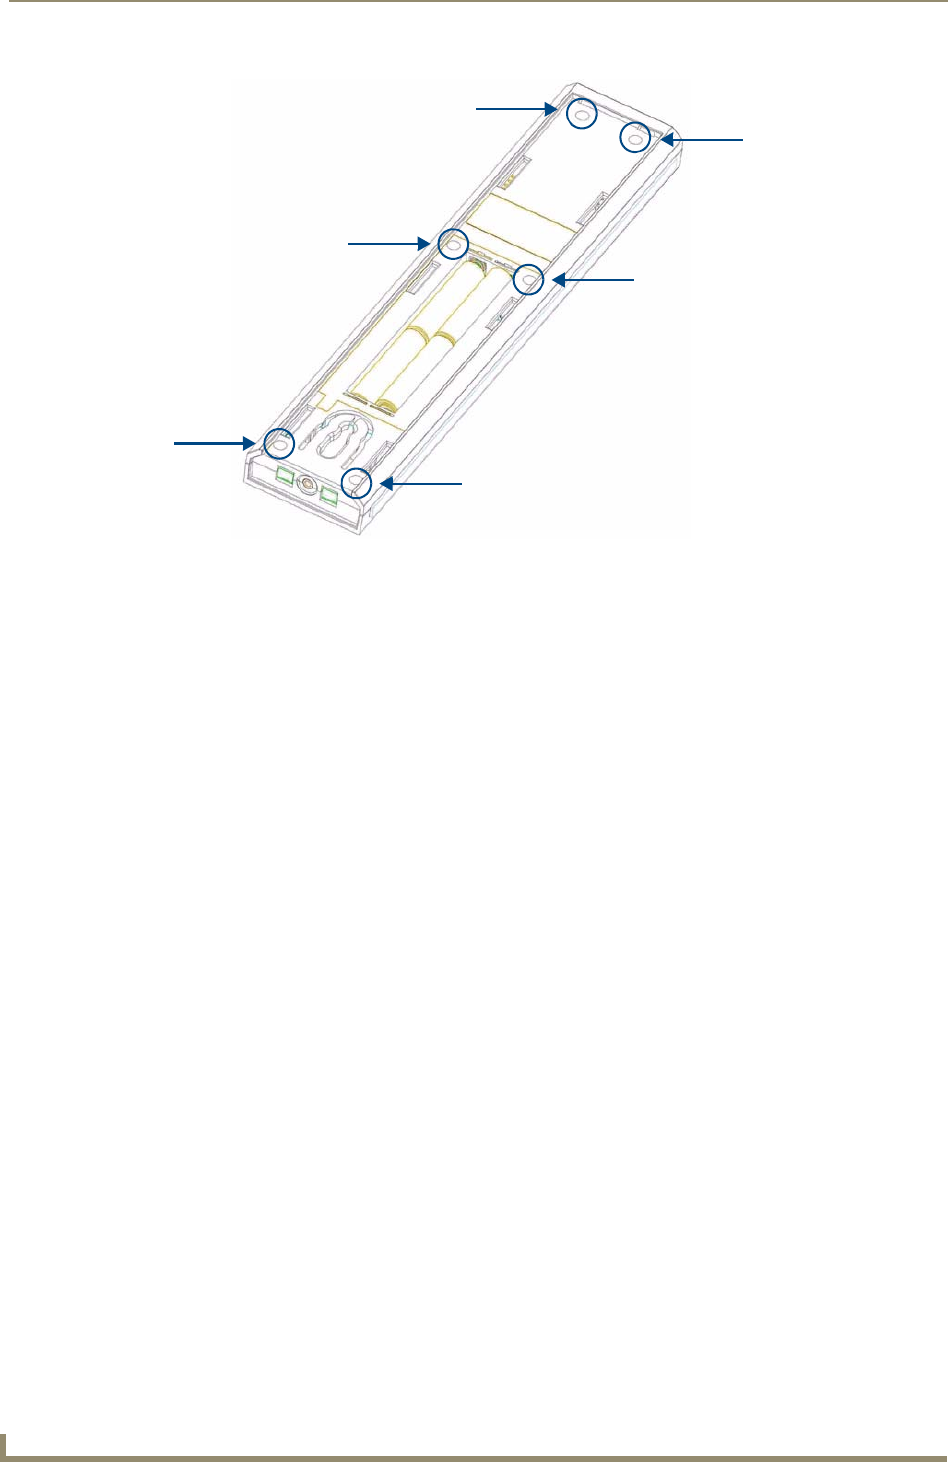
FIG. 14 6 screwpoints (battery compartment cover removed)
1
2
3
4
5
6