


Installation
5
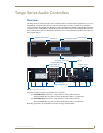
Tango Series Audio Controllers
Installation
Overview
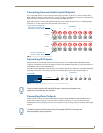
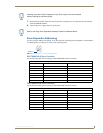
Tango Series Controllers can be installed in a number of configurations depending on your audio needs. The
capacity of a single unit is 8 independent zones and is typically wired with at least one Keypad or DAS-IRRX-
SWT Stealth IR Receiver located in each zone. In some cases it is desirable to operate a second set of speakers
within the same zone controlled by the same Keypad.
Each Tango Controller can power 2 sets of speakers as long as the impedance does not drop below
4 ohms.
A system installation will go much faster and more smoothly if job plans are completed prior to the actual
installation. Accurate record keeping will assist not only in the installation but also in training the client in the
operation of the system. This will also be a great tool for any future servicing issues that may arise.
We recommend that you make copies of the records, and leave them behind with your client, and put one copy
in your client’s file.
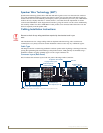
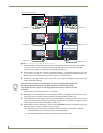
Rack-Mounting
Tango Audio Controllers occupy two rack spaces in a standard 19" equipment rack. Rack mounting brackets
and screws are located in the accessories box supplied with the Controllers.
1. Attach the rack mounting brackets to each side of the Tango Audio Controller using four M4 screws
(supplied) for each bracket.
2. Place the Controller in the equipment rack and hold steady.
3. Secure the Controller in the rack using the mounting holes.
Ventilation
Always ensure that the rack enclosure is adequately ventilated.
Sufficient airflow must be achieved (by convection or forced-air cooling) to satisfy the ventilation
requirements of all the items of equipment installed within the rack.
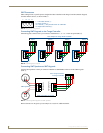
Each audio zone can be configured with either 2 pushbutton keypads (Numeric or
Source), or 1 LCD Keypad and 1 pushbutton Keypad, but not 2 LCD keypads.
Exercise extreme care when lifting or moving Tango Audio Controllers within the rack
to avoid injury. It is recommended that you seek the assistance of another person
when rack mounting Tango Audio Controllers.
To prevent injury the Tango Audio Controller must be securely attached to the rack in
accordance with the installation instructions.
ALWAYS use the special rack mount brackets supplied and high quality fixing screws
to ensure the Tango Audio Controller is installed in the rack correctly.
DO NOT stand other units directly on top of the Tango Audio Controller when it is rack
mounted, as this will place excessive strain on the mounting brackets.