4081 User Manual Issue 2
Channel Controls
The channels can be controlled from the front panel, from a remote Mac or
PC or from Pro Tools using the optional remote control software.
By default, the unit powers-up with all functions locally controllable and
settings are retained on power-down.
The unit is powered by the silver switch with the Neve logo, which will
light red once the power is on.
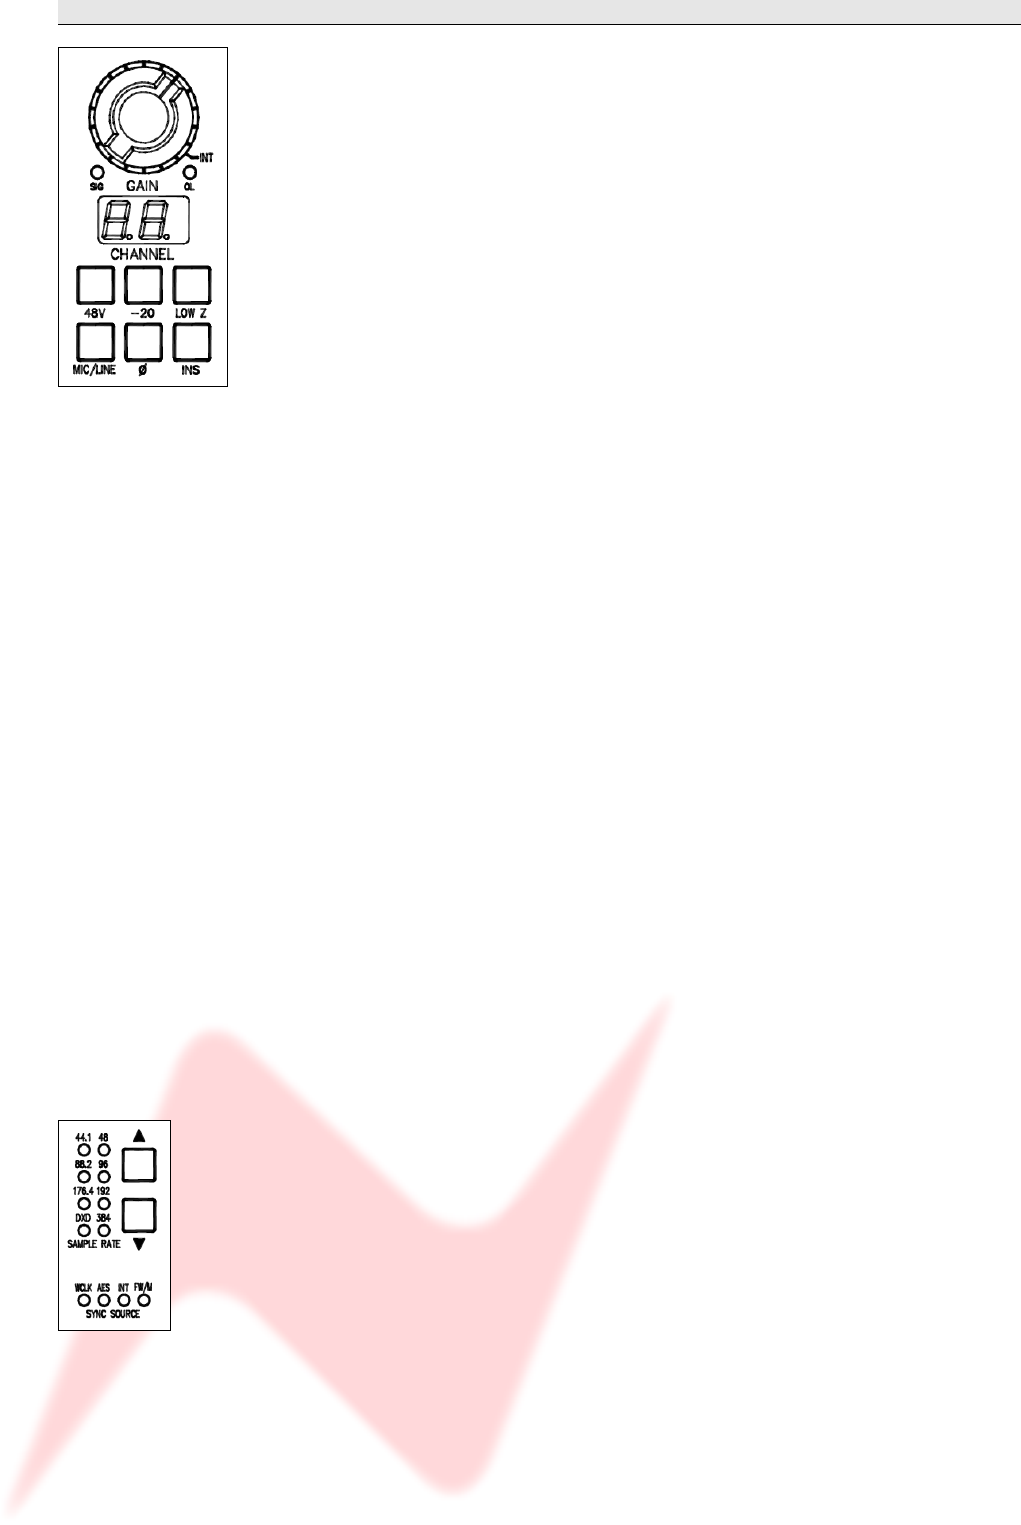
Front panel control is available on each input for:
▪ 48V: Turns on Phantom Power to the Mic (Not available for LINE)
▪ -20: Pad, attenuates the incoming Mic signal by -20dB (Not available
for LINE)
▪ LOW Z: Impedance for Ribbon Microphones (Not available for LINE)
▪ MIC/LINE: Selects between the Mic or Line input.
The button lights yellow when MIC is selected; the button will be unlit
for LINE.
▪ Ø: Swaps the incoming phase of the Mic or Line signal.
▪ INS: This function is controls the source for the A/D in the FireWire
expansion module if fitted.
When illuminated, allows an external Insert Pre- the A/D of the
expansion module.
Turning the Gain control will vary the gain as shown in the display
beneath.
The Gain level is not related to the actual position of the knob, which will
infinitely rotate.
• The MIC gain control runs from +20dB to +70dB in 5dB steps.
• The LINE gain control runs from 0dB to +20dB in 5dB steps.
Just beneath the Gain control are two leds that indicate:
• Signal Presence (lights green at approx -30dBu or greater)
• Signal overload (lights red at 2dB below clipping)
The metering point is Post- the Gain stage.
The maximum signal level is 26dBu.
The Gain knob also has a push-switch which only has a function if the unit
is attached to an AMS Neve 88R console, where it is used to interrogate
console control settings (to be implemented in V2.0 software)
If the optional Digital / Firewire hardware is fitted, the Sample Rate
leds and adjacent buttons will also function.
The unit automatically detects the type and sample rate of the incoming
sync signal if a connection is made to the WCLK I/P connector on the
rear.
The and buttons are used to step through the available sample rates
when running on internal sync.
• If running on Internal sync, the WCLK O/P BNC connector on the rear
will transmit this sync.
• If running on an External sync source, the WCLK O/P BNC connector
on the rear will transmit this sync instead.
The leds will reflect the sample rate & sync source once selected.
- 5 -


