4081 User Manual Issue 2
The settings can be saved and recalled independently using the Store
Preset and Load Preset buttons that launch conventional Windows Save
and Load dialogues (see below).
These Stores will save all the control settings of all the attached racks, not
just for the currently displayed rack.
Setup / Test
Important Note
When the Setup / Test screen is open, any changes made on the front of
the unit will not be sent to the on-screen display shown behind the Setup
screen.
This can result is mis-matches between what is selected on the unit, and
what is displayed on-screen.
FOR THIS REASON, PLEASE DO NOT MAKE ANY CHANGES TO
THE SETTINGS ON THE FRONT OF THE UNIT WHEN THE SETUP
SCREEN IS OPEN.
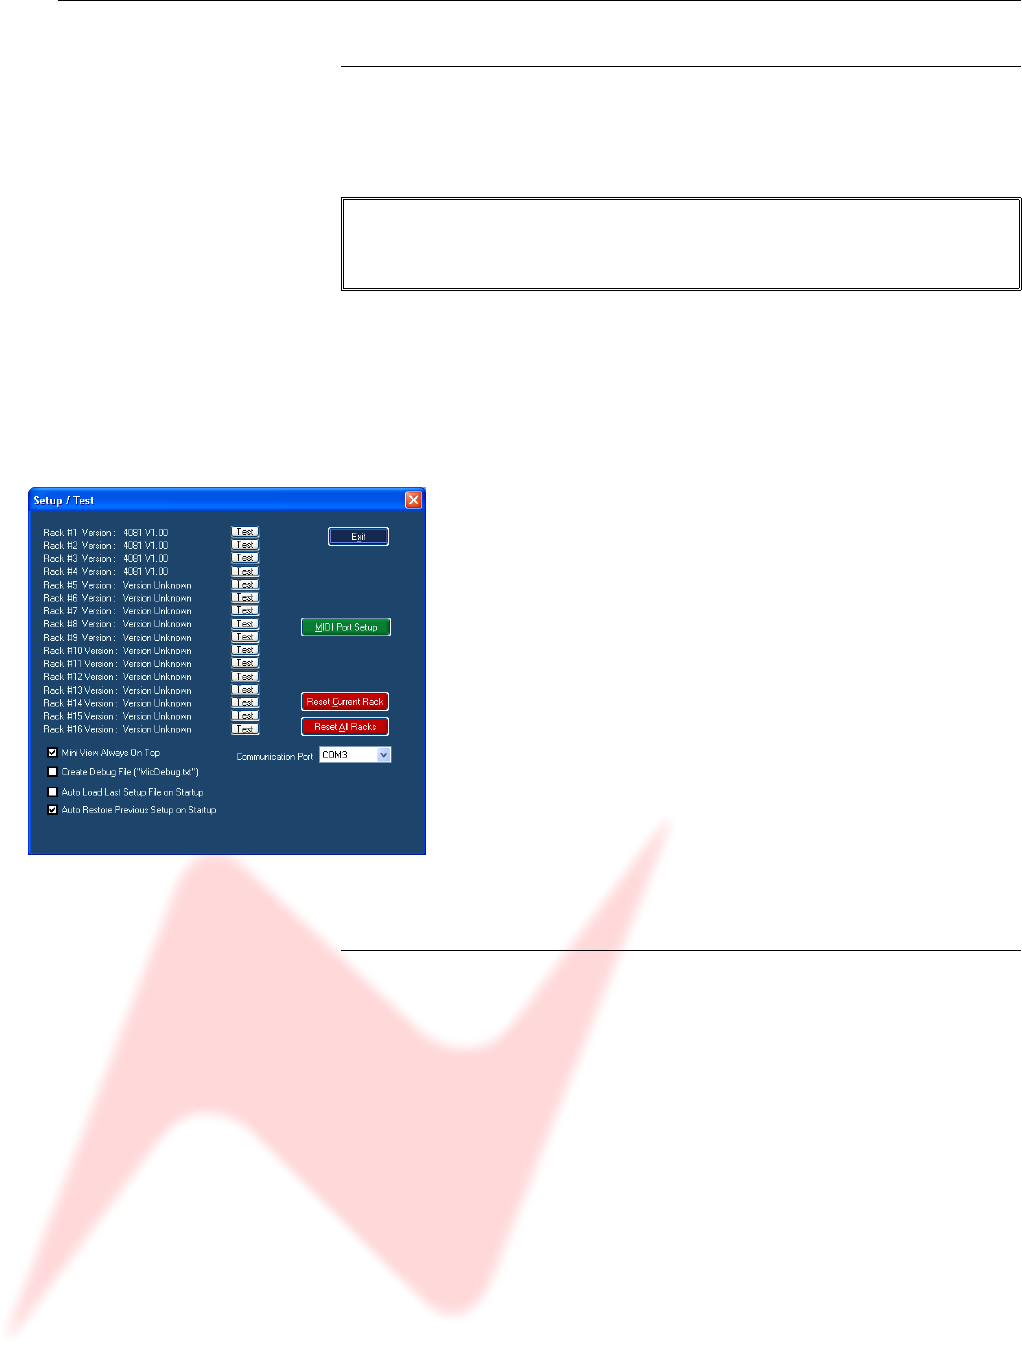
The Setup screen allows you to test that the unit IDs are set correctly, and
also fully configure the software.
As can be seen below, four 4081 units have been detected, as the version
of firmware is shown next to each of these units.
> To test the ID of each unit, click the relevant Test button.
This will flash all of the Phase buttons once on that particular
unit, and you will hear the units internal relays click as this
happens.
Please note that if you wish to change a units ID with the dip
switches, you will need to power cycle the unit after doing this
so that the new ID number is resent to the software.
Communications Port
After installing the software, you will need to set this before control can be
started.
> This is usually set to COM 3 (depending on your computers particular
hardware configuration).
Please note the communications port has been set, and when the unit has
been switched off and back on again, the 4081 unit must switched on
before the software is started.
If this is not observed, the software will fail to find a valid port and will
default back to being Port 1 again.
This will require the correct port to be reselected again.
- 14 -


