


AVR250
E-24
AVR250
E-25
English
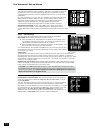
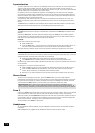
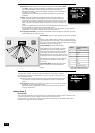
Main Menu Screen 2
Compression: Allows selection of three different compression ratios (OFF, MEDIUM
and HIGH), where the higher compression is intended for ‘late night’ listening.
The compression effect increases the volume of the quiet passages and
decreases the volume of the louder passages. Compression can be disabled by
setting this item to OFF.
Compression is only available on Dolby Digital recordings and on some DTS
recordings.
Lip Sync: Allows the introduction and adjustment of a time delay between the
audio and video signals to compensate for the sound and picture not being
synchronised. This may be required when extra video processing is used in the
system, for line doubling or progressive scan video, or for when a DVD has been
poorly mastered or a broadcast shows noticeable delay between the video and
audio.
The lip sync function works on all sources, unless Stereo Direct is selected. Lip sync is also
directly available on the SYN button on the remote control.
The range of lip sync delay is 0 to 220 milliseconds.The lip sync adjustment can only correct for
delayed video: if the audio is delayed, set lip sync to its minimum.
Pro Logic IIx Music Mode: This allows the adjustment of the sound eld for Dolby Pro Logic II/IIx
Music decoding of two-channel sources.
n
Dimension: allows the user gradually to adjust the sound eld
either towards the front or towards the rear. If a recording is
too spacious or strong from the surrounds, it can be adjusted
‘forward’ to get a better balance. Likewise, if a stereo recording
is somewhat too ‘narrow’ sounding, it can be adjusted toward the
rear to get a more enveloping, immersive result. We recommend
‘Dimension’ is set to 3 for normal use.
n
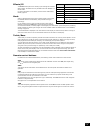
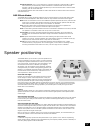
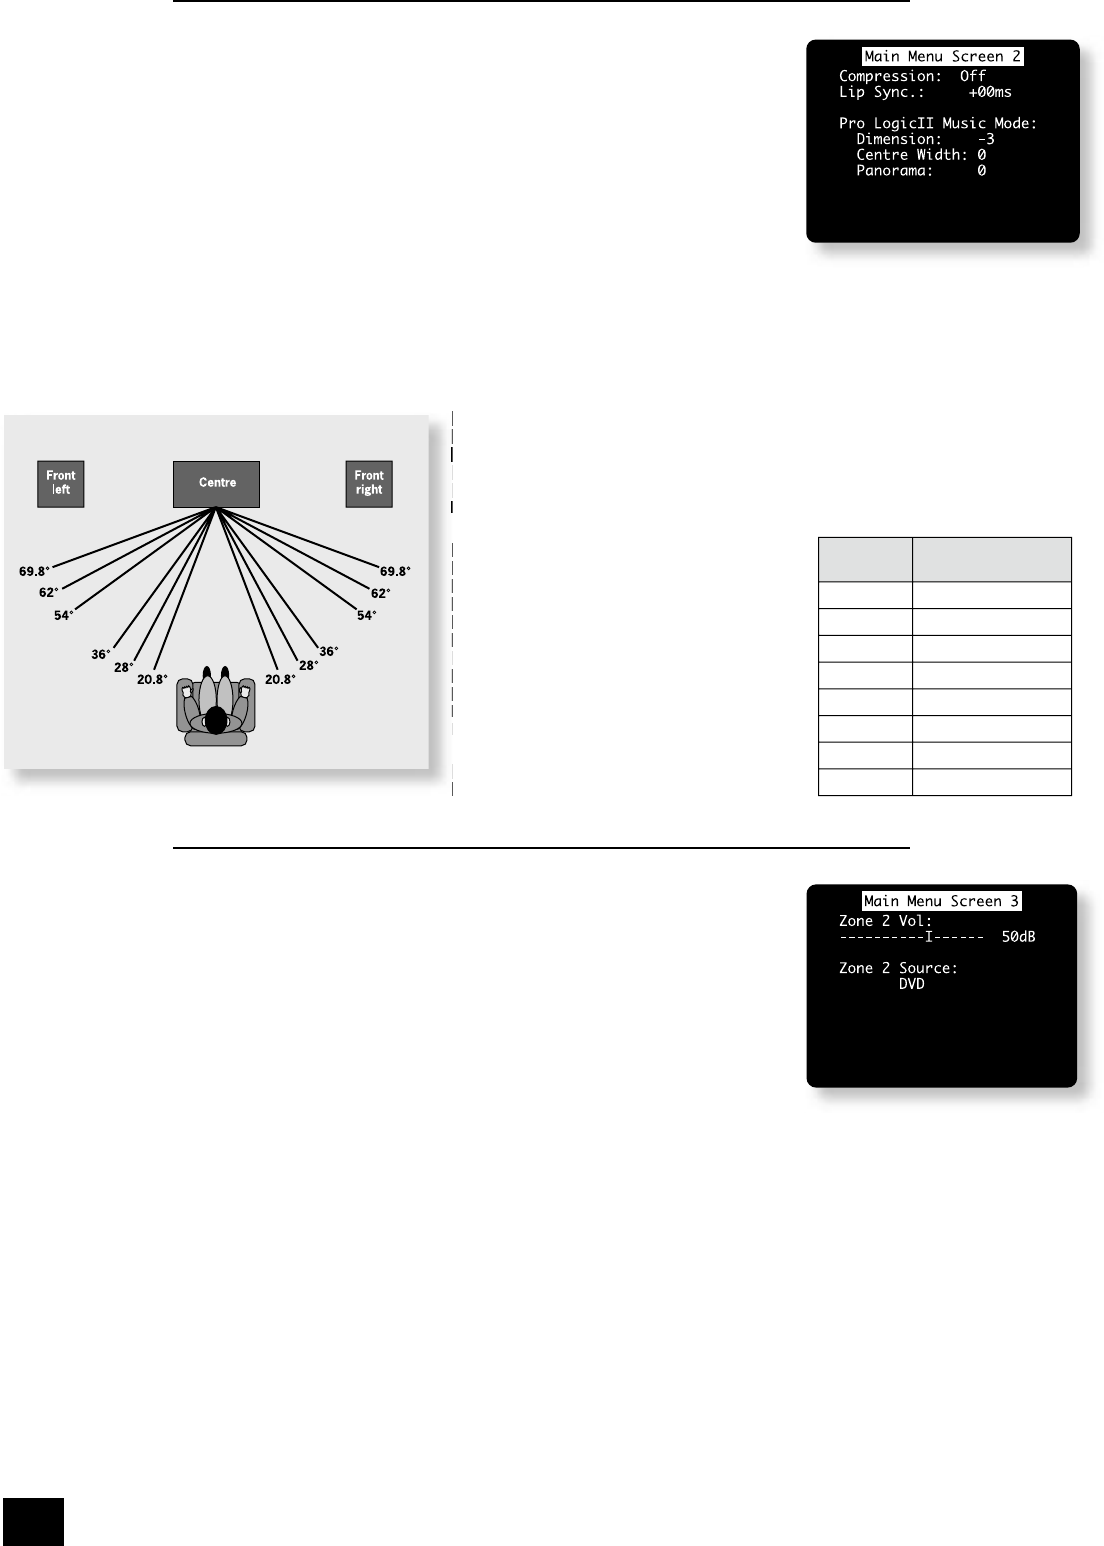
Centre Width: With Pro Logic decoding,
dominant centre signals come only from the
centre speaker. If no centre speaker is present,
the decoder splits the centre signal equally to
the left and right speakers to create a ‘phantom’
centre image. The Centre Width control allows
variable adjustment of the centre image so it may
be heard only from the centre speaker; only from
the left/right speakers as a phantom image; or
from all three front speakers to varying degrees.
We recommend ‘Centre Width’ is set to 3 for
normal use.
n
Panorama Mode: Extends the front centre
image to include the surround speakers for
an exciting ‘wrap-around’ effect with side wall
imaging.
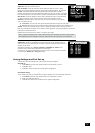
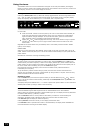
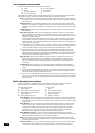
MAIN MENU screen 3
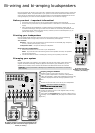
This page refers to Zone 2 functions. These are required if your system is installed
to send audio and video to a separate ‘Zone 2’ room, or you wish to make use of the
Zone 2 headphone facility.
Vol: Shows present volume being used in Zone 2 and can be adjusted from here.
This is also the volume control for the headphones output if it is assigned to
Zone 2.
Zone 2 Source: Selects which source is sent to Zone 2. The source can be selected
speci cally, or can be set to Follow Zone 1.
Note that pressing the THX button in Zone 2 will cause the input for Zone 2 to
be set to ‘Follow zone 1’.
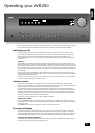
Using Zone 2
Introduction
Zone 2 provides the option for the occupants of the master bedroom, children’s room or kitchen to view
or listen to a different source at a different volume level from the main zone.
Control of Zone 2 is via an infra-red receiver that sends commands back to the AVR250. See ‘Control
Connections’ on page 8 for further information.
either towards the front or towards the rear. If a recording is
too spacious or strong from the surrounds, it can be adjusted
‘forward’ to get a better balance. Likewise, if a stereo recording
is somewhat too ‘narrow’ sounding, it can be adjusted toward the
rear to get a more enveloping, immersive result. We recommend
‘Dimension’ is set to 3 for normal use.
dominant centre signals come only from the
centre speaker. If no centre speaker is present,
the decoder splits the centre signal equally to
the left and right speakers to create a ‘phantom’
centre image. The Centre Width control allows
variable adjustment of the centre image so it may
be heard only from the centre speaker; only from
the left/right speakers as a phantom image; or
from all three front speakers to varying degrees.
We recommend ‘Centre Width’ is set to 3 for
normal use.
image to include the surround speakers for
an exciting ‘wrap-around’ effect with side wall
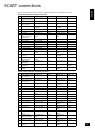
Display Centre spreading
effect
0 No centre spreading
1 20.8°
2 28°
3 36°
4 54°
5 62°
6 69.8°
7 Phantom centre
The ‘Centre Width’ setting for
Dolby Pro Logic IIx Music Mode